Hardware Preparation and Installation
CPCI-6200 Installation and Use (6806800J66C)
41
2.8
Removing the CPCI Baseboard
The board is fully compliant to Compact PCI Hot Swap Specification PICMG 2.1 R2.0, and can
run in both 3.3 V and 5 V Compact PCI systems.
The following procedure describes how to remove the board from a system. It assumes that the
system is powered and running system level management software. If the system is
unpowered, disregard the blue LED and skip the respective step.
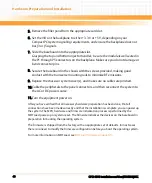
1. Unfasten the two screws on the front panel until the board is detached from the
rack frame.
2. Press the red button to unlock handles.
3. Open handles until resistance is encountered.
The hot swap switch opens automatically.
Data Loss
Removing the RTM with the system power on and the blue LED on the front blade still
flashing causes data loss.
Before removing the RTM from a powered system, power down the slot and the front
blade’s payload by opening the lower handle of the front blade and wait until the blue LED is
permanently ON.
Damage of Circuits
Electrostatic discharge and incorrect installation and removal of the product can damage
circuits or shorten their life.
Before touching the product make sure that your are working in an ESD-safe environment
or wear an ESD wrist strap or ESD shoes. Hold the product by its edges and do not touch any
components or circuits.
Summary of Contents for CPCI-6200
Page 14: ...CPCI 6200 Installation and Use 6806800J66C 14 List of Figures ...
Page 20: ...CPCI 6200 Installation and Use 6806800J66C About this Manual 20 About this Manual ...
Page 28: ...Introduction CPCI 6200 Installation and Use 6806800J66C 28 ...
Page 44: ...Hardware Preparation and Installation CPCI 6200 Installation and Use 6806800J66C 44 ...
Page 70: ...Controls LEDs and Connectors CPCI 6200 Installation and Use 6806800J66C 70 ...
Page 106: ...MOTLoad Firmware CPCI 6200 Installation and Use 6806800J66C 106 ...
Page 178: ...Memory Maps and Addresses CPCI 6200 Installation and Use 6806800J66C 178 ...
Page 195: ......


