background image

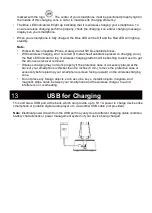
marked with the logo

. The center of your smartphone must be positioned properly right in 

the middle of this charging zone in order to maximize its charging efficiency. 

• 

The Blue LED indicator will light up indicating that it is wireless charging your smartphone. To 
ensure wireless charging performs properly, check the charging icon and/or charging message 
displays on your smartphone.   

• 

When your smartphone is fully charged, the Blue LED will be Off and the Red LED will light up 
steadily. 

Note

:   


Work with Qi-compatible iPhone, Galaxy and all 5W Qi-enabled phones. 


While wireless charging error occurred (if metal sheet/ substance placed on charging zone), 
the Red LED indicator at top of wireless charging platform will be flashing to alert user to get 
the erroneous receiver removed. 


Wireless charging may not work properly if the protective case or accessory placed at the 
back of your smartphone is thicker than 0.2 inches (5 mm), remove the protective case or 
accessory before placing your smartphone (screen facing upward) on the wireless charging 
zone. 


Do not place any foreign objects, such as coins, keys, metallic objects, magnets, and 
magnetic stripe cards, between your smartphone and the wireless charger, to avoid 
interference or overheating. 


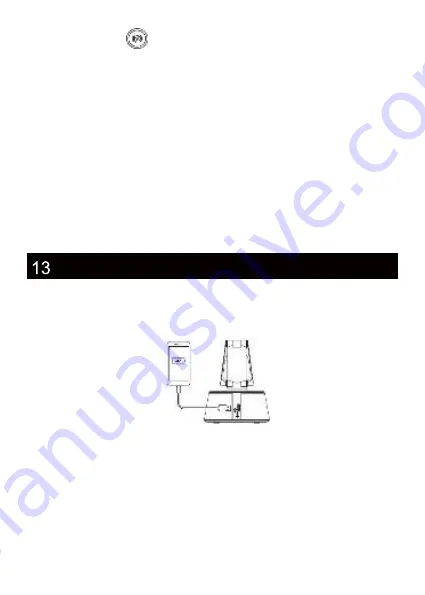
This unit has a USB port at the back, which can provide up to 5V 1A power to charge devices like 
smartphone or portable digital audio player etc. via another USB cable (not provided).   
 

Note

: Electrical power drawn from the USB port may vary due to different charging cable condition, 

battery characteristic or power management system of your device being charged. 


USB for Charging


Summary of Contents for ER-X300

Page 1: ...Bluetooth Speaker with Wireless Charger Phone Rest that Extends and Rotates USB Charger FM Radio Alarm Clock and 10 Watt Stereo ER X300 Visit our website at www emersonradio com ...

Page 2: ...our speaker when you are engaging in any activity that requires your full attention 12 If you have a pacemaker or other electrical medical devices you should consult your physician before using the product 13 This package contains small parts that may be hazardous to children and should be kept out of reach of children at all time The product is not a toy never allow children to play with the prod...

Page 3: ...e as it may explode Batteries may explode if damaged CHARGER CARE Do not attempt to charge your unit with anything other than the AC Adapter provided The use of any other types may damage or destroy the unit and could be dangerous Use of other chargers may invalidate any approval or warranty Charge the product according to the instructions supplied with the product CHARGING WARNING When you discon...

Page 4: ...item please call the Emerson Consumer Products Corp Customer Service Hotline toll free at 1 800 898 9020 Unpacking and Setup Remove the unit from the box and remove all packing material from the unit Save the packing material if possible in case the unit ever needs to be serviced or transported The original box and packing material is the only safe way to pack your unit to protect it from damage i...

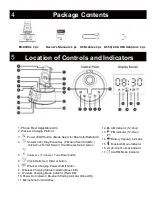
Page 5: ...Charging Power On Off button 8 Wireless Charging Status Indicator Blue LED 9 Wireless Charging Mode Indicator Red LED 10 Power On Indicator Bluetooth Pairing Indicator Blue LED 11 Microphone for Handsfree 12 AM Indicator 12 Hour 13 PM Indicator 12 Hour 14 Battery Capacity Indicator 15 Bluetooth Mode Indicator 16 24 Hour Format Indicator 17 ALARM Mode Indicator USB cable for charging x 1 pc Locatio...

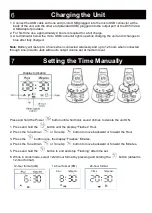
Page 6: ...gh Line In Audio Jack with audio output volume set at medium level Display Indication Press and hold the Power button until a harmonic sound chimes to denote the unit ON 1 Press and hold the button until the display Flashes Hour 2 Press the Tune Down or Tune Up button to move backward or forward the Hour 3 Press the button once the display Flashes Minutes 4 Press the Tune Down or Tune Up button to...

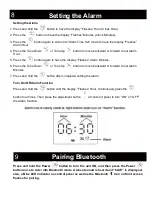
Page 7: ...on to move backward or forward to set Alarm Minutes 7 Press and hold the button after completed setting the alarm Turn On Off Alarm Function Press and hold the button until the display Flashes Hour continuously press the button four times Then press the adjustment button at center of panel to turn ON or OFF the Alarm function Press and hold the Power button to turn the unit ON and then press the P...

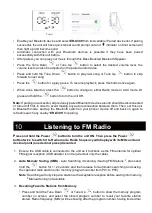
Page 8: ...y auto reconnection between them Then set this unit to Bluetooth mode and tap the Bluetooth switch on your phone device off and back on again to refresh search any nearby ER X300 for pairing Press and hold the Power button to turn the unit ON Then press the Power button twice to switch it to Radio mode Radio frequency will display with its MHz unit and decimal point one decimal place discarded 1 E...

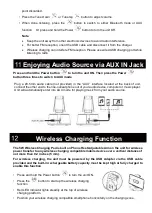
Page 9: ...the line out earphone out of your audio device computer or music player Unit will automatically enter into AUX mode for playing music from your audio source The 5W Wireless Charging Pad is built on Phone Rest Adjustable Arm on the unit for wireless power transfer to any wireless charging compatible mobile device over a vertical distance of not more than 0 2 inches 5 mm For wireless charging the un...

Page 10: ...rm will be flashing to alert user to get the erroneous receiver removed Wireless charging may not work properly if the protective case or accessory placed at the back of your smartphone is thicker than 0 2 inches 5 mm remove the protective case or accessory before placing your smartphone screen facing upward on the wireless charging zone Do not place any foreign objects such as coins keys metallic...

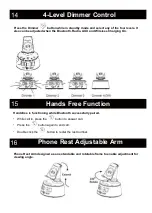
Page 11: ...Handsfree is functioning while Bluetooth successfully paired While call in press the button to answer call Press the button again to end call Double click the button to redial the last number Phone Rest Arm designed as an extendable and rotatable frame to enable adjustment for viewing angle 4 Level Dimmer Control Hands Free Function Phone Rest Adjustable Arm ...

Page 12: ... sure your device is properly paired with the ER X300 RESETTING THE UNIT If the unit does not respond properly or appears to be frozen unfold a paperclip and insert the end of the object into the AUX hole where the reset button resides LOW BATTERY 2 beat sound will be heard while the battery level is low to alert user to recharge the unit with the power adaptor and USB charging cable provided PHON...

Page 13: ...unit prepaid via UPS or parcel post SHIP INSURED and obtain a tracking number NOTE This warranty does not cover a Damage to equipment not properly connected to the product b Cost incurred in the shipping of the product to and from Emerson s Return Facility c Damage or improper operation of unit caused by customer abuse misuse negligence or failure to follow operating instructions including cleanin...

Page 14: ...can be found on the bottom cabinet We suggest that you record the serial number of your unit in the space below for future reference Model Number ER X300 Serial Number _______________________________ Emerson Part No ERX300 20190613 01 Printed in China S E R V I C E FOR ADDITIONAL SET UP OR OPERATING ASSISTANCE PLEASE CALL 1 800 898 9020 FOR CUSTOMER SERVICE PLEASE E MAIL TO internet emersonradio c...

Reviews: