1-8-12
U25TRB_4H
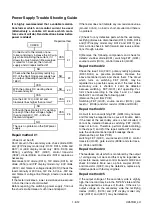
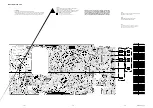
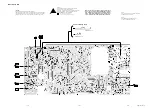
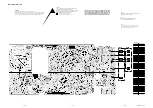
Power Supply Trouble Shooting Guide
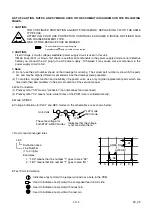
It is highly recommended that a variable isolation
transformer which can monitor current be used.
(Alternatively a variable AC source which moni-
tors current will do). Read directions below before
power is added!
Repair method #1
(Power must be off)
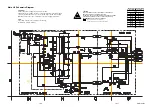
Short circuit in the secondary side. check diode D013
and {(FIP display model only: D012, D015, D016 and
D017) or (LED display model only: D014, D015 and
D016)}, switching FET (Q001), control transistor
(Q002), diode (D006), and resistor (R014) replace as
necessary.
Disconnect 40V diode (D013), 12V diode (D015), 5V
diode (D016) and {FIP display model only: -30V diode
(D012) and filament voltage diode (D017)}Check the
load continuity of 40V line, 12V line, 5V line, -30V line
and filament voltage line through a tester (resistance
range).
If the tester indicates a lower resistance value around
0 ohm, the line is short-circuited.
Before repairing the switching power supply, find out
the short-circuited area of such line and repair it.
If the tester does not indicate any low resistance value
(around 0 ohm), no load is short-circuited and there is
no problem.
2] Check for any defective parts while the secondary
rectifying diodes are disconnected (D013, D015, D016
and {FIP display model only: D012 and D017)} per-
form a diode check in both forward and reverse direc-
tions through a tester.
3] Remove the following components and check for
defects: snubber diode (D051), switching FET (Q001),
source resistor (R014), control transistor (Q002).
Repair method #2
Check the fuse 1.0A (F001), primary rectifying diodes
(D001-D004) as possible problems. Remove the
above mentioned parts and check them. The circuit
which turns on switching FET (Q001) may be
regarded as a possible cause, even if the load at the
secondary side is shorted, it can't be detected
because switching FET (Q001) isn't operating. Per-
form check according to the step 1 and 2 of repair
method #1 and check the following parts:
(Remove the part from PCB)
Switching FET (Q001), source resistor (R014), gate
resistor (R008) and start resistor (R004 and R005).
Repair method #3
A circuit to turn on switching FET (Q001) may not work
and this may be regarded as a cause of trouble. Even
if the load at the secondary side is short-circuited, it
cannot be detected because switching FET (Q001)
does not turn on. Therefore, perform check according
to the steps 1] and 2] of the repair method #1 and exe-
cute the under-mentioned parts breakage check.
(Remove the part from PCB.)
switching FET (Q001), source resistor (R014), control
transistor (Q002), gate resistor (R008) and start resis-
tor (R004 and R005).
Repair method #4
The feedback circuit which is monitored by the output
of voltage may not work and this may be regarded as
a possible cause, remove control transistor Q002 and
check for defects. More over, a photo coupler (IC001)
and transistor (Q031) may be defective, replace any
defective parts with factory originals.
Repair method #5
If the output voltage of the secondary side is slightly
high, the line load may be in the "OPEN" state and this
may be regarded as a cause of trouble. If there is no
output voltage on the secondary side, the rectifying
diodes (D013), (D015) and {FIP display model only
only: (D012) and (D017)} may be defective.
Repair method
CHECK
Connect unit to the isolation trans-
former and slowly increase the AC sup-
ply while monitoring the current, if it
draws too much current (Be ware fuse
is rated for 1.0 amps), then turn off
supply and do repair method #1.
YES
#1
NO
Check whether the primary rectifying
DC of the Switching power supply has
an output. (Reading should be about
168V.)
NO
#2
YES
With the primary DC working check
the secondary 5V.
NO
#3
YES
Are the 40V, 12V, -30V, 5V and
filaments lines higher than normal?
YES
#4
NO
Although the secondary 5V is working,
are any of the other voltages higher
than normal (40V, 12V, -30V and
filament voltages)?
YES
#5
NO
There is no problem on the SW power
supply.

