


Emerson FB1100 Flow Computer Instruction Manual
D301752X012
August 2020
Installation
31
2.12.1
Attach Mounting Hardware to the Solar Panel
DANGER
EXPLOSION HAZARD: Ensure the area in which you perform this operation is non-hazardous.
Performing this operation in a hazardous area could result in an explosion.
Attach mounting hardware to the solar panel as shown in
Figure 2-22
.
Attach aluminum tilt brackets (Item 2) to solar panel using the provided pan head screws
(Item 3), hex nuts (Item 10 in
Figure 2-23
), and #10 lock washers (Item 9 in
Figure 2-23
).
Apply Loctite 222 threadlocker removable adhesive sparingly to threads of hex nuts (Item 6).
Attach mounting bracket to tilt brackets using provided hex nuts (Item 6), hex bolts (Item 5),
washers (Item 4), and spring lock washers (Item 7). The spring lock washer goes between the
washer and the nut. Torque to 30 in-lbs (3.4 N m).
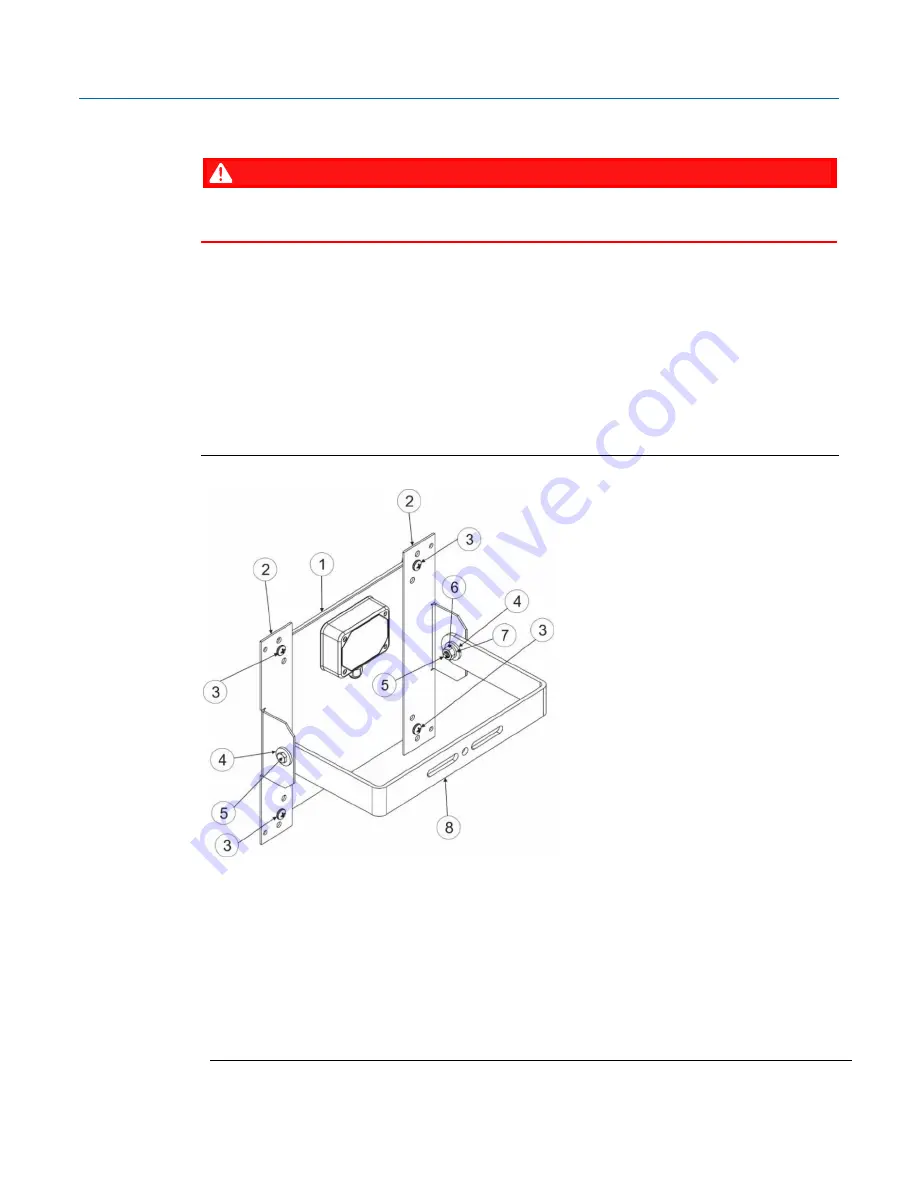
Figure 2-22: Attaching Mounting Hardware to the Solar Panel
1
6V, 6W solar panel
2
Aluminum tilt bracket (2)
3
10-32 x ½ pan head screw (4). Note: Matching hex nuts and washers not visible in this
graphic; see Items 9 and 10 in
Figure 2-23
4
5/16 flat washer (4); only two visible in this graphic
5
5/16-18 x .75 LG hex head bolt (2)
6
5/16-18 hex nut (2); only one visible in this graphic
7
5/16 flat spring lock washer (2) only one visible; placed on bolt between washer and nut
8
Mounting bracket
Summary of Contents for FB1100
Page 14: ...Emerson FB1100 Flow Computer Instruction Manual D301752X012 August 2020 10 Introduction ...
Page 48: ...Emerson FB1100 Flow Computer Instruction Manual D301752X012 August 2020 44 Installation ...
Page 87: ...Emerson FB1100 Flow Computer Instruction Manual D301752X012 August 2020 Index 83 ...


