Startup Procedure
6
5.0
S
TARTUP
P
ROCEDURE
5.1
Pluggable Connections
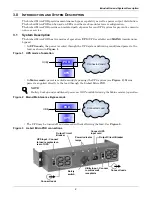
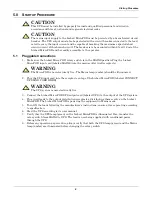
1. Make sure the Liebert Micro POD rotary switch is in the MAINS position. Plug the Liebert
MicroPOD input cord (labeled MAINS) into the mains outlet (wall receptacle).
2. Plug the UPS input cord into the receptacle on top of the Liebert MicroPOD (labeled: CONNECT
UPS LINE CORD HERE).
3. Connect the Liebert MicroPOD UPS output cord (labeled: UPS) to the output of the UPS system.
4. Plug in all loads to the output distribution receptacles, distributing them evenly on the Liebert
MicroPOD. The Liebert MicroPOD is powering the equipment in Mains mode.
5. Turn ON the loads following the manufacturer’s instructions; ensure all are operating according
to specification.
6. Start the UPS according to its user manual.
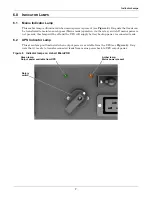
7. Verify that the UPS lamp (green) on the Liebert MicroPOD is illuminated. If so, transfer the
rotary switch from MAINS to UPS. The load is now being supplied with conditioned power
through the UPS.
8. Before any operation or procedure, always verify that both the UPS lamp (green) and the Mains
lamp (amber) are illuminated before changing the rotary switch.
!
CAUTION
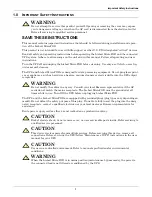
This UPS must be installed by properly trained and qualified personnel and wired in
accordance with local, national and regional electrical codes.
!
CAUTION
The mains input supply to the Liebert MicroPOD must be protected by a branch rated circuit
breaker. The UPS output must also be protected with a circuit breaker connected to the load,
rated to carry the input current and be capable of breaking the maximum expected short
circuit current of this branch circuit. The breaker is to be mounted within 6 feet (1.8m) of the
Liebert MicroPOD and be readily accessible to the operator.
!
WARNING
The MicroPOD is now electrically live. The Mains lamp (amber) should be illuminated.
!
WARNING
The UPS system is now electrically live.
Summary of Contents for Liebert MicroPOD MP2-210K
Page 1: ...AC Power For Business Critical Continuity Liebert MicroPOD 230V User Manual ...
Page 2: ......
Page 4: ...ii ...
Page 15: ......


