background image

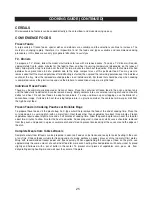
SANDWICHES, INCLUDING HAMBURGERS AND HOT DOGS

Guide for Heating Sandwiches

Sandwiches heat very quickly because, being porous, they have a low density. Since the filling is usually
more dense than the bread or rolls, the filling determines the heating time. Surprisingly, the filling will
always be hotter than the bread feels. Care must be taken not to overcook as the bread will become
tough. Use several thin slices of meat. Thin slices heat more quickly and are better than one thick slice.
The slow heating thick slice often causes the bread to overcook before the meat is hot. Sandwiches may
be placed on a paper plate, napkin or paper towel to be warmed. The sandwich should be covered with a
paper towel. Remove wrapping immediately after warming. Already-baked frozen breads and rolls may be
used for sandwiches. The filling, however, should be thawed first. Toasted bread is fine for sandwiches
and provides a firm base. The toast is warmed only; no further browning occurs.

Food

Amount

Cook

Special Notes

on Power 100

Sandwich

1

1 min.

(6 oz)

2

1 1/2 - 2 min.

Place on paper towels.

4

3 - 4 min.

Hamburger

1

1 min.

Cover with paper towel.

(4 oz)

4

3 - 4 min.

Hot Dogs

4

1 1/2 - 2 min.

Cover with paper towel.

(2 oz)

Sloppy Joes

4

4 min.

Place on microwaveable plate.

PASTA & GRAINS

Guide for Cooking Pasta and Grains

Raw long grain rice takes time to rehydrate. Microwaving time is a little shorter than conventional, but the
greatest advantage is the ease with which you can prepare fluffy rice without sticking or burning. Cooked
rice and pasta reheat easily in the microwave oven without loss of flavor or texture. No extra water is
needed to prevent sticking or drying, so there's no danger of overcooking rice and pasta or thinning
sauces.

Food

Hot

Salt

Oil or

Power

Cooking

Standing

Water

Butter

Level

Time

Time

Pasta (8 oz)

Egg Noodles 

4 cups

1 tsp.

1 Tbsp.

100

6 1/2 - 7 1/2 min.

2 - 5 min.

Macaroni

4 cups

1 tsp.

1 Tbsp.

100

8 - 10 min.

2 - 5 min.

Spaghetti

4 cups

1 tsp.

1 Tbsp.

100

8 - 10 min.

2 - 5 min.

Lasagna Noodles 4 cups

1 tsp.

1 Tbsp.

100

12 - 14 min.

2 - 5 min.

Rice, Long Grain

100

5 - 6 min.

White Rice (1 cup) 2 cups

1 tsp.

1 tsp.

then

5 - 7 min.

80

9 1/2 - 12 min.

100

5 - 6 min.

Brown Rice (1 cup) 2 cups

1/2 tsp. 1 tsp.

then

5 - 7 min.

80

22 - 27 min.

COOKING GUIDE (CONTINUED)

24

Summary of Contents for MW8991SB

Page 1: ... 900W MICROWAVE OVEN OWNER S MANUAL Visit our web site at www emersonradio com UNAUTHORIZED MODIFICATIONS TO THIS DEVICE COULD VOID THE USER S AUTHORITY TO OPERATE IT MW8991SB ...

Page 2: ...wave Energy 1 Important Safety Instructions 2 Safety Precautions 4 Grounding Instructions 5 Installation 5 Care of Your Microwave Oven 6 How to Use Your Microwave Oven Safely 6 Location of Controls 7 Operation 8 Setting the Clock 8 Weight Defrost 9 Time Defrost 9 Cooking In One Stage 10 Auto Start 10 Cooking in Two Stages 11 Defrosting Cooking in Two Stages 12 Quick Cook 12 Auto Cook 13 Child Lock...

Page 3: ...uld not be heated in this oven 7 As with any appliance close supervision is necessary when used by children 6 Use this appliance only for its intended use as described in this manual Do not use corrosive chemicals or vapors in this appliance This type of oven is specifically designed to heat cook or dry food It is not designed for industrial or laboratory use 13 Keep cord away from heated surfaces...

Page 4: ... utensils or food in the cavity when not in use Do not use this microwave oven to heat corrosive chemicals for example sulfides and chlorides Vapors from such corrosive chemicals may interact with the contact and springs of the safety interlock switches thereby rendering them inoperable 17 Liquids such as water coffee or tea are able to be overheated beyond the boiling point without appearing to b...

Page 5: ...T use CONVENTIONAL THERMO METERS in the microwave oven They may cause arcing 5 Remove PLASTIC STORE WRAPS before cooking or defrosting foods in the oven 6 For FURTHER INFORMATION on proper cooking utensils refer to the COOKING GUIDE on page 14 Food 1 Never use your microwave oven for HOME CANNING The oven is not designed to permit proper canning Improperly canned food may spoil and be dangerous to...

Page 6: ...pping over a longer cord B Longer cord sets or extension cords are available and may be used if care is exercised in their use C If a long cord or extension cord is used 1 the marked electrical rating of the cord set or extension cord should be at least as great as the electrical rating of the appliance 2 the extension cord must be a grounding type 3 wire cord and 3 the longer cord should be arran...

Page 7: ...he ROLLER GUIDE and oven floor should be cleaned frequently to prevent excessive noise 2 The ROLLER GUIDE MUST ALWAYS be used for cooking together with the Glass Tray Glass Tray 1 Do NOT operate the oven without the Glass Tray in place 2 Do NOT use any other Glass Tray with this oven 3 If the Glass Tray is hot ALLOW IT TO COOL before cleaning it or placing it in water 4 Do NOT cook directly on the...

Page 8: ...automatically lock shut If the door is opened while the oven is operating the magnetron will automatically shut off Door screen Allows viewing of food The screen is designed so that light can pass through but not the microwaves Oven cavity Spatter shield Protects the microwave outlet from splashes of cooking foods Safety interlock system Prevents the oven from operating while the door is opened Do...

Page 9: ... is cooking or defrosting simply press the CLOCK button and the display will show the actual time for three seconds NOTES SETTING THE CLOCK When the microwave oven is plugged into an outlet the oven will display 0 00 1 Press the CLOCK button the hour digit will blink and the clock indicator will light 3 Press the number keys to set current minute 8 OPERATION 2 Press the number keys to set current ...

Page 10: ...e number keys of the power level wanted 4 Press the Start button to start defrosting the Microwave and Defrost indicators will blink and the display will show count down the remaining defrosting time in minutes and seconds It will beep five times when defrosting is completed 1 Press Weight Defrost button LED will display dEF1 when at the same time Microwave Defrost indicators will light OPERATION ...

Page 11: ...tart cooking the Microwave and one of the Cook indicators will blink when cooking is completed 1 Repeat steps 1 through 3 above then press the CLOCK button the Timer Cook hour digit will blink 2 Press the number keys to set the timer hour and minute 3 Press the Start button When the actual time matches the preset Auto Start time the microwave will turn on and cook as per the preset cooking instruc...

Page 12: ...utes 99 seconds 4 Press the Power button the Microwave and High Cook indicators will light and PL 10 will light in the display 5 Press the Power button different times to set the desired power the display will show the level of power you chose 6 Press number keys to set the desired cooking time up to 99 minutes 99 seconds 7 Press the Start button to start cooking the Microwave and one of the Cook ...

Page 13: ...nds and beep once between stages It will beep five times when all the stages have completed cooking OPERATION CONTINUED 1 Press the Weight Defrost button the Microwave and Defrost indicators will light and dEF 1 will appear in the display 2 Press number keys to set the desired cooking weight The microwave can start cooking at the press of a button as follows To stop cooking or cancel a cooking pro...

Page 14: ...tton for three seconds the display will return to the time 2 Repeatedly press the desired Auto Cook button to set the desired weight portion Each Auto Cook item will have the most popular weight portion settings to chose from 5 Press the Start button to start cooking the Auto Cook indicator will blink and the display will countdown the remaining cooking time in minutes and seconds It will beep fiv...

Page 15: ...Oz 3 Slices 12 Oz 1 Cup 2 Cups 3 Cups 100 mL 150 mL 200 mL 9 0 Oz 12 0 Oz 18 0 Oz 4 0 Oz 8 0 Oz 16 0 Oz 4 0 Oz 8 0 Oz 16 0 Oz POTATO PIZZA BEVERAGE FRESH VEGETABLE OPERATION CONTINUED BABY MILK DINNER PLATE FROZEN VEGETABLE 2 00 2 25 5 30 7 20 9 20 1 00 1 30 2 00 1 10 2 20 3 20 30 40 50 1 30 2 40 3 30 2 30 4 30 6 30 2 50 5 00 8 00 Menu Press Times Weight Portion Auto Cook Menu Chart Cooking Time D...

Page 16: ...cooking time 5 Press the MEMORY button to write your settings into the chip Or press the Start button to start cooking this will also write your settings into the chip The Microwave and one of the Cook indicators will blink and the display will countdown the remaining cooking time in minutes and seconds It will beep five times when cooking is completed Remember above settings for future use 6 Pres...

Page 17: ...or PM for 3 seonds NOTES To prolong the magnetron s life the power will be switched to mid low when cooking at high power for more than 30 minutes One beep will sound when pressing the buttons Five beeps will sound when the cooking defrosting ends If the door is opened during oven operation close the door and press the START button to continue the cooking If a cooking program has been set but the ...

Page 18: ...e dish and thicker pieces toward the edge of the dish Starting Temperature Frozen or refrigerated foods take longer to cook than foods at room temperature Bone and Fat Because bones conduct heat the side of the meat the bone is on will cook first while boneless cuts cook slower but more evenly Fat attracts microwaves The middle of these foods are cooked by heat conduction Moisture Content Microwav...

Page 19: ...NUED HOT SNACKS AND APPETIZERS Hot hors d oeuvres and appetizers can be prepared very quickly in the oven by the hostess or individual servings may be prepared by guests Many appetizers may be cooked on the serving platter provided the platter does not have metal trim A time saving tip prepare these foods ahead of time refrigerate or freeze and refresh in the oven at serving time A plate of appeti...

Page 20: ...Medium 80 8 10 min 10 15 min Turn over after half the time Well 80 10 12 min 10 15 min Pork Roast Bone in 80 12 15 min 10 min Cover with plastic wrap Boneless 80 16 18 min 10 15 min Turn over after half the time Lamb Roast Bone in Medium 80 7 9 min 10 12 min Well 80 9 1 2 11 1 2 min 10 15 min Turn over after half the time Boneless Medium 80 9 11 min 10 12 min Well 80 11 13 1 2 min 10 15 min Beef P...

Page 21: ...ng Cover with wax paper SEAFOOD Guide for Cooking Seafood Microwaving is one of the easiest and most efficient ways of preparing fish and seafood which stay delicate and tender with quick moist cooking Overcooking dries out and toughens seafood so you should check it after the minimum time If thick pieces like fish steaks or lobster tails are done on the outside but still slightly translucent in t...

Page 22: ...or omelets scrambled eggs or custards they cook more evenly and need less stirring than during conventional cooking methods Do not try to cook eggs in the shell Steam can build up inside the shells causing them to burst Scrambled Eggs Eggs Butter Milk or Cook on Procedure Water Power 100 2 1 Tbsp 2 Tbsp 1 2 min 4 1 Tbsp 2 Tbsp 2 3 min 6 2 Tbsp 4 Tbsp 3 4 min Poached Eggs Eggs Water Cook Water Cook...

Page 23: ...unt Power 100 Time Asparagus Spears 1lb 1 4 cup 5 6 min 2 min Medium Casserole Re Cuts 1lb 1 2 cup 5 6 min 2 min arrange once Beans Fresh green 1 2 lb 1 4 cup 4 5 min 2 min Stir twice Frozen green 1 2 lb 2 Tbsp 5 1 2 6 1 2 min 2 min Stir twice Green Peas 2 cups 1 4 cup 4 5 min 2 min Small casserole Stir twice Broccoli 2 cups 1 4 cup 4 5 min 2 min Medium casserole Rearrange once during cooking Brus...

Page 24: ...heir shorter cooking time casseroles cooked in the microwave oven generally need less liquid Casseroles with cream and cheese sauces or meats which need slower cooking to tenderize cook best on power level 40 When cooking a favorite casserole make two and freeze the second for future use Line a casserole or baking dish with plastic wrap Transfer the cooked food to the lined container and freeze As...

Page 25: ...wer 100 Sandwich 1 1 min 6 oz 2 1 1 2 2 min Place on paper towels 4 3 4 min Hamburger 1 1 min Cover with paper towel 4 oz 4 3 4 min Hot Dogs 4 1 1 2 2 min Cover with paper towel 2 oz Sloppy Joes 4 4 min Place on microwaveable plate PASTA GRAINS Guide for Cooking Pasta and Grains Raw long grain rice takes time to rehydrate Microwaving time is a little shorter than conventional but the greatest adva...

Page 26: ...s into a casserole or serving dish and continue to defrost and heat Do not heat foods in deep foil containers To crisp and brown special toppings use the broiler of a conventional range If allowed to heat to serving temperature in a plastic container the container will warp or melt from the high heat of food Frozen Foods in Cooking Pouches or Boilable Bags To prepare these foods slit the plastic b...

Page 27: ...waveable ring mold of your own by placing a medium size glass in the center of a round glass baking dish Because your cakes will rise higher in microwave cooking never fill microwaveable cake pans more than half full Reduce baking powder and soda by approximately one fourth when converting a conventional recipe Fill paper lined muffin cups to only half full which allows for muffins to rise more th...

Page 28: ...me is set 4 Check for a blown circuit fuse or tripped main circuit breaker in your house 5 Check that the Child Lock feature is not engaged If there is sparking in the cavity 1 Check the containers dishes or utensils in the oven and make sure they are not metal or have metal trim AUTHORIZED SERVICE CALL TOLL FREE 1 800 695 0098 FOR ADDITIONAL SET UP OR OPERATING ASSISTANCE PLEASE CALL 1 800 898 90...

Page 29: ...amage or improper operation of unit caused by customer abuse misuse negligence or failure to follow operating instructions provided with the product d Ordinary adjustments to the product which can be performed by customer as outlined in the owner s manual e Signal reception problems caused by external antenna or cable systems f Products not purchased in the United States g Damage to product if use...

Page 30: ...EMERSON PART NO 80 5120 511 02 Printed in China ...

Reviews: