NetSure
™
9500 120kW 400V DC Power System
Operation Manual, UM584001200 (Issue AA, April 14, 2014)
Spec. No: 584001200
Code: UM584001200
Model No: 9500
Issue AA, April 14, 2014
[7 of 13]
5.
Press ENT to select the operation. Press ENT again to
confirm.
6.
Return to the Main screen by repeatedly pressing ESC
(escape).
Clearing a Rectifier Lost Alarm
If the ACU+ controller resets while a rectifier communications fail
alarm is active, the rectifier communications fail alarm is replaced
with a rectifier lost alarm. The alarm can be cleared as described in
the following local LCD interface procedure.
PROCEDURE
1.
With the Main screen displayed, press ENT to go to the
Main Menu. Navigate to and select “Manual” (ENT).
2.
If a password screen opens, a password must be entered
to allow the User to make adjustments. If a password was
previously entered and has not yet timed out, skip this
step and proceed to step 3). Otherwise, to enter a
password, with the cursor at the User Name field (default
is “Admin”), press the down arrow key to move cursor
down to the password line. Press ENT. “0” is highlighted.
Press the up arrow key once to change the “0” to”1”
(default password is “1”), then press ENT twice. (
Note:
If
you have been assigned a unique User Name and password,
follow this procedure to enter these.)
3.
With the Manual menu screen displayed, navigate to and
select “Rectifier” (ENT) / “All Rect Ctrl” (ENT).
4.
Navigate to “Clear Rect Lost”. Press ENT. “Clear”
highlights.
5.
Press ENT to select the operation. Press ENT again to
confirm.
6.
Return to the Main screen by repeatedly pressing ESC
(escape).
Replacement Information
User Replaceable Components
Refer to SAG584001200 (System Application Guide) for part
numbers of User replaceable components.
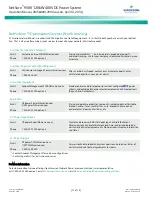
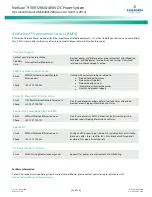
When a trouble symptom is localized to a faulty rectifier,
controller, or User replaceable circuit card; that particular
component should be replaced in its entirety. Other than a
rectifier fan replacement, no attempt should be made to
troubleshoot or repair an individual rectifier, controller, or circuit
card.
Replacement Procedures
Danger! Adhere to the “Important Safety Instructions”
presented at the front of this document.
Replacing a Rectifier or Rectifier Fan
Refer to the Rectifier Instructions (UM1R40015000e) for a rectifier
replacement procedure and a rectifier fan replacement procedure.
Refer also to “System Troubleshooting Information” on page 6.
The rectifier being replaced is assigned by the ACU+ the lowest
available identification number. If desired, you can change the
identification number, see “Configuring the ACU+ Identification of
Rectifiers” in the “INITIALLY STARTING THE SYSTEM” section of the
separate Power System Installation Instructions (IM584001200).
Replacing the ACU+ Controller
Refer to the ACU+ User Instructions (UM1M820NNB-2) for a
controller replacement procedure.
Replacing a Circuit Breaker in a List 21HA Distribution Panel
Danger! Hazardous DC voltage (400V DC) is present.
The distribution panel MUST be completely isolated
from all power sources.
Replace distribution circuit breakers with the same type and
rating. Refer to System Application Guide SAG584001200 for part
numbers.
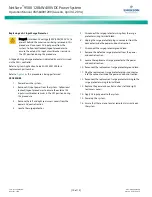
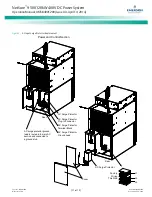
Refer to
as this procedure is being performed.
PROCEDURE
1.
Power down and isolate the distribution panel from all
power sources.
2.
Remove the distribution panel’s top or bottom front
cover to access the defective circuit breaker and wiring
by removing the screws securing the cover to the
distribution panel.
3.
Label the wires connected to the defective circuit breaker
for correct placement on the replacement circuit
breaker. Remove the wires from the defective circuit
breaker, leaving the ends attached to the input and
output bus in place.
4.
Remove the defective circuit breaker by pulling it out
from the front of the distribution panel.
5.
Transfer the leads that were attached to the defective
circuit breaker to the replacement circuit breaker. Refer
to
. The leads are to be oriented so they exit the
rear of the circuit breaker. Note that the DC load
Danger
Danger


