background image

14

LIMITED WARRANTY

Emerson Radio Corp. warrants manufacturing defects in original material, including

original parts and workmanship, under normal use and conditions, for a period of

ninety (90) days from the date of original purchase in the U.S.  With your dated

proof of purchase, we will provide repair service at no charge for labor and parts at

an authorized Depot Repair Facility, or replace the product in our discretion.  For

repair or replacement, pack your unit in a padded box, enclose your check or

money order payable to Emerson Radio Corp. in the amount of $9.00 (not required

by California residents) to cover shipping and handling costs, and enclose a copy

of your proof of purchase.  Send your unit to:

Emerson Radio Corp.,

5101 Statesman Drive,

Irving, TX 75063.

This warranty does not cover damage from negligence, misuse, abuse, accident,

failure to follow operating instructions, commercial use, rental, repairs by an

unauthorized facility, or products purchased, used, serviced or damaged outside

of the United States.

THIS WARRANTY GIVES YOU SPECIFIC LEGAL RIGHTS, AND YOU MAY

ALSO HAVE OTHER RIGHTS WHICH VARY FROM STATE TO STATE.

AU898M

The Serial Number of your clock is located on a label on the bottom of the cabinet.

We suggest that you record the Serial Number in the space below for future

reference.

Model No: AC100

Serial Number:

AC100_072806.p65

28/7/2006, 10:32

14

Summary of Contents for Research AC100

Page 1: ...OWNER S MANUAL AC100 Visit our web site at www emersonradio com Dual Alarm Clock with SmartSet Auto Time Setting System U S Patent No 6 567 344 AC100_072806 p65 28 7 2006 10 32 16 ...

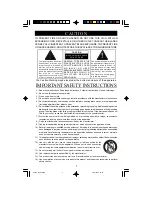
Page 2: ...ply cord or plug is damaged liquid has been spilled or objects have fallen into the apparatus the apparatus has been exposed to rain or moisture does not operate normally or has been dropped 11 This appliance shall not be exposed to dripping or splashing water and no object filled with liquids such as vases shall be placed on the apparatus 12 Use only with the cart stand tripod bracket or table sp...

Page 3: ...olled by a wall switch When the power to the clock is interrupted the built in lithium battery takes over to maintain the time and alarm settings To maximize the life of the lithium battery keep the clock connected to a live AC outlet at all times You will note that this system is equipped with a polarized AC power plug having one blade wider than the other This is a safety feature If this plug do...

Page 4: ...iptive labels or stickers on the front or top of the cabinet Do not remove any labels or stickers from the back or bottom of the cabinet Note the serial number on the bottom of your unit and write this number in the space provided on Warranty Page of this manual Place your clock on a level surface such as a table desk or shelf convenient to an AC outlet out of direct sunlight and away from sources...

Page 5: ...ing Button 13 Time Setting Button 14 Time Zone Button 15 Alarm Mode Button Weekdays Weekends EverydayAlarm 16 Alarm 1 Setting Button 17 Alarm 2 Setting Button 18 Back Up Battery Compartment Bottom cabinet 19 Up Button 20 Down Button LOCATION OF CONTROL AND INDICATORS SNOOZE Down Up Alarm 2 Alarm Mode Alarm 1 Time Zone Time Year Month Date 11 12 13 14 15 16 17 19 20 10 18 LOW BATT MON TUE WED THU F...

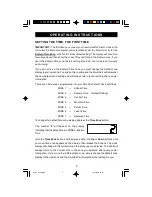
Page 6: ...time zones programmed into your SmartSet alarm clock as follows ZONE 1 Atlantic Time ZONE 2 Eastern Time Default Setting ZONE 3 Central Time ZONE 4 Mountain Time ZONE 5 Pacific Time ZONE 6 Yukon Time ZONE 7 Hawaiian Time To change the default time zone display depress the Time Zone button The number 2 will appear on the display indicating that the default zone is ZONE 2 Eastern Time Hold the Time ...

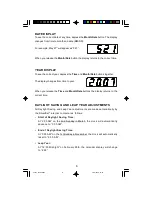
Page 7: ... release the Time and Month Date buttons the display returns to the correct time DAYLIGHT SAVING AND LEAP YEAR ADJUSTMENTS All Daylight Saving and Leap Year adjustments are made automatically by the SmartSet internal computer as follows Start of Daylight Saving Time At 2 00 AM on the 2nd Sunday in March the clock will automatically advance to 3 00 AM End of Daylight Saving Time At 3 00 AM on the 1...

Page 8: ...hen the power is restored ADJUSTING THE WAKE UP TIMES Your SmartSet alarm clock has two separate alarms that can be set and used independently You may use the alarms to wake two people at different times or you may use one alarm for weekdays and the other for weekend wake up times The procedure for adjusting the wake up time is the same for both Alarm 1 and Alarm 2 1 Depress and hold either the Al...

Page 9: ...Saturday and Sunday indicators are On the Weekends only mode is selected To change the Alarm Mode setting for Alarm 1 hold the Alarm 1 setting button and press the Alarm Mode button until the day indicators show the desired mode setting Weekdays only Weekends only or Everyday operation Release the Alarm Mode and Alarm 1 setting buttons and the display will return to the correct time Follow the sam...

Page 10: ... Alarm 2 button The buzzer will stop but the alarm remains set and will turn the buzzer on again at the same time on the following day depending on the Alarm Mode setting 5 If you do not want the alarm to turn the buzzer on the following day set the Alarm selector to the Off position SNOOZE ALARM After the buzzer alarm sounds in the morning you may press the SNOOZE button for a few more minutes sl...

Page 11: ...elow a certain level the LOW BATT indicator will flash When you see this indicator you should change the battery as soon as it is convenient for you to do so To change the battery proceed as follows 1 Purchase a replacement 3V lithium battery wherever batteries are sold The battery type is CR2430 or equivalent 2 Remove the battery from its package so it is ready to install IMPORTANT Leave the cloc...

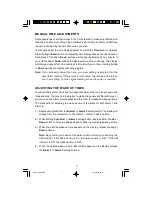
Page 12: ...t 1 1 2005 If you notice that the time on your SmartSet clock is completely incorrect and the day indicator is also wrong press the Month Date buttons to see the date If the date display is showing 1 1 January 1st you probably experienced a total memory loss To reset the clock after a total memory loss proceed as follows 1 Follow the instructions on page 10 and install a new CR2430 lithium battery...

Page 13: ...rm that the Day and Month Date displays are still correct Make final adjustments if necessary The SmartSet clock memory is now reset and the new lithium battery will maintain it for the next 5 to 8 years depending on the number and duration of the power outages you experience IMPORTANT NOTE After resetting the clock don t forget to reset your wake up times and alarm mode settings as well AC100_072...

Page 14: ...REE 1 800 695 0098 SERVICE CARE AND MAINTENANCE FOR CUSTOMER SERVICE PLEASE WRITE TO Emerson Radio Corp Consumer Affairs Dept 5101 Statesman Drive Irving TX 75063 FOR ADDITIONAL SET UP OR OPERATING ASSISTANCE PLEASE CALL 1 800 898 9020 LITHIUM BATTERY PRECAUTIONS Dispose of the old battery properly Do not leave it lying around where a young child or pet could play with or swallow it If the battery...

Page 15: ...y California residents to cover shipping and handling costs and enclose a copy of your proof of purchase Send your unit to Emerson Radio Corp 5101 Statesman Drive Irving TX 75063 This warranty does not cover damage from negligence misuse abuse accident failure to follow operating instructions commercial use rental repairs by an unauthorized facility or products purchased used serviced or damaged o...

Page 16: ...EMERSON Part No 16 2878 607 05 Printed in China AC100_072806 p65 28 7 2006 10 32 15 ...

Reviews: