Instruction Manual
IM-105-4000, Rev 1.3
October 2008
2-9
OPM 4000
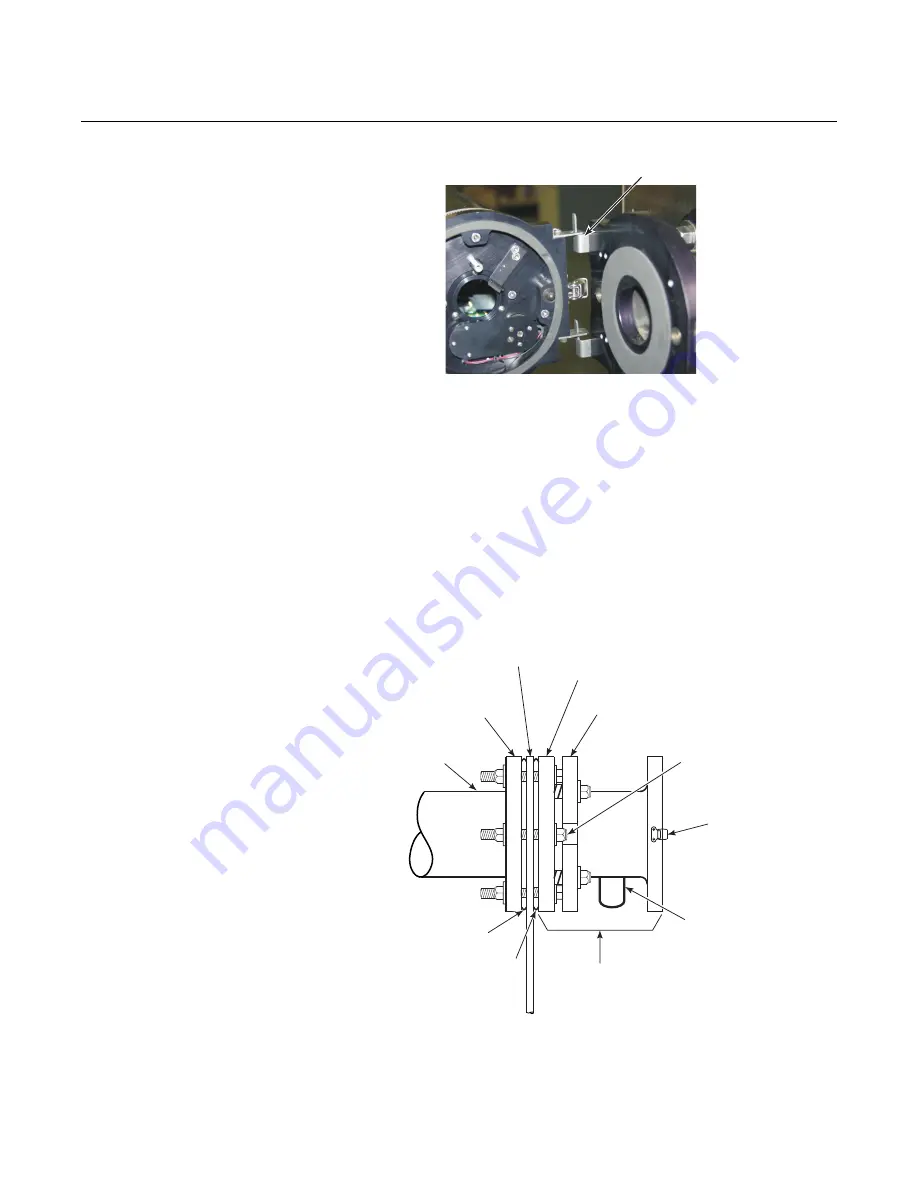
Figure 2-5. Transceiver and
Retro Reflector Hinge Pins
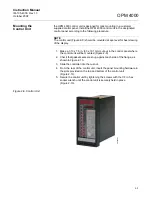
4. Working from the 3 in. pipe flange, assemble in the following order
(Figure 2-6):
a. gasket
b. mounting plate
c. gasket
d. mating flange and air plenum
5. Place a flat washer onto each of the four 5/8-11 bolts.
6. Once aligned, place the 5/8-11 bolt and flat washer through the top hole
of the middle plate so it is flush against the mating flange.
7. Place a split lock washer over the end of the bolt and secure with a nut.
Repeat for the remaining three mounting bolts.
Figure 2-6. Air Plenum
Hinge Pin
38450002
Latch
38450003
Middle Plate
Mating Flange
3” Pipe
Flange
Mounting Plate
Gasket
Gasket
5/8-11 Bolt (4)
Mating Flange and
Air Plenum
Air Blower Port
Mounting
Nipple
Summary of Contents for Rosemount Analytical OPM 4000
Page 2: ......
Page 6: ......
Page 10: ...Instruction Manual IM 105 4000 Rev 1 3 October 2008 OPM 4000 TOC 4 ...
Page 14: ...Instruction Manual IM 105 4000 Rev 1 3 October 2008 OPM 4000 iv ...
Page 42: ...Instruction Manual IM 105 4000 Rev 1 3 October 2008 OPM 4000 2 20 ...
Page 52: ...Instruction Manual IM 105 4000 Rev 1 3 October 2008 OPM 4000 4 6 ...
Page 58: ...Instruction Manual IM 105 4000 Rev 1 3 October 2008 OPM 4000 5 6 ...
Page 64: ...Instruction Manual IM 105 4000 Rev 1 3 October 2008 OPM 4000 6 6 ...
Page 100: ...Instruction Manual IM 105 4000 Rev 1 3 October 2008 OPM 4000 A 24 ...
Page 102: ...Instruction Manual IM 105 4000 Rev 1 3 October 2008 OPM 4000 B 2 ...
Page 104: ...Instruction Manual IM 105 4000 Rev 1 3 October 2008 OPM 4000 C 2 ...
Page 114: ...Instruction Manual IM 105 4000 Rev 1 3 October 2008 OPM 4000 D 10 ...
Page 116: ...Instruction Manual IM 105 4000 Rev 1 3 October 2008 Index 2 OPM 4000 ...


