background image

Instruction Manual

IM-105-4000, Rev 1.3
October 2008

OPM 4000

http://www.raihome.com

Section 4

Operation

Overview  . . . . . . . . . . . . . . . . . . . . . . . . . . . . . . . . . . . . . . . page 4-1
Control Unit Operations  . . . . . . . . . . . . . . . . . . . . . . . . . . . page 4-1
Service Module  . . . . . . . . . . . . . . . . . . . . . . . . . . . . . . . . . . page 4-4

OVERVIEW

This section describes:

• Operation of the OPM 4000 through the control unit.
• How to make alarm adjustments.
• Various terminal locations.
• How to operate the service module.

CONTROL UNIT 
OPERATIONS

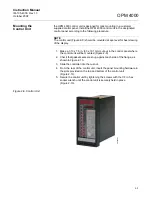
The control unit front panel is shown in Figure 4-1 and described below. The 
following LED indicators are located on the control unit.

Front Panel LEDs

ALARM

 - Red LED is blinking when a fault is detected. Performing a manual 

calibration will cause an alarm condition.

RUN

 - Green LED is on during normal operation and blinking if system is in 

S/M mode. The primary use of S/M mode is to prevent 4-20 mA outputs from 
changing while modifying blockware.

OPERATE

 - Red LED is on during normal operation.

CAL. AUTO/MAN

 - Red LED is on during calibration check mode.

ZERO

 - Red LED is on when zero calibration cycle is in progress, off during 

span or normal operation.

SPAN

 - Red LED is on when span calibration cycle is in progress, off during 

zero or normal operation.

HIGH OPACITY

 - Red LED is on if opacity exceeds set point for more than 

the time delay (typically 30 seconds).

REM/LOC

 - Not used.

Fault Messages

The following mesages are displayed during a fault condition.

Air purge low

 - Airflow to the transceiver and/or retro reflector is not 

sufficient.

No Stack Power

 - Indicates loss of service module power or other related 

power or component failure from the service module.

T2 4-20 Lost/low

 - Transceiver 4-20 mA current loop output is out of 

specification or missing.

Summary of Contents for Rosemount Analytical OPM 4000

Page 1: ...http www raihome com Instruction Manual IM 105 4000 Rev 1 3 October 2008 OPM 4000 Opacity Dust Density Monitor ...

Page 2: ......

Page 3: ...eminders from body text into the five Notes Page 2 7 Added Figure 2 3 Mounting the Stack Flanges Page 2 8 Added Figure 2 4 Stack Flange Installation Page 2 9 Updated Figure 2 5 Transceiver and Retro Reflector Hinge Pins to better illustrate the hinge pin Revised and streamlined information for Mounting the Air Plenum and Weather Covers Page 2 10 Updated Figure 2 6 Air Plenum to better illustrate i...

Page 4: ...alibration Page 6 2 Updated Figure 5 2 Zero Calibration to better illustrate PT 1 and PT 3 locations Page 6 3 Renumbered procedural steps under Zero Reflector Adjustment Page 6 3 Relocated Span Filter Mark procedural steps from the end of the section to follow the Zero Reflector Adjustment procedural steps Page 6 4 Reformatted Record the Zero Span Values in the Quick Menu into procedural steps Ref...

Page 5: ... parts Page A 2 thru A 24 Added note 11 to the safety data section Added new language translations Page B 1 Updated the return of materials address Back Cover Updated the address blocks Page Summary Page 2 1 Added note regarding installed path length Page 2 2 Clarified transceiver distance from stack exit Page 2 7 Added note regarding installed path length Page 2 15 Added information on recommende...

Page 6: ......

Page 7: ...Installation Site 2 2 Accessibility 2 2 Clearance 2 2 Environment 2 2 Sample Area 2 2 Stack Exit 2 2 Regulatory Process Considerations 2 4 Mechanical Installation 2 5 Installation of Stack Flanges 2 5 Mounting the Air Plenum and Weather Covers 2 9 Attach Blowers 2 10 Mounting the Transceiver and Retro Reflector 2 11 Mounting the Control Unit 2 12 System Wiring Installation 2 15 Beam Alignment Proc...

Page 8: ...on 5 2 Coarse Adjustments 5 4 Filter Correction 5 4 Filter Certification 5 5 SECTION 6 Zero and Span Calibration Overview 6 1 Clear on Stack Zero and Span Calibration 6 1 Zero Reflector Adjustment 6 3 Span Filter Mark 6 4 Record the Zero Span Values in the Quick Menu 6 4 Zero Cal Value 6 4 Span Cal Value 6 4 Off Stack Zero Calibration 6 4 SECTION 7 Maintenance Overview 7 1 Preventive Maintenance S...

Page 9: ...tions C 1 APPENDIX D OPM 2000 Retrofit Instructions Foreword D 1 Overview of the Upgrade D 1 Removal of Existing Equipment D 2 Remove Transceiver Side Components D 2 Remove Retro Reflector Side Components D 2 Installation D 3 Install Retro Reflector Side Components D 3 Install Transceiver Side Components D 7 Install Stack Service Module D 8 System Setup D 8 Beam Alignment D 8 Startup and Calibrati...

Page 10: ...Instruction Manual IM 105 4000 Rev 1 3 October 2008 OPM 4000 TOC 4 ...

Page 11: ...ess Management representative for clarification Follow all warnings cautions and instructions marked on and supplied with the product Inform and educate your personnel in the proper installation operation and maintenance of the product Install your equipment as specified in the Installation Instructions of the appropriate Instruction Manual and per applicable local and national codes Connect all p...

Page 12: ...ntial operating procedure condition or statement SYMBOLS NOTE TO USERS The number in the lower right corner of each illustration in this publication is a manual illustration number It is not a part number and is not related to the illustration in any technical manner Highlights an operation or maintenance procedure practice condition statement etc If not strictly observed could result in injury de...

Page 13: ...a day 7 days a week Phone 1 800 433 6076 1 440 914 1261 In addition to the CSC you may also contact Field Watch Field Watch coordinates Emerson Process Management s field service throughout the U S and abroad Phone 1 800 654 RSMT 1 800 654 7768 Emerson Process Management may also be reached via the Internet through e mail and the World Wide Web e mail GAS CSC emerson com World Wide Web www raihome...

Page 14: ...Instruction Manual IM 105 4000 Rev 1 3 October 2008 OPM 4000 iv ...

Page 15: ...IEW General The OPM 4000 Opacity Dust Density Monitor provides continuous low maintenance precision measurement of opacity and optical density in industrial applications It is a cost effective instrument that serves as an aid in operating pollution and or process control equipment Opacity refers to the amount of light being scattered or absorbed by particles in the light beam path An opacity or du...

Page 16: ...n Manua l IM 105 40 00 Rev 1 0 May 200 6 Mo de l Se ria l Operate Zero Span Normal Test External Meter mA Opacity T2 0 100 Model Serial 1 2 3 4 5 6 7 8 9 10 11 1 Zero Jig 2 Instruction Manual 3 Mounting Plate 4 Control Unit 5 Service Module 6 Air Blower 7 Air Filter 8 Air Hose with Clamps 9 Duplexer Note The optional weather covers are not shown in the typical system package 10 Transceiver with Ai...

Page 17: ...et 2 of 2 38440041 M od el Se ria l Notes 1 Plug air blower into an external AC power source 2 The optional weather covers are not shown in the typical system package 1 2 1 Terminal Board 2 Mounting Plate 3 4 5 6 Air Blower Air Filter Air Hose with Clamps Retro Reflector with Air Plenum attached 3 4 5 6 ...

Page 18: ...s but also as a means to achieve improved efficiency and operating profit Originally a trained smoke reader determined the particulate level of stack emissions solely by observation The opacity of the plume was judged in reference to a standard Ringelmann scale of 0 to 5 These determinations tended to be influenced by several sources of error such as sky haze sun position and the subjective determ...

Page 19: ...e zero and span cycles and insertion of external current meter in the transceiver to control unit 4 20 mA loop Optional Air Purge Weather Cover System The transceiver and reflector may be mounted in weather covers The weather covers are fairly compact to allow movement around them even on a three foot walkway or platform They protect the stack mounted components from dirt moisture stack temperatur...

Page 20: ... transmissometer The bulls eye is used to correct changes in alignment and is unique in that no moving parts are used The ratio of the measurement and reference detectors is used to provide a transmittance2 T2 signal Because the same light source is used for both detectors and a measurement reference ratio is used throughout for the calculations the monitor is insensitive to variations in light in...

Page 21: ...ale Remote control unit Numeric Digital Display 5 8 in 15 9 mm 4 digit LED Selectable for instantaneous opacity average opacity optional mg m3 Display Resolution 0 1 Opacity Alphanumeric 8 character LED 0 2 in Fault Display Air purge low No Stack Power T2 4 20 Lost low Maintenance Mode Window Dust Zero Cal Fail Span Cal Fail Manual Cal Bargraph Left Right 51 segments LED 5 1 in 129 5 mm for instan...

Page 22: ... 56 kg pipe flange Ambient Light Immunity Solid state electronic light modulation Design and Performance Peak and Mean Spectral Response Photopic 515 to 585 nm less than 10 of peak response outside 400 to 700 nm Relative Spectral Response 10 Angle of View 4 0o from optical axis Angle of Projection 4 0o from optical axis Calibration Error Accuracy 1 of full scale Response Time 10 seconds Zero Drift...

Page 23: ...s and pictures to assist in the process Wiring schematics for the OPM 4000 system The beam alignment procedure Before installing this equipment read the Safety instructions for the wiring and installation of this apparatus in Appendix A Failure to follow safety instructions could result in serious injury or death Install all protective equipment covers and safety ground leads after installation Fa...

Page 24: ...re ranges Areas that are clean and dry are desirable Avoid areas with condensation Maintenance intervals are directly related to the installation environment Intervals can vary from 2 to 3 months in fairly clean environments to twice a month in dirty environments Lens cleaning is a function of the ambient conditions and cleanliness of the purge air Choose a location that will minimize excessive vi...

Page 25: ...lange face for swinging Stack or Breeching Wall OD 38450017 RETRO TRANSCEIVER 12 250 in 311 mm R 6 125 in 156 mm 6 to 8 in 152 to 203 mm TOP VIEW 6 to 8 in 152 to 203 mm 6 125 156 mm R 7 5 in 191 mm SIDE VIEW Note 1 Note 2 The top view represents the transceiver and retro reflector assemblies with their swing clearances Optional weather covers are not shown The side view represents the installatio...

Page 26: ... Figure 2 2 5 Ideally locate the transmitter eight to ten stack diameters upstream from the stack exit and three to five diameters downstream from any bends junctions or other constrictions in the stack or duct For best results mount the transceiver and retro reflector modules so the light beam is exactly perpendicular to the stack or duct and the beam goes through the center Do not install the tr...

Page 27: ...be mounted approximately 5 feet 1 5 m up from the deck of the platforms roof or walk way 1 Form two mounting holes in the stack at locations specified in Installation Considerations Holes must be on the same horizontal and vertical axes A liquid level can be used to ensure that modules are installed on the same horizontal plane 2 Insert a piece of 2 1 2 in 64 mm pipe through the mounting holes Mak...

Page 28: ...nting the Stack Flanges 6 in 8 in 152 203 mm 2 1 2 in 64 mm Pipe Size to Span as needed for alignment VERTICAL AXIS GAS FLOW Stack or Breeching Wall OD 3 in Sch 40 Mounting Nipple 38450015 STACKS UNDER 6 FEET ACROSS STACKS OVER 6 FEET ACROSS Alignment Tool in 13 mm Alignment Hole ...

Page 29: ... on the same horizontal plane 2 Locate one 3 1 2 in 89 mm diameter hole large enough to accept the 3 in mounting nipple and the other hole approximately 1 2 in 13 mm diameter directly across from each other NOTE An alignment tool can be purchased from the factory to ensure accurate alignment 3 Attach the alignment tool to the pipe flange assembly and insert the assembly into the 3 1 2 in 89 mm hol...

Page 30: ...f installed path length is not within 10 of the factory set path length return the unit to the factory so the path length can be reset Mounting the Air Plenum and Weather Covers Use the following procedure to mount the air plenum and weather covers NOTE Before installing the transceiver retro reflector or any type of weather cover remove the air plenum from both the transceiver and retro reflector...

Page 31: ...to each of the four 5 8 11 bolts 6 Once aligned place the 5 8 11 bolt and flat washer through the top hole of the middle plate so it is flush against the mating flange 7 Place a split lock washer over the end of the bolt and secure with a nut Repeat for the remaining three mounting bolts Figure 2 6 Air Plenum Hinge Pin 38450002 Latch 38450003 Middle Plate Mating Flange 3 Pipe Flange Mounting Plate...

Page 32: ...wn in Figure 2 1 1 Power up the air purge blowers to prevent stack particulate from accumulating in the nipple and air purge housing 2 Attach the transceiver and retro reflector to the air plenum assembly by placing them on the hinge pins Figure 2 7 3 Close transceiver and retro reflector and secure in place with the two hold down latches Figure 2 7 Upper and Lower Hinge Pins If installed location...

Page 33: ...display 1 Make a 3 13 x 7 5 in 80 x 191 mm cut out in the control panel where the control unit will be mounted Figure 2 9 2 Check that gasket seals are snug against each side of the flange as shown in Figure 2 10 3 Slide the controller into the cut out 4 From the rear of the control unit insert the panel mounting hardware in the slots provided on the top and bottom of the control unit Figure 2 10 ...

Page 34: ...105 4000 Rev 1 3 October 2008 OPM 4000 2 12 Figure 2 9 Panel Cutout for Control Unit 1 75 in 45 mm minimum spacing to mount next unit above or below 7 5 in 191 mm CUTOUT 0 630 in 16 mm minimum spacing 3 13 in 80 mm 38450018 ...

Page 35: ...t KO 0 5 in 13 mm 0 75 in 19 mm 1 8 in Hex Socket Gasket Flange Gasket 0 50 in 13 mm max 8 00 in 203 mm 7 38 in 188 mm Removable Rear Cover Field Wiring Terminal Blocks Located behind this cover 3 0 in 76 mm 1 13 in 29 mm 1 2 in 3 4 in Conduit K O 7 75 in 197 mm 1 13 in 29 mm 3 75 in 95 mm 38450019 Mounting Hardware ...

Page 36: ...Connect terminal 6 on the control unit to terminal 12 on TB 1 7 Connect terminal 5 on the control unit to terminal 11 on TB 1 8 Connect shield covering the wires from terminals 6 and 5 of the control unit to terminal 10 on TB 1 9 Connect terminal 9 on the control unit to terminals 9 and 8 on TB 1 10 Connect terminal 5L on the control unit to terminal 7 on TB 1 11 Connect terminal 6L on the control...

Page 37: ...4 24Vdc DOUT 5 Open collector transistor for span solenoid 6 Open collector transistor for zero solenoid 7 Open collector transistor for High Opacity alarm 8 Open collector transistor for Fault alarm 9 Common DOUT 11 12 4 20 mA output Instantaneous Opacity to recording device and service module 13 14 4 20 mA output Average Opacity 120 Vac tie points 1L 2L 3L 4L 5L 6L 7L 8L N L L DIN 1 DIN 2 DIN 3 ...

Page 38: ...Instruction Manual IM 105 4000 Rev 1 3 October 2008 OPM 4000 2 16 Figure 2 12 Typical System Wiring ...

Page 39: ...nit to an AC power source 2 Connect the neutral wire terminal 12 of the control unit to an AC power source 3 The transceiver blower is factory wired to the duplexer 4 Plug the retro reflector blower into an AC power source 5 Plug the service module into the duplexer 6 Plug the duplexer into an AC power source Figure 2 13 P1 and P2 Pin Designations ...

Page 40: ...alignment For optimal alignment accuracy the stack should be at normal operating temperature Alignment should be completed before instrument calibration Service module switches Figure 2 14 should be in the normal operating positions given below Operate Zero Operate Operate Span Operate Normal Test Normal Opacity T2 Opacity Figure 2 14 Service Module Switch Location OPERATE SPAN ZERO EXTERNAL METER...

Page 41: ...ting flange The adjusting bolts have nylon locking inserts to prevent loosening by vibration 3 Look through the viewing port located on the rear of the transceiver to determine monitor alignment 4 Adjust the 3 adjusting bolts to align the beam image in the center of the cross hair bulls eye as shown in Figure 2 15 Figure 2 15 Alignment of the Transceiver 38450042 Adjusting Bolts Beam image in the ...

Page 42: ...Instruction Manual IM 105 4000 Rev 1 3 October 2008 OPM 4000 2 20 ...

Page 43: ...should be left off until system has been completely checked according to the following instructions in this section After system operation has been verified connect and test external connections 3 The air purge and weather cover system transceiver retro reflector and service module must be installed and power applied 4 Control unit must be installed and wired to the service module and customers eq...

Page 44: ... of the instrument increases as Lx Lt becomes greater Lx inside stack diameter at stack exit Lt inside stack diameter at the transmitter location Lf flange to flange distance between the transceiver and retro reflector unit 1 Measure and record Lx and Lt and compute the Optical Path Length Ratio OPLR 2 Check that the calculated value and the OPLR found in the Factory OPLR are within 2 refer to Zer...

Page 45: ...utton the red EDIT ESC LED will light The message display will read QUICK MENU 2 Press the ENTER key then the EDIT key to scroll through the listing shown below Alarm Set Point In opacity Alarm Time Delay In seconds Auto Cal Cycle Time In hours Zero Cal Value In opacity Span Cal Value In opacity OPLR Read Only XX XX DISPLAYING THE FACTORY SET OPLR 1 Open the hinged cover and press the EDIT ESC but...

Page 46: ...hen the system enters a manual or auto cal check cycle the current zero and span values are checked against the stored values If either the zero or span current value exceeds the stored value by 2 opacity the fault system will energize To verify the zero span calibration check follow the procedure below 1 Push the CAL AUTO MAN key to initiate a manual calibration cycle The Alarm LED will light and...

Page 47: ...is in S M mode The primary use of S M mode is to prevent 4 20 mA outputs from changing while modifying blockware OPERATE Red LED is on during normal operation CAL AUTO MAN Red LED is on during calibration check mode ZERO Red LED is on when zero calibration cycle is in progress off during span or normal operation SPAN Red LED is on when span calibration cycle is in progress off during zero or norma...

Page 48: ...ring calibration check the span reading has exceeded the 2 opacity set point Manual Calibration A manual calibration check has been started from the control unit front panel Manual Controls ACK Acknowledges fault alarms and displays the fault message DIS Changes displayed value each time it is pressed The display rotates between opacity average opacity dust zero shift and hours to next calibration...

Page 49: ...ormation supplied by the customer Maximum current loop resistance is 800 ohms AOUT1 instantaneous opacity zero span when in check mode is connected at terminals 11 and 12 and supplies the opacity signal to a recorder or DAS and to the service module for display at the sensor location AOUT2 average opacity zero span when in check mode is connected at terminals 13 and 14 Recorder or Other Device Cal...

Page 50: ... condition exists Only two conditions are considered normal operation 1 Reading opacity 2 Computer or internal clock initiated calibration check cycle Switches OPACITY T2 This switch selects the display of the stack digital meter In the opacity mode the digital displays opacity from the control unit In the T2 mode it is the signal out of the transceiver in Transmittance2 OPERATE ZERO This switch c...

Page 51: ...en and the current loop from the transceiver is interrupted allowing the use of an external current meter to be placed in series with the transceiver current output When this is in the test mode position it is considered a maintenance condition and fault condition If no current meter is in the test jacks the loop current the control unit will indicate will be full scale and the control unit will i...

Page 52: ...Instruction Manual IM 105 4000 Rev 1 3 October 2008 OPM 4000 4 6 ...

Page 53: ...e OPLR How to make adjustments on the iris USING THE ZERO JIG The zero jig Figure 5 1 or Micro turn 200 on line test and audit system contains a test reflector three neutral density filters filter certification certificates and a carrying case The zero jig on line test and audit system may be used for Opacity audit Linearity checks and adjustments System accuracy verification Service on line or of...

Page 54: ...lose 2 Loosen clamps on the transceiver and swing it open 3 Clean the lens using alcohol and a clean lint free paper that will leave no film on the lens 4 Place the zero jig on the two alignment pins Figure 5 2 with the reflector facing toward the transceiver away from the stack 5 Secure the device to the transceiver by tightening the mounting screw 6 Using the fine adjustment large knob start by ...

Page 55: ...Instruction Manual IM 105 4000 Rev 1 3 October 2008 5 3 OPM 4000 Figure 5 2 Zero Jig Installation 38450037 Alignment Pin Alignment Pin Mounting Screw Fine Adjustment Large Knob ...

Page 56: ...t knob as far as it will go into the zero jig housing perform the following procedure 1 Hold the zero jig in your hand so you can see the iris and retro reflector Turn the adjustment knob so that the iris is open as far as it will go 2 Loosen the coarse adjustment set screw 3 Turn the fine adjustment knob in the opposite direction as far as it will go 4 Tighten the coarse adjustment set screw Be s...

Page 57: ... not more than 6 months is recommended Filter certification replacement or additional neutral density filters are available from Emerson Process Management Emerson s Rosemount Analytical neutral density filters for the zero jig are calibrated on a Perkin Elmer Lambda Series 6 PECSS Spectrophotometer per Federal Environmental Protection Agency specifications These specifications are contained in th...

Page 58: ...Instruction Manual IM 105 4000 Rev 1 3 October 2008 OPM 4000 5 6 ...

Page 59: ...ete this procedure the zero jig on line test kit with a high filter of at least 0 8 OD is required 1 Swing both the retro reflector and transceiver open and clean the protective windows Figure 6 1 Return both to the closed position 2 Verify alignment the beam must be centered on the TTL target Refer to the Beam Alignment Procedure in Section 2 Installation 3 On the transceiver remove the screw bel...

Page 60: ...tion Manual IM 105 4000 Rev 1 3 October 2008 OPM 4000 6 2 Figure 6 1 Zero Reflector Figure 6 2 Zero Calibration Protective Window Zero Reflector 38450011 PT 1 Zero PT 3 Span 38450030 R M Signal Processor Board ...

Page 61: ... under Zero Cal Value see Zero Span Calibration Check in Section 3 Startup and Calibration for procedures to access the quick menu 2 Place the OPACITY T2 switch on the service module in the OPACITY position to observe the correlated opacity on the digital display 3 Swing open the transceiver 4 Place the ZERO switch on the service module in the ZERO position This will raise the zero reflector into ...

Page 62: ...times or hold and scroll down until the display reads ZERO CAL VALUE 3 Press the ENTER key the Edit Value Light will flash 4 Press and hold the EDIT or EDIT key until the zero value recorded in Clear on Stack Zero and Span Calibration is displayed 5 Press ENTER then press the EDIT key 3 times to return to normal operation Span Cal Value In order to enter the span cal value into the control unit th...

Page 63: ...used for the off stack zero calibration If test stands are not available an alternate method is to use 3 in pipe flanges with air plenums installed Contact the factory for air plenum availability Set the spacing between the 3 in flanges exactly the same as the flange to flange measurement 3 Clean the transceiver and retro reflector windows 4 Connect the control unit with the control to service mod...

Page 64: ...Instruction Manual IM 105 4000 Rev 1 3 October 2008 OPM 4000 6 6 ...

Page 65: ...ads could result in serious injury or death Item to Check Frequency Procedure Zero Span Daily Check that readings are within specification 2 Refer to Section 6 Zero and Span Calibration Fault conditions Daily Check for fault conditions refer to Fault Messages in Section 4 Operation Projection lens Monthly or as required Clean with cloth and lens cleaning fluid Beam alignment Monthly or as required...

Page 66: ...nd retro reflector to clean air plenum Refer to Transceiver and Retro Reflector Hinge Pins in Section 2 Installation Clear stack or off stack zero Yearly For instructions refer to Section 6 Zero and Span Calibration Hoses and gaskets Yearly Replace if necessary Inner optics Yearly Clean if necessary System operations Yearly Check all system operations Refer to Section 4 Operation Transceiver and r...

Page 67: ... panel Interior Dust in the interior of the control unit should be removed before it builds up enough to cause arcing and short circuits during periods of high humidity Dust is best removed from the interior by the type of canned air used for computer cleaning Dirt clinging to the surfaces can be removed with a soft paintbrush Visual Inspection Inspect the interior occasionally for broken connecti...

Page 68: ... screws Figure 7 1 using an Allen wrench Remove the lamp holding fixture 4 Turn the set screws to loosen the clamp for lamp removal 5 Remove the lamp assembly consisting of the lamp wires and connector 6 Install new lamp assembly in the lamp holding fixture and tighten set screws 7 Install lamp holding fixture and secure with the two socket head cap screws Connect J2 8 Calibrate the OPM 4000 per S...

Page 69: ...al plate 2 Pull fuse F1 from the clamp Figure 7 2 3 Firmly press new fuse into the clamp on the power modulator board 4 Install cover Service Module Fuse Replacement 1 Press down on the service module fuse and turn counterclockwise for removal Figure 7 3 2 When installing new service module fuse align notches press down and turn clockwise Figure 7 3 Service Module Fuse 38450032 Transceiver Fuse F1...

Page 70: ... four nuts Figure 7 4 holding the signal processor board 4 Install new signal processor board Install wiring removed in step 2 5 Calibrate OPM 4000 per Section 3 Startup and Calibration 6 Install cover Power Modulator Board Replacement Procedures 1 Remove the transceiver cover by removing the screw below the target viewing window and pulling the housing straight back 2 Tag and remove all wiring co...

Page 71: ...gure 7 6 2 Open control unit front panel to access CPU board 3 Tag and remove all wiring from the CPU board 4 Remove CPU board by pulling out of control unit 5 Install CPU board and reconnect wires removed in step 3 6 Install front panel and secure with screw 7 Calibrate OPM 4000 per Section 3 Startup and Calibration 38450036 Socket Head Cap Screws Socket Head Cap Screws Iris Assembly Rotary Solen...

Page 72: ...ontrol unit front panel to access the backup memory module 3 Press on sides of chip and pull back to remove 4 Install the backup memory module 5 Install front panel and secure with screw 6 Calibrate OPM 4000 per Section 3 Startup and Calibration Figure 7 6 CPU Board and Backup Memory Module 38450038 CPU Board Backup Memory Module Screw Front Panel ...

Page 73: ...lignment is good but control unit reads high opacity or erratic in normal zero and span mode service module meter in opacity reads high or erratic Reference voltage TP 2 on R M signal processor board is lower than 9 3V Adjust lamp drive PT 2 on the power modulator board until reference voltage TP 2 on R M signal processor board is 10 0 Volts Main lamp out Replace main lamp assembly Refer to Lamp R...

Page 74: ... Replace the leads when the test is complete Problem Possible Cause Remedy No stack power fault message Service module lost power or failed Check power check SM fuse Replace as needed Refer to Service Module Fuse Replacement in Section 7 Maintenance Maintenance Mode message Maintenance switch or maintenance function is on Return all to operate or neutral positions and press ACK key to clear alarms...

Page 75: ... Maintenance 7 6 1A99993H26 Backup Memory Module 8kx8 EEPROM see Circuit Board Replacements in Section 7 Maintenance 7 5 1A99993H06 Zero reflector iris assembly with rotary solenoid retro reflector tape and zero arm 7 4 1A99993H04 Power modulator board see Circuit Board Replacements in Section 7 Maintenance 7 4 1A99993H03 R M Signal processor board see Circuit Board Replacements in Section 7 Maint...

Page 76: ... 62 transmittance N A 1A99993H21 Replacement 2 ND filter 0 6 0 048 OD 74 88 opacity 25 12 transmittance N A 1A99993H22 Replacement 2 ND filter 0 7 0 056 OD 80 05 opacity 19 95 transmittance N A 1A99993H23 Replacement 2 ND filter 0 8 0 064 OD 84 15 opacity 15 85 transmittance N A 1A99993H24 Replacement 2 ND filter 0 9 0 072 OD 87 41 opacity 12 59 transmittance ...

Page 77: ...Instruction Manual IM 105 4000 Rev 1 3 October 2008 OPM 4000 http www raihome com Appendix A Safety Data Safety Instructions page A 2 ...

Page 78: ...a mechanically operated isolating switch If not then another means of disconnecting the equipment from the supply must be provided and clearly marked as such Circuit breakers or switches must comply with a recognized standard such as IEC947 All wiring must conform with any local standards 7 Where equipment or covers are marked with the symbol to the right hazardous voltages are likely to be presen...

Page 79: ...ory Jistič může také obsahovat mechanický odpojovač Pokud ho neobsahuje musí být zajištěn a jasně označen jiný způsob odpojení zařízení od zdroje Jističe nebo přepínače musí odpovídat uznávaným normám např IEC947 Všechna zapojení musí odpovídat místním normám 7 Je li zařízení nebo kryt označen symbolem na pravé straně pravděpodobně se uvnitř nachází nebezpečné napětí Tyto kryty by měly být sejmuty...

Page 80: ...t kontakt Hvis ikke skal anden form for afbryder mellem forsyning og udstyr benyttes og mærkes som sådan Afbrydere eller kontakter skal overholde en kendt standard som IEC947 7 Hvor udstyr eller dæksler er mærket med dette symbol er farlige spændinger normalt forekom mende bagved Disse dæksler bør kun afmonteres når forsyningsspændingen er frakoblet og da kun af instrueret servicepersonale 8 Hvor ...

Page 81: ...sche schakelaar bevatten Zoniet moet een andere mogelijkheid bestaan om de voedingsspanning van het toestel te halen en ook duidelijk zo zijn aangegeven Stroomonderbrekers of schakelaars moeten onderworpen zijn aan een erkende standaard zoals IEC947 7 Waar toestellen of deksels aangegeven staan met het symbool is er meestal hoogspanning aanwezig Deze deksels mogen enkel verwijderd worden nadat de ...

Page 82: ...de schakelaar Bij het ontbreken van deze voorziening dient een andere als zodanig duidelijk aangegeven mogelijkheid aanwezig te zijn om de spanning van de apparatuur af te schakelen Zekeringen en schakelaars dienen te voldoen aan een erkende standaard zoals IEC 947 7 Waar de apparatuur of de beschermdeksels kappen gemarkeerd zijn met het volgende symbool kunnen zich hieronder spanning voerende del...

Page 83: ...r Unterbrechung der Spannungszufuhr gewährleistet werden mit Hinweisen deutlich gekennzeichnet werden Ein solcher Mechanismus zur Spannungsunterbrechung muß mit den Normen und Richtlinien für die allgemeine Installation von Elektrogeräten wie zum Beispiel der IEC947 übereinstimmen 7 Mit dem Symbol sind Geräte oder Abdeckungen gekennzeichnet die eine gefährliche Netzspannung Spannung führen Die Abd...

Page 84: ...αµβάνει µηχανικό διακόπτη αποµόνωσης Εάν δεν περιλαµβάνει τότε άλλα µέσα αποσύνδεσης της συσκευής από την τροφοδοσία πρέπει να παροχηθούν και να σηµανθούν σαφώς ως τέτοια Οι ασφαλειοδιακόπτες ή διακόπτες πρέπει να συµµορφώνονται µε αναγνωρισµένα πρότυπα όπως το IEC947 Όλες οι καλωδιώσεις πρέπει να συµµορφώνονται µε τα τοπικά πρότυπα 7 Όπου συσκευές ή καλύµµατα είναι σηµασµένα µε το σύµβολο που εικ...

Page 85: ...tasel juhul peab seadme toiteallikast lahtiühendamiseks olema teine ja selgelt osutatud moodus Automaatkorgid või lülitid peavad vastama tunnustatud standarditele nagu nt IEC947 Kogu juhtmestik peab vastama kohalikele standarditele 7 Seadmel või ümbristel asuv paremale osutav sümbol tähistab selle all leiduvat ohtlikku pinget Selliste sümbolitega ümbriseid võib eemaldada vaid juhul kui seade on to...

Page 86: ...ytyy myös sisältyä mekaaninen erotuskytkin Jos ei niin jännitesyöttö on pystyttävä katkaisemaan muilla keinoilla ja merkittävä siten että se tunnistetaan sellaiseksi Turvakytkimien tai kat kaisimien täytyy täyttää IEC947 standardin vaatimukset näkyvyydestä 7 Mikäli laite tai kosketussuoja on merkitty tällä merkillä on merkinnän takana tai alla hengenvaarallisen suuruinen jännite Suojaa ei saa pois...

Page 87: ...les conducteurs en cas d anomalie Ce disjoncteur doit également pouvoir être actionné manuellement de façon mécanique Dans le cas contraire un autre système doit être mis en place afin de pouvoir isoler l appareil et doit être signalisé comme tel Disjoncteurs et interrupteurs doivent être conformes à une norme reconnue telle IEC947 7 Lorsque les équipements ou les capots affichent le symbole suiva...

Page 88: ...ikusan működtethető áramtalanító kapcsolót is Ellenkező esetben biztosítani kell a berendezés elektromos hálózatról történő lekapcsolásának más módját és ezt világosan jelezni kell A megszakítóknak vagy kapcsolóknak meg kell felelniük egy elismert szabványnak például az IEC947 szabványnak Az összes vezetéknek meg kell felelnie az összes helyi szabványnak 7 Ha a berendezés vagy a burkolata a jobb o...

Page 89: ...i di circuito in caso di guasto Tale interruttore dovrà inoltre prevedere un sezionatore manuale o altro dispositivo di interruzione dell alimentazione chiaramente identificabile Gli interruttori dovranno essere conformi agli standard riconosciuti quali IEC947 7 Il simbolo riportato sullo strumento o sui coperchi di protezione indica probabile presenza di elevati voltaggi Tali coperchi di protezio...

Page 90: ...pertraukiklis taip pat gali turėti mechaniškai veikiantį įzoliavimo jungiklį Jeigu ne tuomet turi būti nurodytos kitos įrenginio atjungimo priemonės ir aiškai pažymėtos kad jos tokios yra Automatiniai perjungikliai ar jungikliai turi atitikti pripažintus standartus tokius kaip IEC947 Visi laidai turi atitikti visus vietinius standartus 7 Kur įrenginys ar dangos yra pažymėti simboliu dešinėje žemia...

Page 91: ... padeves un tā atbilstoši un skaidri jāmarķē Slēdžiem jāatbilst kādam vispāratzītam standartam piemēram IEC947 Visai elektroinstalācijai jāatbilst vietējiem standartiem 7 Vietās kur iekārta vai tās pārsegi ir marķēti ar labajā pusē norādīto simbolu visticamāk zem tiem ir bīstams spriegums Šos pārsegus drīkst noņemt tikai tad ja iekārta ir atvienota no strāvas padeves un šos darbus drīkst veikt tik...

Page 92: ...uq il lemin x aktarx li jkun hemm vultaġġi perikolużi taħthom Dawn l għatjien għandhom jitneħħew biss meta titneħħa l provvista tad dawl mit tagħmir u minn ħaddiema tal manutenzjoni mħarrġa biss 8 Meta t tagħmir jew l għatjien ikunu mmarkati bis simbolu fuq il lemin ikun hemm periklu mill uċuħ jaħarqu li jkun hemm taħthom Dawn l għatjien għandhom jitneħħew biss minn ħaddiema tal manutenzjoni mħarr...

Page 93: ...syningen Dersom det ikke er en mekanisk operert bryter installert må det være en annen måte å isolere utstyret fra spenningsforsyningen og denne måten må være tydelig merket Kretsbrytere eller kontakter skal oppfylle kravene i en annerkjent standard av typen IEC947 eller tilsvarende 7 Der hvor utstyr eller deksler er merket med symbol for farlig spenning er det sannsynlig at disse er tilstede bak ...

Page 94: ...ięcia W przeciwnym razie należy zapewnić i jasno oznaczyć inną możliwość odłączenia urządzenia od zasilania Wyłączniki automatyczne oraz odłączniki powinny być zgodne z uznawanymi standardami takimi jak norma IEC947 Wszystkie przewody muszą być zgodne z lokalnymi przepisami 7 Pod pokrywami lub elementami urządzenia oznaczonymi symbolem pokazanym na rysunku po prawej stronie może występować niebezp...

Page 95: ...derá também conter um interruptor de isolamento accionado manualmente Caso contrário deverá ser instalado qualquer outro meio para desligar o equipamento da energia eléctrica devendo ser assinalado convenientemente Os disjuntores ou interruptores devem obedecer a uma norma reconhecida tipo IEC947 7 Sempre que o equipamento ou as tampas contiverem o símbolo é provável a existência de tensões perigo...

Page 96: ...Ak nie musí byt poskytnutý iný spôsob odpojenia zariadenia od siet ového napájania a tento spôsob musí byt zreteľne označený Prerušovače obvodu alebo spínače musia byt v zhode s uznanou normou ako napr IEC947 Všetky káblové pripojenia musia vyhovovat akýmkoľvek miestnym normám 7 Tam kde je zariadenie alebo kryty označené symbolom na pravej strane sa pravdepodobne nachádza nebezpečné napätie Tieto ...

Page 97: ...tikalo lahko vključuje tudi mehansko izolacijsko stikalo V nasprotnem primeru morajo biti zagotovljeni in jasno označeni drugi načini za izklop opreme iz napajanja Odklopna in druga stikala morajo biti skladna z uveljavljenimi standardi kot je IEC947 Vsa napeljava mora biti skladna z lokalnimi standardi 7 V opremi ali pod pokrovi ki so označeni s simbolom na desni je prisotna nevarna napetost Te p...

Page 98: ...fallo Los interruptores estaran de acuerdo a la norma IEC 947 u otra de reconocido prestigio 7 Cuando las tapas o el equipo lleve impreso el simbolo de tension electrica peligrosa dicho alojamiento solamente se abrira una vez que se haya interrumpido la alimentacion electrica al equipo asimismo la intervencion sera llevada a cabo por personal entrenado para estas labores 8 Cuando las tapas o el eq...

Page 99: ...jare Om så inte är fallet måste ett annat förfarande för att frånskilja utrustningen från strömförsörjning tillhandahållas och klart framgå genom markering Säkring eller omkopplare måste överensstämma med en gällande standard såsom t ex IEC947 7 Där utrustning eller hölje är markerad med vidstående symbol föreliggerisk för livsfarlig spänning i närheten Dessa höljen får endast avlägsnas när strömm...

Page 100: ...Instruction Manual IM 105 4000 Rev 1 3 October 2008 OPM 4000 A 24 ...

Page 101: ...perating housing weather vibration dust etc c Site from which equipment was removed d Whether warranty service or nonwarranty service is requested e Complete shipping instructions for the return of the equipment f Reference the return authorization number 4 Enclose a cover letter and purchase order and ship the defective equipment according to instructions provided in an Emerson Process Management...

Page 102: ...Instruction Manual IM 105 4000 Rev 1 3 October 2008 OPM 4000 B 2 ...

Page 103: ... used by the OPM 4000 are shown in Table C 1 Table C 1 Modbus Addresses Note 1 Air purge low No stack power T2 4 20 mA lost low Maintenance mode Window dust Zero cal fail Span cal fail and Manual cal Read Block Address Function 40150 0 to 100 instantaneous opacity output analog 4 20 mA 40151 0 to 100 average opacity output analog 4 20 mA 00100 Cal zero check 00101 Cal span check 00140 Cal zero fai...

Page 104: ...Instruction Manual IM 105 4000 Rev 1 3 October 2008 OPM 4000 C 2 ...

Page 105: ...sted prior to shipment The final test sheet is included with the retrofit kit OVERVIEW OF THE UPGRADE Retrofit work will be done in two locations wherever the Model 1304 control room unit is mounted and at the transceiver and retro reflector stack locations Equipment drawings are found at the end of this appendix unless otherwise indicated The following is a summary of additional drawings and mate...

Page 106: ...ied to connect to the pressure switch assembly 8 Remove the check valve part 3532B51H01 item 9 3D39389 and discard Save adapter 3532B52H01 for installation later and discard 3532B53H02 adapter items 10 and 11 3D39389 Remove Retro Reflector Side Components Perform the following tasks to remove components from the transceiver side of the OPM 2000 Retain or discard the components as instructed 1 Remo...

Page 107: ...0 retrofit kit and the components that were retained for reuse on the retro reflector side 1 Install 1 8 NPT pipe plugs 2 kit P N 1927 in the air window assembly 3D39389 where the old pressure switch fittings were removed NOTE Spacers shown in Figure D 1 to be mounted between the air plenum insert and the air window Figure D 1 Purge Adapter Assembly Figure D 2 Installed Purge Adapter ...

Page 108: ...l one onto the pipe coupling on the air window assembly with the rubber coupling and clamps NOTE Large end of rubber coupling mounts to air flow switch and smaller end mounts to pipe coupling attached to the 3532B52H01 adapter 5 Size the existing air hose length to connect the air flow switch Figure D 3 to the blower outlet using original stainless steel hose clamps for mounting 6 Remove the conne...

Page 109: ... 4000 D 5 Figure D 4 Air Flow Switches Wiring Diagram 8 Mount the retro reflector assembly to the air window assembly and secure with the two spring latches 9 DO NOT install the weather cover until the instrument is operational and the alignment is complete ...

Page 110: ...Instruction Manual IM 105 4000 Rev 1 3 October 2008 OPM 4000 D 6 Figure D 5 Retrofit System Wiring Diagram ...

Page 111: ...blower Slide the sub plate with the slots going between the flat washers and the mounting plate Tighten the two blower bolts securely 4 Connect the air flow switch leads to the switch wiring with the wire nuts or butt splices Connect and wire air flow switches from transceiver and retro reflector sides in series to TB1 on SSM mounting plate The black lead goes to terminal 4 the red lead to termina...

Page 112: ...the service module and terminate the leads at TB1 5 Connect Belden cable Belden P N E108998 or equivalent from TB1 on the stack service module to the Model 1304 control room unit See the system wiring diagram Figure D 5 6 Dress secure and plug the power cord for the transceiver stack controller into electrical outlet box on the stack service module Figure D 7 Stack Service Module SYSTEM SETUP Afte...

Page 113: ... on line test reflector kit with case 1 Stack service module Stack service module mounting plate with terminal strip and power receptacle 1 Transceiver air plenum insert with gasket 1 Retro reflector air plenum insert with gasket 1 Transceiver adapter plate 1 Retro reflector adapter plate 1 Air flow switch assembly with hose clamps extension pipe and pipe coupling 2 Cable stack service module to T...

Page 114: ...Instruction Manual IM 105 4000 Rev 1 3 October 2008 OPM 4000 D 10 ...

Page 115: ...tro Reflector 2 11 Stack Flanges 2 5 Transceiver 2 11 Weather Covers 2 9 Wiring 2 15 Installation Considerations 2 2 Internal Calibration System Span Mode 1 6 Zero Mode 1 6 L Lx Lt Ratio 3 2 M Modbus C 1 D 1 O OPLR Calculation 3 2 Display 3 3 P Preventive Maintenance Procedures 7 3 Schedule 7 1 Q Quick Menu 3 3 R Recommended Spare Parts 9 1 Record the Zero Span Values 6 4 Remote Calibration Cycle ...

Page 116: ...Instruction Manual IM 105 4000 Rev 1 3 October 2008 Index 2 OPM 4000 ...

Page 117: ...s for any failure of Rosemount Analytical to comply with the warranty provisions whether claims by the purchaser are based in contract or in tort including negligence Rosemount Analytical does not warrant equipment against normal deterioration due to environment Factors such as corrosive gases and solid particulates can be detrimental and can create the need for repair or replacement as part of no...

Page 118: ... Process Management Asia Pacific Private Limited 1 Pandan Crescent Singapore 128461 Republic of Singapore T 65 6 777 8211 F 65 6 777 0947 E analytical ap emerson com ROSEMOUNT ANALYTICAL EUROPE Emerson Process Management Gmbh co OHG Industriestrasse 1 63594 Hasselroth Germany T 49 6055 884 0 F 49 6055 884 209 WORLD HEADQUARTERS Emerson Process Management Rosemount Analytical Inc 6565P Davis Indust...

Reviews: