background image

9

OPERATING INSTRUCTIONS

  • Make sure you have installed the batteries in the battery compartment, or

  • Connect the AC power cord plug to a 120V 60Hz AC outlet.

GENERAL CONTROLS

BASS BOOST ON 

 /OFF 

 Button

Set this button to the ‘ON 

’ position to increase the bass response. Set to the

‘OFF 

 ’ position for normal bass response.

FM MODE Selector

Normally you should leave this switch set to the “ST 

” position for FM Stereo

reception. However if you are listening to a distant FM Stereo station and the

reception is noisy or weak set this switch to the ‘MONO 

’ position. This will

normally provide some improvement in reception, however the sound will no longer

be in stereo.

LISTENING TO THE RADIO

1.) Slide the POWER OFF/CD/RADIO selector switch, located on the top cabinet,

to the RADIO position. The Power indicator will light.

2.) Select the desired band – AM or FM – by sliding the BAND selector, located

on the right side, to the correct position.

3.) Fully extend the telescoping FM rod antenna.

4.) Set the FM MODE button to the Stereo “ST 

” position.

5.) Tune to the desired station by slowly rotating the TUNING control on the right

side. If you tune to an FM Stereo station the FM ST indicator will light.

6.) Rotate the VOLUME control to adjust the volume to the desired level.

7.) Set the BASS BOOST switch to the “ST 

” position to increase the bass

response if desired.

8.) When you are finished listening slide the POWER OFF/CD/RADIO selector

switch back to the POWER OFF position. The Power indicator goes off.

SB250_251_ib071703.p65

17/7/2003, 14:27

9

Summary of Contents for SpongeBob Squarepants SB250

Page 1: ...onal Inc All Rights Reserved Nickelodeon SpongeBob SquarePants and all related titles logos and characters are trademarks of Viacom International Inc Created by Stephen Hillenburg PORTABLE CD CD R RW PLAYER with AM FM STEREO RADIO OWNER S MANUAL ...

Page 2: ...of time 13 Refer all servicing to qualified service personnel Servicing is required when the apparatus has been damaged in any way such as power supply cord or plug is damaged liquid has been spilled or objects have fallen into the apparatus the apparatus has been exposed to rain or moisture does not operate normally or has been dropped 14 This appliance shall not be exposed to dripping or splashi...

Page 3: ...e reference NOTES Please avoid using this unit in places of high temperature or humidity over prolonged periods of time as damage may occur Exposure to direct sunlight in places such as car interiors may cause the unit to become warped and or lead to malfunctioning Avoid using or storing this unit in dusty or sandy locations The serial number of your unit is located on a label on the bottom cabine...

Page 4: ...t 15 of the FCC Rules These limits are designed to provide reasonable protection against harmful interference in a residential installation This equipment generates uses and can radiate radio frequency energy and if not installed and used in accordance with the instructions may cause harmful interference to radio communications However there is no guarantee that interference will not occur in a pa...

Page 5: ...e AC power cord and extend it to its full length This unit was shipped with a dummy CD transit card in the CD player This dummy CD prevents the laser pick up from moving during shipment This card must be removed before you can insert your own CDs Press on the indented area of the CD door to open it Carefully remove the dummy CD from the player and discard it Close the CD door Place the unit on a f...

Page 6: ...is plug will only fit into a matching polarized AC outlet This is a safety feature to reduce the possibility of electric shock If this plug will not fit in your AC outlet you probably have an outdated non polarized outlet You should have your outdated outlet changed by a qualified licensed electrician Do not file the wide blade on the plug or use an adapter to make the plug fit into your outlet Th...

Page 7: ...r When the sound becomes weak or distorted it is time to change the batteries Always change all 8 batteries at the same time Do not mix old and new batteries together Do not mix different types of batteries such as alkaline batteries and normal batteries in the battery compartment If the unit will not be used for an extended period of time such as two weeks or more or if the unit will be used main...

Page 8: ... and apply these pads to the bottom of the rubber feet before you place the product on fine wooden furniture BATTERY PRECAUTIONS Follow these precautions when using batteries in this device 1 Use only the size and type of batteries specified 2 Be sure to follow the correct polarity when installing the batteries as indicated in the battery compartment Reversed batteries may cause damage to the devi...

Page 9: ... Battery Compartment Bottom Cabinet 14 Speakers 15 CD Door 16 FUNCTION Selector Switch POWER OFF CD RADIO 17 BASS BOOST ON OFF Button 18 AC Cord Socket Back Cabinet 19 Telescopic Antenna 20 PHONES Jack Back Cabinet 21 Carrying Handle 22 FM MODE ST MONO Button 23 BAND FM AM Selector Switch 24 CD Door OPEN CLOSE Position 14 15 16 17 18 19 20 21 22 23 24 14 1 2 3 4 5 7 8 9 10 11 6 12 13 FRONT PANEL T...

Page 10: ...ISTENING TO THE RADIO 1 Slide the POWER OFF CD RADIO selector switch located on the top cabinet to the RADIO position The Power indicator will light 2 Select the desired band AM or FM by sliding the BAND selector located on the right side to the correct position 3 Fully extend the telescoping FM rod antenna 4 Set the FM MODE button to the Stereo ST position 5 Tune to the desired station by slowly ...

Page 11: ...a until you find the position and direction that provides the best reception AM The AM ferrite bar antenna is inside the cabinet If AM reception is unsatisfactory try turning the cabinet slightly until you find the position that provides the best reception SB250_251_ib071703 p65 17 7 2003 14 27 10 ...

Page 12: ...n the track number display After a few seconds the track number display will show no indicating that there is no disc in the player 3 Press on the indented area of the CD door to open it The OP indicator appears in the display If you have not already done so before loading your own disc be sure to remove the dummy CD transit card from the player and discard it 4 Place your disc on the center spind...

Page 13: ...splay again shows the total tracks on the disc 8 If you are finished listening remove your disc from the player and close the CD door 9 Slide the POWER OFF CD RADIO selector switch back to the POWER OFF position The Power indicator goes off Pause Control To pause momentarily during CD playback press the PLAY PAUSE button again The sound stops and the track number display flashes but the disc conti...

Page 14: ...ckward as long as the buttons are depressed When you hear the desired passage release the buttons and normal playback will resume at that point Note The volume level is automatically reduced during high speed search operation To start playback from a specific track load your disc as usual and wait until the display shows the total number of tracks Press the SKIP Forward or SKIP Reverse buttons rep...

Page 15: ...SE button to begin playback The selected track will be repeated continuously All Tracks Repeat Press the REPEAT button on the front panel twice The REPEAT ALL indicator remains in the display If necessary press the PLAY PAUSE button to begin playback The entire disc will be repeated continuously To cancel Repeat playback press the REPEAT button on the front panel until the REPEAT or REPEAT ALL ind...

Page 16: ... disc as usual and wait until the display shows the total number of tracks 2 Press the INTRO button The player will begin playing track 1 After 10 seconds the player skips to track 2 and so on until it has played the first 10 seconds of each track on the disc 3 When you hear the desired song press the INTRO button again to cancel the Intro Scan playback mode and resume normal playback SB250_251_ib...

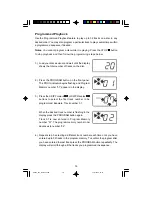
Page 17: ...egins flashing and Program Memory number 01 appears in the display 3 Press the SKIP Forward or SKIP Reverse buttons to select the first track number to be programmed Example Track number 07 When the desired track number is flashing in the display press the PROGRAM button again Track 07 is now entered in Program Memory number 01 The program memory number now advances to number 02 4 Repeat step 3 se...

Page 18: ...together to continuously repeat a programmed sequence First program the desired sequence according to steps 1 through 5 above When Programmed Playback begins press the REPEAT button twice to select the Repeat All Tracks mode The REPEAT ALL indicator appears in the display together with the PROG and indicators The programmed sequence will be repeated continuously Headphone Jack The Stereo Headphone...

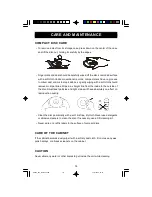
Page 19: ... inside to the outside of the disc Small dust particles and light stains will have absolutely no effect on reproduction quality Clean the disc periodically with a soft lint free dry cloth Never use detergents or abrasive cleaners to clean the disc If necessary use a CD cleaning kit Never write on or affix labels to the surface of compact discs CARE OF THE CABINET If the cabinet becomes dusty wipe ...

Page 20: ... to RADIO RADIO position Volume at minimum Increase Volume Compact Disc Player CD Player will not play Function switch is not set to Set Function switch to CD CD CD is not installed or installed Insert CD with Iabel side incorrectly up CD skips while playing Disc is dirty or scratched Wipe disc with cloth or use another disc TO FIND THE LOCATION AND PHONE NUMBER OF YOUR NEAREST SERVICE CENTER PERM...

Page 21: ...your check or money order payable to Emerson Radio Corp in the amount of 9 00 not required by California residents to cover shipping and handling costs and enclose a copy of your proof of purchase Send your unit to Emerson Radio Corp 1901 Diplomat Drive Farmers Branch TX 75234 This warranty does not cover damage from negligence misuse abuse accident failure to follow operating instructions commerc...

Page 22: ...EMERSON Part No 21 2049 307 01 Printed in China R SB250_251_ib071703 p65 17 7 2003 14 27 21 ...

Reviews: