


18
19
SETTING THE AUTOMATIC OVEN SWITCH OFF
- On electric ovens this function
allows you to set the length of cooking time.
1. Switch the oven to the function and temperature you want to use.
2. Press and hold MENU and then press it again. The display shows “DUR” (for duration).
3. Press + to set the desired cooking time. Wait for a moment and the timer will beep and
return to time of day.
4. Once the time period is complete the oven will switch off and the beeper will sound.
5. Press any button to switch off the beeper.
• If you wish to cancel at any time during the cooking period press and hold the
MENU, press it again and then the + and – at the same time.
• Do not forget to switch off the oven and temperature setting at the end of the cycle.
PROGRAMMING THE OVEN TO SWITCH OFF AT A CERTAIN TIME OF DAY
-
Sometimes it is handy to set the time of day you want to finish cooking such as heating a
casserole for dinner. This feature allows you to set the length of time you want the oven
to run and the time of day when you would like the oven to turn off.
1. Press and hold MENU and then press again. The display shows “DUR” (for duration).
2. Press + to set the desired cooking time.
3. Press MENU once to show “END” in the screen. This is where you set the time of day
that you want the oven to finish cooking.
4. Press the + to set the time of day when you wish for the cooking to stop.
5. Turn on the oven and select the oven function. Of course the oven doesn’t switch
on yet.
6. The oven will switch off at the end of the period and the beeper will sound.
7. Press any button to switch off the beeper.
• If you wish to cancel the program at any time press and hold the MENU then press
MENU twice and then the + and – at the same time.
• Do not forget to switch off the oven and temperature setting and the end of the
cycle.
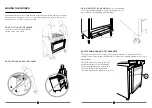
GETTING STARTED
When you first connect the power the display will flash on and off. This is normal. Your
cooker is fitted with a touch control timer programmer. The timer has a key lock function
and to activate it a key must be pressed for 2 seconds. After that it operates immediately
and if left for 8 seconds reverts to key lock.
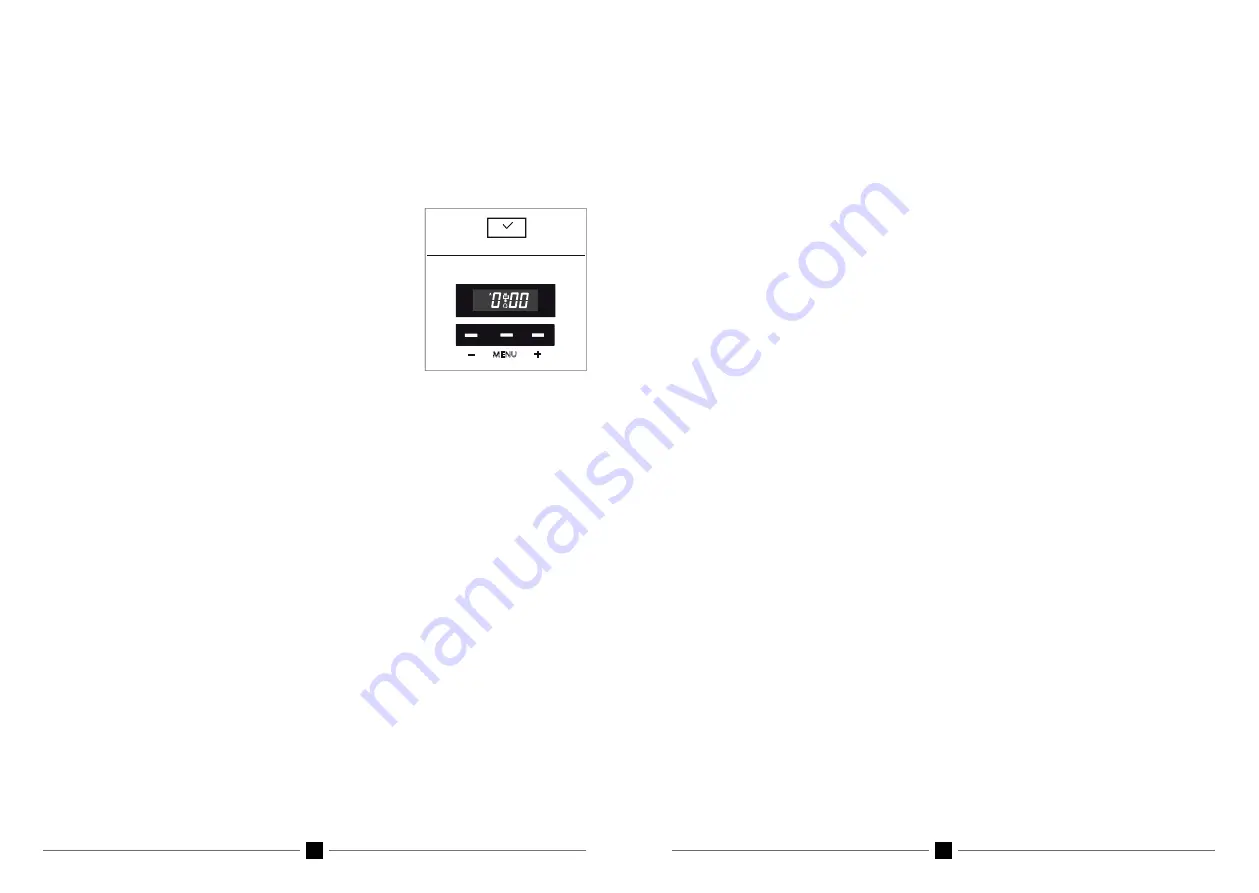
SETTING THE TIME OF DAY
- First set the time of day before you operate your
appliance.
1. Press the bars at positions “+” and “-” at the same
time and hold down.
2. The centre dot will start to flash on and off.
3. While it is flashing use the “+” and “-” to set the time.
If you hold your finger down the clock will scroll
much faster. The clock has a 24-hour display.
4. Once you reach the correct time of day leave
it for a few seconds it will beep and the clock will be set.
SETTING THE MINUTE COUNTDOWN TIMER
- The minute countdown timer works
independently of the oven and is handy for checking time periods for all cooking tasks.
1. Press MENU and hold down until the screen changes and then let go.
2. Set the countdown time you want by pressing the “-” or “+”. The time is in minutes
not seconds.
3. There will be a beep and the timer is set. You will see the time of day and the bell
icon on the clock display.
4. Once the countdown is completed a beeper will sound. Press any button to switch
off the beeper. To stop the bell icon flashing press and hold MENU.
• If you want to check the amount of time remaining in this mode just press and
hold MENU once.
• If you want to cancel at any time press and hold the MENU until the screen
changes and then hold the + and – at the same time. The timer will be cancelled
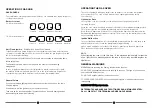
MENU
+
-
A


