5
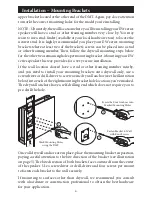
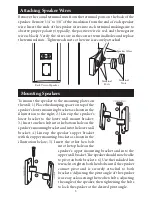
Remove the round terminal nuts from the terminal posts on the back of the
speaker. Remove /4” to 3/8” of the insulation from the end of each speaker
wire. Insert the ends of the speaker wires into each terminal making sure to
observe proper polarity (typically, the positive wire is red, and the negative
wire is black). Verify the wires are in the correct terminal holes and replace
the terminal nuts. Tighten each nut so the wire is securely attached.
Attaching Speaker Wires
Mounting Speakers
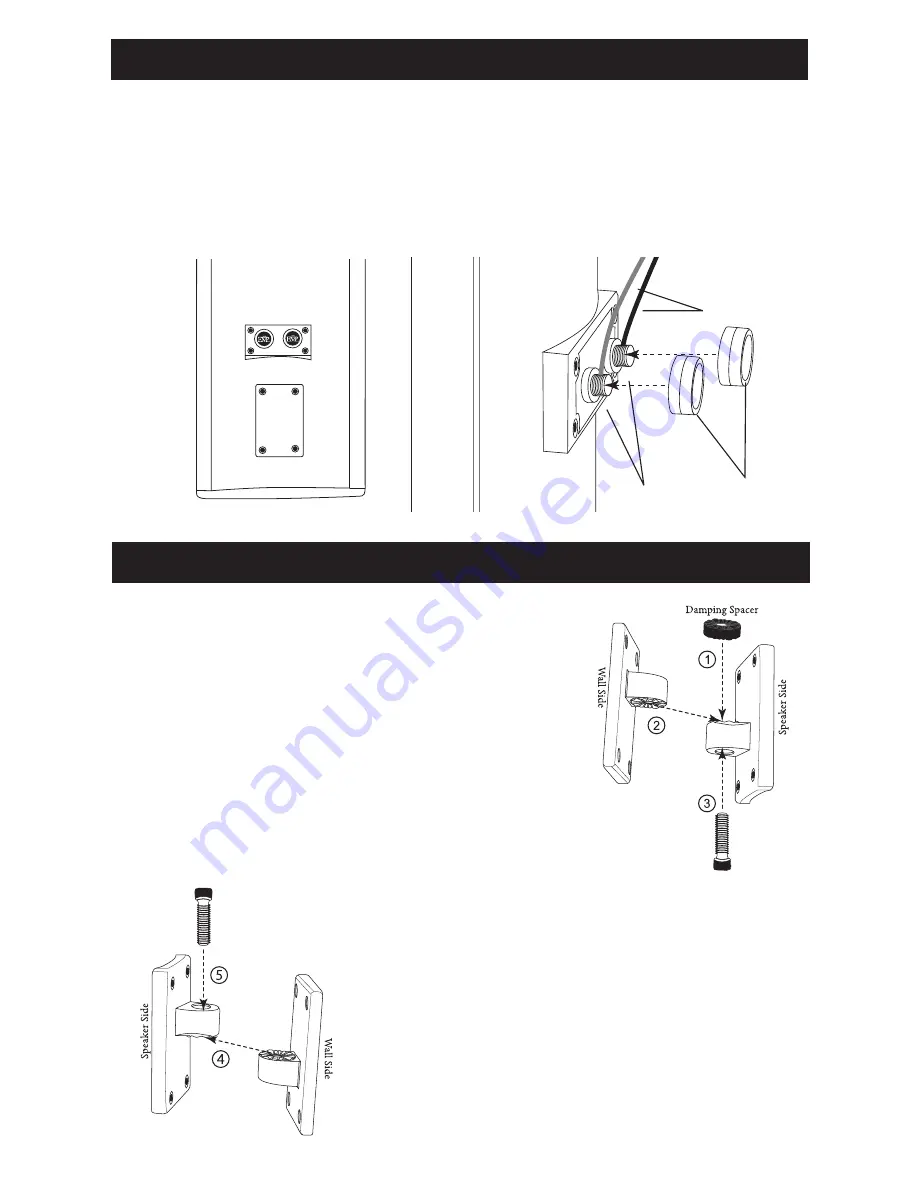
To mount the speaker to the mounting plates on
the wall: .) Place the damping spacer on top of the
speaker’s lower mounting bracket as shown in the
illustration to the right; 2.) Line up the speaker’s
lower bracket to the lower wall mount bracket;
3.) Insert one hex bolt into the bottom hole on the
speaker’s mounting bracket and into the lower wall
bracket; 4.) Line up the speaker’s upper bracket
with the upper mounting bracket as shown in the
illustration below; 5.) Insert the other hex bolt
into the top hole on the
speaker’s upper mounting bracket and into the
upper wall bracket. The speaker should now be able
to pivot on both brackets. 6.) Use the included hex
wrench to tighten both hex bolts until the speaker
cannot pivot and is securely attached to both
brackets. Adjusting the pivot angle of the speaker
is as easy as loosening the two hex bolts, adjusting
the angle of the speaker, then tightening the bolts
to lock the speaker at the desired pivot angle.
Speaker Wires
Terminal
Posts
Terminal
Nuts
Back View of Speaker


