32
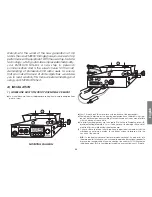
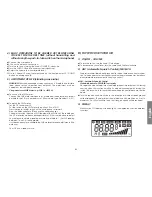
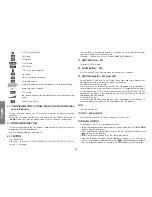
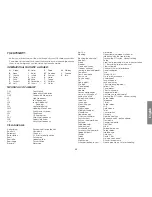
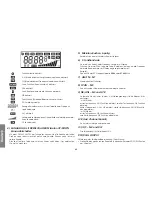
FUNCTION activated
AM mode
FM mode
SCAN mode
ANL mode
LOCK : key lock enabled
NB mode
DW : dual watch activated
RX: receipt mode
channel number or channel frequency or frequency band
preset memory channels
ASC mode
the received signal strength and the power of the transmitting
signal
transmission mode
4) CHANNEL SELECTOR : ROTARY KNOB, UP and DOWN button
on microphone
Turning this knob allows you to choose a channel for transmitting and
receiving.
Buttons on microphone allows you to choose the next (
UP
) or the previous
(
DOWN
) channel. A beep is heard every time the channel is changed.6)
5) PIN MICROPHONE PLUG
This plug is situated on the front panel, thereby making it easier to set the
equipment into the dashboard.
See the cabling diagram on page 48.
6) F BUTTON
Function Button.
Allows you to select a CHANNEL NUMBER or CHANNEL FREQUENCY DISPLAY
via the LCD display.
Press the
F
key during approximately 2 seconds, you may then select either
frequency display or channel number.
Example : Channel 40 on the EU band :
EU 40
or
27.405
MHz.
7) AM/FM button ~ M1
To select AM/FM mode.
8) SCAN button ~ M2
With this control, you can automatically seek a busy channel.
9) ANL/NB selector ~ M3 and LCR
Noise Blanker/ Automatic Noise Limiter. These filters allow the reduction of
back ground noise, and some reception interference.
AM Mode (NB and ANL active)
Press this key once to activate the NB filter. NB appears in the display. A
second depression of the same key activates ANL. ANL appears in the dislay.
A third depression of the same key activates both NB and ANL. NB ANL
appears in the dislay. A fourth depression cancels both filters and NB ANL
disappears from the display.
FM Mode (NB only)
To activate the NB filter, press the key once. NB appears in the display. To
cancel, depress the same key. NB disappears from the display.
LCR
Last channel recall.
10)19/9 ~ M4 and DW
EMG channel selector : to select channel 19 or channel 9.
DW (DUAL WATCH)
To activate DUAL WATCH, proceed as follows :
• Select the required channel through the channel selector or the
UP
/
DOWN
buttons on the microphone.
• Press the
DW
button during about 2 seconds : you will hear a « beep » and
will flash on the display.
• Select the second channel with the same procedure.
• Press the
DW
button again during approx. 2 seconds : you will hear a
« BEEP » ; the display will permanently show
and will alternatively display
the two selected channels ; the radio will start its dual watch monitoring.
English
Summary of Contents for Ninja
Page 1: ...Manuel d utilisation Manual del usuario Owner s manual Handbuch ...
Page 37: ...37 English ...
Page 49: ......
Page 50: ......
Page 51: ......

