background image

7

Before you attempt to conduct the installation of the amplifier, it is recom-
mended to map out the complete audio system and the respective wiring
required. Consider all electrical requirements, i.e. safe mounting, sufficient
ventilation and availability of space to access the control panel. Please note
that – because of possible interference problems with the existing car elec-
trics and electronics – especially the routing of the signal cables and the
chassis ground connection will have a profound influence on a trouble-
free operation of the installed system. It is recommended to use quality
installation material.

If you have no or only little experience with car audio installations, we
strongly recommend to consult your nearest authorized EMPHASER dea-
ler/installer.

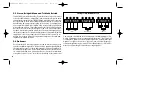
2.2 Selecting Operating Modes 

(Bottom Panel Controls)

As the operating mode selector(s) are only accessible from the bottom panels
of the amplifiers, the operating mode has to be decided and set, before
mounting the amplifier.

– Switch Position "FLAT": Fullrange Mode, ideal for driving soundboards and
high-power-handling rear systems.

– Switch Position "HPF": High-Pass Mode, cutting the low frequency parts of
the music signal below the frequency setting on the side panel ("FREQ.
Hz"). This mode is ideal for driving coaxial and separate component spea-
ker systems.

– Switch Position "LPF": Low-Pass Mode, cutting the high frequency parts of
the music signal above the frequency setting on the side panel ("FREQ.
Hz"). This mode is ideal for driving subwoofer(s).

Please note that the 2-channel model EA2190 feature one single 3-position
mode selector, while the 4-channel model EA490 features two different
3-position mode selectors.

– Switch Modes „Front“: „LPF”, „FLAT“ or „HPF”
– Switch Modes „Rear“:  „LPF”, „FLAT“ or „HPF”

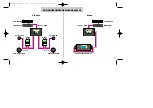
Therefore the 4-channel amplifier EA490 allows driving a fully active stereo
subwoofer/satellite system consisting e.g. of a pair of coaxials or separate
component systems in the doors or dashboard operating in HPF mode (using
the two "FRONT" channels) and a subwoofer in the trunk operating in LPF
mode (using the two "REAR" channels see system configuration of the EA490).
The coaxials or component speaker system will be connected to the "FRONT"
section speaker outputs and the subwoofer(s) to the "REAR" speaker outputs.
Please note: In case your head-unit has a separate subwoofer-signal output
and you want to make use of the amplifiers integrated LPF mode, make sure

INSTALLATION PLANNING

EA2190490 Manual neu  31.07.2000 19:02 Uhr  Seite 7

Summary of Contents for EA2190

Page 1: ...1 2 A N D 4 C H A N N E L P O W E R A M P L I F I E R INSTALLATION OPERATING MANUAL EINBAU BEDIENUNGSANLEITUNG EA2190490 Manual neu 31 07 2000 19 02 Uhr Seite 1...

Page 2: ...ttings 12 Specifications 14 Warranty Policy 27 Warranty Certificate 28 Technischer Aufbau Merkmale 16 Bedienungselemente 17 Installation 19 Konfigurationsvorschlag EA2190 21 Konfigurationsvorschlag EA...

Page 3: ...e read this manual carefully before undertaking the installation of this amplifier EMPHASER amplifiers are the result of outstanding craftmanship and the highest quality control standards When properl...

Page 4: ...modes will cause the amplifier to shut off imme diately Operating Mode Fault Monitor LED monitoring the correct func tion of the amp 1 Ohm Stability for simultaneous connection of several loudspeaker...

Page 5: ...to chassis ground or negative terminal of car battery see section 2 6 4 7 12V for connection to positive terminal of car battery see section 2 6 3 8 REM for the automatic remote turn on turn off of t...

Page 6: ...3 4 5 1 2 3 4 5 6 7 8 9 10 9 EMPHASER EA2190 FILTER SETTINGS LOW PASS FLAT HIGH PASS LOW PASS FLAT HIGH PASS LOW PASS FLAT HIGH PASS 11 EMPHASER EA2190 2 Channel Amplifier Bottom Panel Controls EMPHA...

Page 7: ...ing the low frequency parts of the music signal below the frequency setting on the side panel FREQ Hz This mode is ideal for driving coaxial and separate component spea ker systems Switch Position LPF...

Page 8: ...de please refer to the respective connecting diagram The mono mode will provide approximate ly triple the rated output power of a single stereo channel In mono mode the load impedance must be kept at...

Page 9: ...u d i o G r e a t A m e r i c a n C a r A u d i o G r e a t A m e r i c a n C a r A u d i o PRE OUT REAR EA2190 PRE OUT FRONT CD CHANGER HEAD UNIT X OVER BASS MIDRANGE TWEETER X OVER BASS MIDRANGE TW...

Page 10: ...r i c a n C a r A u d i o G r e a t A m e r i c a n C a r A u d i o BASS MIDRANGE CD CHANGER HEAD UNIT X OVER X OVER TWEETER X OVER X OVER BASS MIDRANGE TWEETER EA490 BASS MIDRANGE TWEETER BASS MIDRAN...

Page 11: ...e driver and passenger safety solid mounting of the amp unit is cru cial The actual mounting surface should be completely flat Any mounting position allowing for a good air stream across the cooling f...

Page 12: ...ove approximately 8 mm of the insulation Insert the bare ends into the speaker terminal output section on the amplifier Be sure to fol low correct polarity to to Tighten the allen screws of the amplif...

Page 13: ...satellite type coaxial or component system in HPF High Pass mode The 4 channel model EA490 even allows both am plification modes simultaneously The correct setting has to be determined by ear The two...

Page 14: ...nse 0 dB 1 dB Channel Separation Input Sensitivity Integrated Cross Over Filtering Slope Rate Cross Over Frequency Fuse 2 x 190 W 2 x 290 W 1 x 600 W fuse will blow 200 90 dB 10 Hz 40 kHz 55 dB 150 mV...

Page 15: ...ung f r vielleicht sp ter auftauchende Fragen auf EMPHASER Car HiFi Verst rker sind Produkte die in Handarbeit mit h ch sten Qualit tstandards und Kontrollen hergestellt werden Sie werden Ihnen korrek...

Page 16: ...ED zeigt Kurzschl sse elektrische und thermische berlastung des Verst rkers und Gleichspannung an den Anschlu klemmen an 1 Ohm Stabilit t f r den gleichzeitigen Anschlu von mehreren Laut sprechersyste...

Page 17: ...r den Anschlu der Lautsprecher siehe Abschnitt 2 6 2 6 GND f r den Anschlu an die Chassis Masse des Kfz s siehe Abschnitt 2 6 4 7 12 V f r den Anschlu an die Autobatterie siehe Abschnitt 2 6 3 8 REM...

Page 18: ...4 5 1 2 3 4 5 6 7 8 9 10 9 EMPHASER EA2190 FILTER SETTINGS LOW PASS FLAT HIGH PASS 11 EMPHASER EA2190 Zweikanalendstufe Bedienungselemente Bodenblech EMPHASER EA490 Vierkanalendstufe Bedienungselemen...

Page 19: ...dboards oder gro e Hecksysteme Schalterstellung HPF Hochpassfilter schneidet B sse ab Ideal zum Ansteuern von Koax und Komponentensystemen Schalterstellung LPF Tiefpassfilter schneidet alle Frequenzen...

Page 20: ...zten Lautsprecher eine Minimum Impedanz von 4 Ohm aufweisen 2 4 Einbauort Der Verst rker mu unbedingt gut plaziert und im Interesse der passiven Sicherheit stabil befestigt werden Pr fen Sie ob die ge...

Page 21: ...m e r i c a n C a r A u d i o G r e a t A m e r i c a n C a r A u d i o CD WECHSLER STEUERGER T PRE OUT REAR WEICHE PASSIV WEICHE PASSIV HOCHT NER BASS MITTELT NER EA2190 HOCHT NER BASS MITTELT NER P...

Page 22: ...e r i c a n C a r A u d i o BASS MITTELT NER CD WECHSLER STEUERGER T WEICHE PASSIV WEICHE PASSIV HOCHT NER WEICHE PASSIV WEICHE PASSIV BASS MITTELT NER HOCHT NER EA490 HOCHT NER BASS MITTELT NER BASS...

Page 23: ...ps Verwenden Sie beim Einziehen der Stromkabel entsprechende Kabelt llen aus Gummi um ein Durchscheuern der Isolation an Blechkanten respektive den dadurch resultierenden Kurzschlu auf Chassismasse zu...

Page 24: ...itschaft anzeigen Leuchtet die LED rot auf ist Ihre Installation feh lerhaft Gehen Sie die Installationsanweisungen von Abschnitt 2 6 1 bis 2 6 5 nochmals genau durch 3 1 Eingangsempfindlichkeitsanpas...

Page 25: ...stimmung sollte geh rm ig erfolgen und orientiert sich an der Midbasswiedergabe und der gew nschten Pegel festigkeit der Satelliten Dabei f hrt eine zu tief gew hlte Trennfrequenz zu einer guten Midba...

Page 26: ...ennung Eingangsempfindlichkeit Integrierte Frequenzweiche Flankensteilheit Trennfrequenz Sicherung 2 x 190 W 2 x 290 W 1 x 600 W Sicherung brennt durch 200 90 dB 10 Hz 40 kHz 55 dB 150 mV 3 V HPF LPF...

Page 27: ...n Vie len Dank da Sie sich zum Kauf eines EM PHASER Verst rkers entschlossen haben Wir m chten Sie bitten die Originalverpackung f r einen allf lligen Transport aufzuheben und die untenstehenden Garan...

Page 28: ...tal Code Country Your phone number Limited Warranty 12 Months Valid with authorized Installation Approval only Your EMPHASER Dealer Installed by authorized dealer Installation date Inspected and appro...

Reviews: