32186-0-0513
Page 9
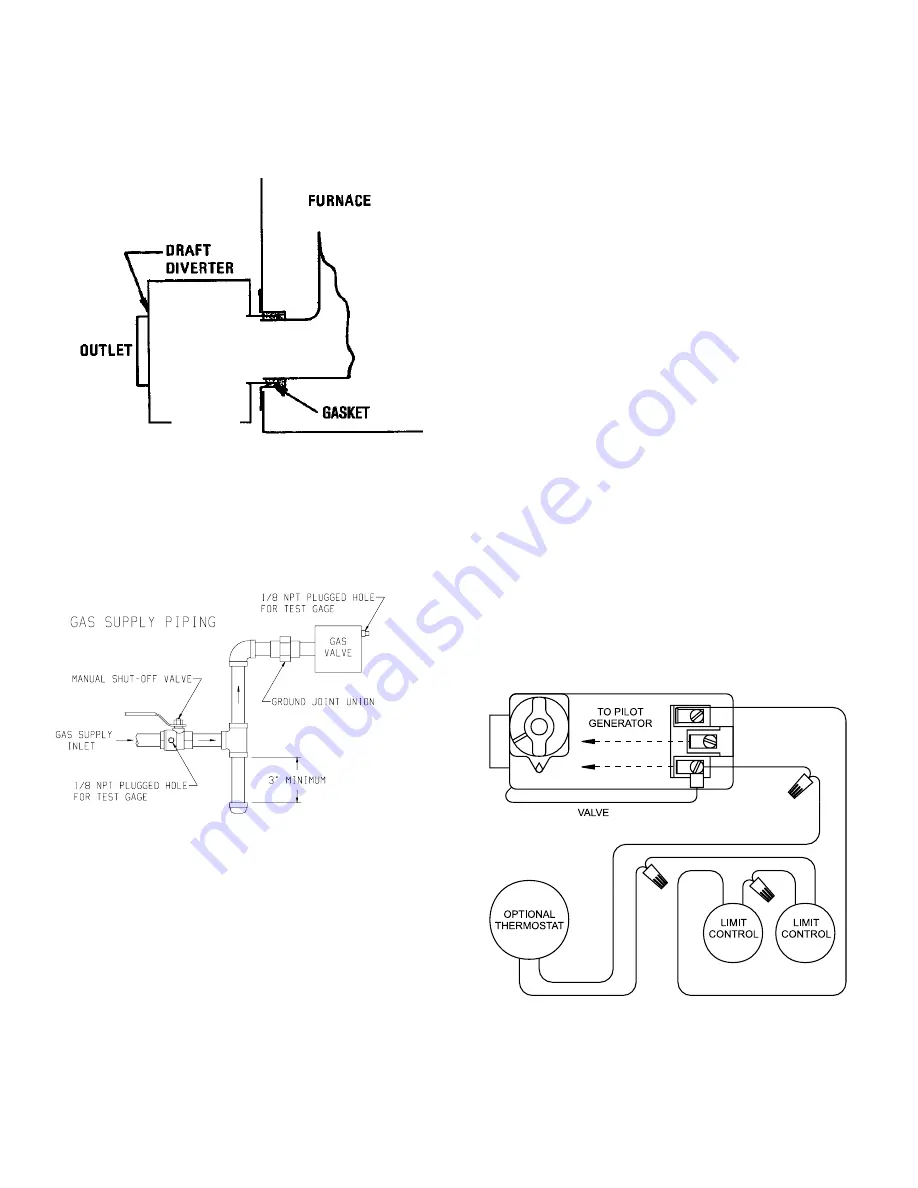
INstALLING dRAFt dIvERtER
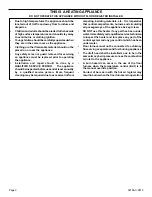
The draft diverter mounts on the exhaust end of the furnace with
four #10 x 1/2" sheet metal screws. The holes are already drilled
in the furnace and the screws are supplied with the furnace. Make
sure collars of the diverter go outside the collars on the furnace.
When the diverter is tightened against the furnace, its collars should
be embedded into the gasket in the recesses.
Figure 12
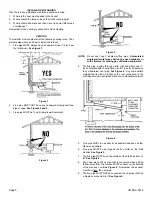
After the installation of the diverter as shown, do not install walls or
partitions that would place the diverter in a different pressure zone
than the combustion air for the main burner.
dEbRIs pAN
A flat rectangular burner pan (debris pan) is attached to the burner.
This pan is designed to catch hot particles that might drop from
the combustion chamber. SEE LABEL ON SIDE OF FURNACE.
Figure 13
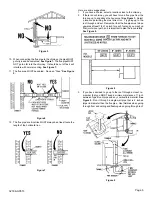
Method of Installing a tee Fitting sediment trap
In the state of Massachusetts the gas cock must be a T handle type.
To check the inlet pressure to the gas valve, a 1/8" N.P.T. plugged
tapping, accessible for test gauge connection must be placed im-
mediately upstream of the gas supply connection to the appliance.
GAs CONNECtIONs
1. A manual valve and ground-joint type union should be installed
close to the furnace for servicing.
2. A "drip" shall be put in the gas line to collect condensate or
dirt. This can be a "tee" fitting near the furnace inlet with an
extension downward that is capped.
3. Use a large enough pipe to prevent excessive pressure drop.
The pipe should be at least the size of the opening on the
furnace inlet.
The state of Massachusetts requires that a flexible appliance con
-
nector cannot exceed three feet in length.
The gas inlet to the furnace is 1/2 inch nominal pipe thread. Use
at least 1/2 inch pipe to avoid excessive pressure drop; check lo-
cal codes. Install the piping in accordance with the requirements
described in Installation Planning.
Compounds used on threaded joints of gas piping shall be resistant
to the action of liquefied petroleum gases. The gas lines must be
checked for leaks by the installer. This should be done with a soap
solution watching for bubbles on all exposed connections and, if
unexposed, a pressure test should be made. NEVER USE AN
ExPOSED FLAME TO CHECk FOR LEAkS. Appliance must be
disconnected from piping at inlet of control valve, and pipe capped or
plugged for pressure test. NEVER PRESSURE TEST WITH APPLI-
ANCE CONNECTED; CONTROL VALVE WILL SUSTAIN DAMAGE.
tEstING tHE sUppLY pIpING
The appliance and its individual shutoff valve must be disconnected
from the gas supply piping system during any pressure testing of
that system at test pressures in excess of 1/2 psig (3.5kPa).
The appliance must isolated from the gas supply piping system
by closing its individual manual shut off valve during any pressure
testing of the gas supply piping system at test pressures equal to
or less than 1/2 psig (3.5 kPa).
AttENtION!
If one of the above procedures results in pressures
in excess of 1/2 psig (14 in. w.c.) (3.5 kPa) on the appliance gas
valve, it will result in a hazardous condition.
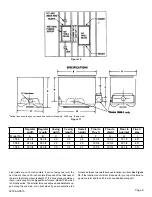
OptIONAL WALL tHERMOstAt
No wire is supplied with the thermostat because the wire size de-
pends on low long the wire has to be.
It is important to use wire of a gauge proper for the length of the wire:
RECOMMENdEd WIRE GAUGEs
Maximum Length
Wire Gauge
1' to 10'
18
10' to 25'
16
25' to 35'
14
Thermostat is mounted to the wall with two screws that are supplied.
Mount the thermostat about 4 to 5 feet up from the floor, in the room
heated by the furnace, and exposed to normal free air circulation.
Connect thermostat to gas valve terminals as shown in 14.
Figure 14


