background image

INSTALLATION INSTRUCTIONS

AND

OWNER’S MANUAL

Direct Vent Zero Clearance Gas  

Fireplace Heater

GAS-FIRED

Installer: 

Leave this manual with the appliance.

Consumer:  Retain this manual for future reference.

—  Do not store or use gasoline or other flammable 

vapors and liquids in the vicinity of this or any 

other appliance.

—  WHAT TO DO IF YOU SMELL GAS


•  Do not try to light any appliance.


•  Do not touch any electrical switch; do not use 

any phone in your building.


•  Immediately  call  your  gas  supplier  from  a 

neighbor’s phone. Follow the gas supplier’s 

instructions.


•  If you cannot reach your gas supplier, call the 

fire department.

—  Installation and service must be performed by a 

qualified installer, service agency or the gas sup

-

plier.

WARNING: If the information in these instructions 

are  not  followed  exactly,  a  fire  or  explosion  may 

result causing property damage, personal injury or 

loss of life.

WARNING

HOT GLASS

DO NOT TOUCH

NEVER

WILL

CAUSE BURNS.

GLASS

UNTIL COOLED.

ALLOW CHILDREN

TO TOUCH GLASS.

EMPIRE

EMPIRE

Comfort Systems

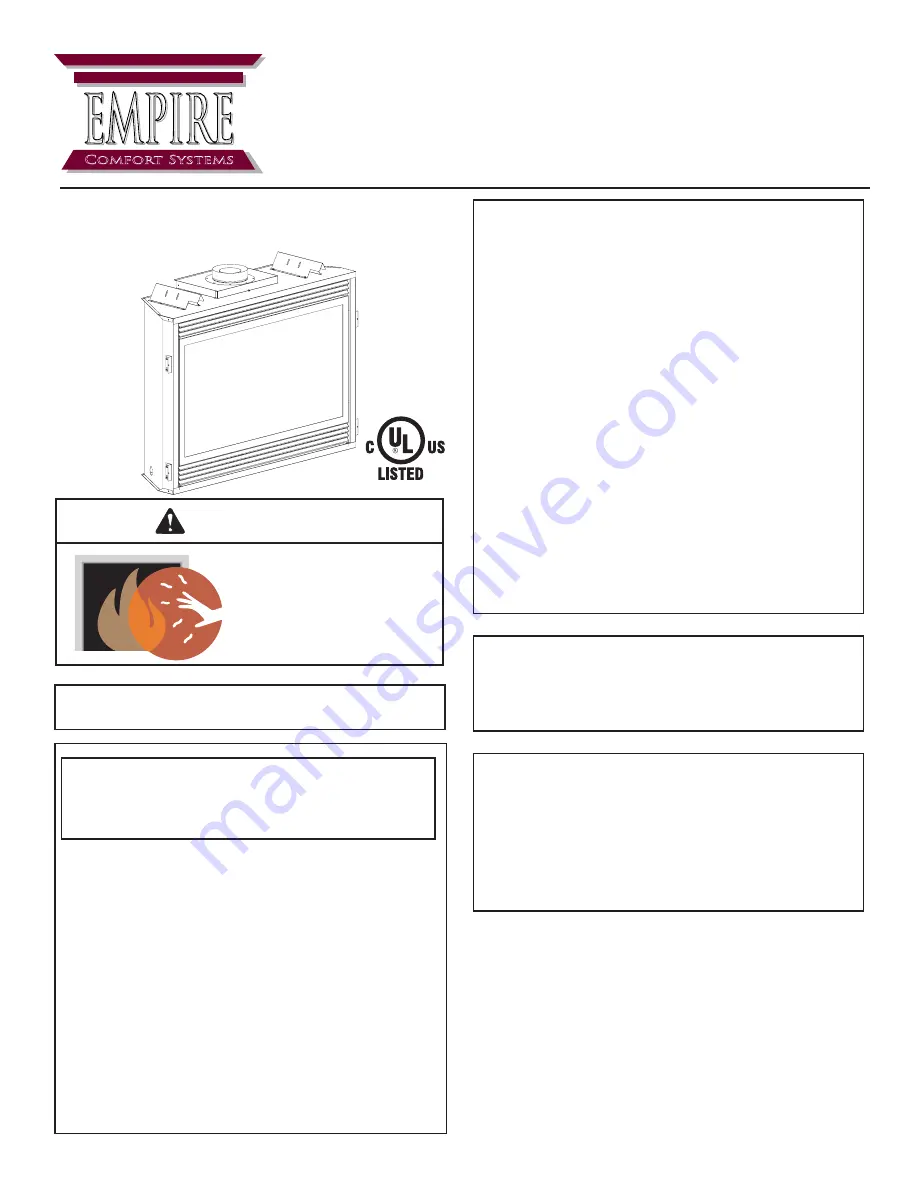
LUXURY DIRECT VENT 

GAS FIREPLACE HEATER

MODEL SERIES

MILLIVOLT STANDING PILOT

DVX36FP31L(N,P)-4

DVX42FP31L(N,P)-4

DIRECT IGNITION

DVX36FP51LN-2

DVX42FP51LN-2

INTERMITTENT PILOT

DVX36FP71L(N,P)-2

DVX42FP71L(N,P)-2

REMOTE RF MODELS

DVX36FP91(N,P)-2

DVX42FP91(N,P)-2

UL FILE NO. MH30033

WARNING: If not installed, operated and maintained 

in accordance with the manufacturer’s instructions, 

this product could expose you to substances in fuel 

or  from  fuel  combustion  which  can  cause  death  or 

serious illness.

This  appliance  may  be  installed  in  an  aftermarket, 

permanently located, manufactured home (USA only) 

or mobile home, where not prohibited by state or local 

codes.
This appliance is only for use with the type of gas 

indicated on the rating plate. This appliance is not 

convertible for use with other gases, unless a certified 

kit is used.

Page 1

Summary of Contents for DVX36FP31L(N

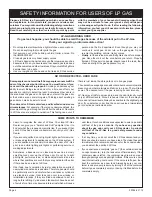
Page 1: ...causing property damage personal injury or loss of life WARNING HOT GLASS DO NOT TOUCH NEVER WILL CAUSE BURNS GLASS UNTIL COOLED ALLOW CHILDREN TO TOUCH GLASS EMPIRE EMPIRE Comfort Systems LUXURY DIRE...

Page 2: ...ighting Instructions 47 Standing Pilot Troubleshooting 48 Direct Ignition Wiring Diagram 49 Optional Remote Control 49 Direct Ignition Lighting Instructions 50 Initial Start Up Gas Line Purge 51 Direc...

Page 3: ...ss front or any part removed for servicing the appliance must be replaced prior to operating the appliance Work should be done by a qualified service person Keep burner and control compartment clean V...

Page 4: ...m service or make adjustments in an area where the conditions are such that you may not detect the odor if there has been a leak of LP Gas Odor fade due to oxidation by rust or adsorption on walls of...

Page 5: ...ons shall comply with NFPA 720 and be ANSI UL 2034 listed and IAS certified 3 SIGNAGE A metal or plastic identification plate shall be permanently mounted to the exterior of the building at a minimum...

Page 6: ...ith the National Fuel Gas Code ANSI Z223 1 NFPA 54 Natural Gas and Propane Installation Code or CSA B149 1 in Canada Available from theAmerican National Standards Institute Inc 11 West 42nd St New Yor...

Page 7: ...0 21 000 26 000 24 000 KWH Maximum 10 3 8 8 11 0 10 3 Minimum 7 2 6 2 7 6 7 2 Orifice 32 P 211 1 65mm P 250 31 P 209 DVX42FP 3 7 9 2 75 mm P 305 DVX42FP5 50 P 245 DVX42FP 3 7 9 1 80 mm P 304 DVX42FP5...

Page 8: ...ance from side of fireplace to adjacent sidewall is 6 36 914mm 6 152mm Figure 5 Figure 2 Combustible Material No greeting cards stockings or ornamentation of any type should be placed on or attached t...

Page 9: ...details in Venting Section When you install your Direct Vent Fireplace in F Room divider or A Flat on wall corner positions a minimum of 6 inches clearance must be maintained from the perpendicular wa...

Page 10: ...in excess of 1 2 psig 14 w c 3 5 kPa on the fireplace gas valve it will result in a hazardous condition Checking Manifold Pressures Both Propane and Natural gas valves have a built in pressure regulat...

Page 11: ...package to screw through slotted holes in drywall strip and then screw into pre drilled holes on fireplace side Measure from face of fireplace to face of drywall strip to determine final depth Figure...

Page 12: ...ial must be used These joints are not required to be sealed Only non combustible material using 300 F minimum adhesive if needed can be applied as facing to the fireplace surround Flush Mount Mantel I...

Page 13: ...fan option is used The appliance can be mounted on any of the following surfaces 1 A flat hard combustible burnable surface 2 A raised wooden platform 3 Four 4 corner supports Example Four 4 concrete...

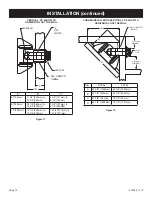
Page 14: ...29mm MINIMUM VENT CAP 6 152mm MINIMUM WALL FIRESTOP THIMBLE C A B C 6 152mm 11 1 4 286mm to 12 3 4 324mm 4 3 4 121mm to 6 1 4 159mm 9 229mm 14 1 4 362mm to 15 3 4 400mm 7 3 4 197mm to 9 1 4 235MM 12 3...

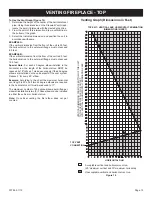
Page 15: ...izontal run MUST be reduced by 18 45cm This does not apply if the 45 degree elbows are installed on the vertical part of the vent system Reduce 3 for every 90 elbow Example According to the chart the...

Page 16: ...e required vent terminal clearances of 12 305mm above grade level a snorkel kit is recommended It allows installation depth down to 7 178mm below grade level The 7 178mm is measured from the center of...

Page 17: ...This hole must be 12 305mm high x 10 254mm wide with its center line determined by the amount of vertical rise and horizontal run of the termination See Figure 23 When locating the hole it must be not...

Page 18: ...6 Figure 27 Figure 28 24 MINIMUM CLEARANCE TO COMBUSTIBLES 24 Example H2 2ft 2 90 90 6ft V1 21ft H 8ft V 15ft Example H2 3ft H3 1ft 4ft 90 90 90 6ft V1 21ft H 10ft V 21ft Example H1 2ft V1 20ft H 2ft...

Page 19: ...mine whether or not the extension thimble is to be used If the combustible wall depth is over 5 3 8 137mm then the extension thimble should be used See Figure 29 3 Install the wall thimble assembly th...

Page 20: ...h 4 10 x 1 1 2 screws Ensure upward slope 11 From inside Attach the inlet tube to the collar on the back of the fireplace or the rigid venting system using 3 self tapping screws 12 Seal the 4 102mm di...

Page 21: ...high temperature sealant to the opposite end of the tube on the inside of the tube The end with the gasket will attach to the back of the unit Continue with Step 13 Connecting to Rigid Vent System If...

Page 22: ...a qualified field service per son Inspect the external vent cap on a regular basis to make sure that no debris is interfering with the airflow Inspect entire venting system to ensure proper function...

Page 23: ...kits include connection hardware Installation of the Vertical Flex Termination Kit WARNING Ensure that the venting system exits the structure through the roof and does not terminate less than 12 inch...

Page 24: ...Fig ure 34 5 Next determine the location for the cutout in the roof opening This opening must be large enough to provide a minimum 1 air space clearance from the vertical vent pipe to any combus tible...

Page 25: ...and firestop thimble assembly installed in steps 4 through 6 14 Secure the roof support assembly to the roof sheathing with at least 4 nails screws through each support bracket Check that the combusti...

Page 26: ...ractices 21 An additional storm collar band is provided in kit that may be used as an attic insulation shield The collar can be installed around the flex pipe or hard pipe just above the firestop thim...

Page 27: ...FLUE CONNECTOR 7 DIA ADAPTER COLLAR WITH GASKET CLAMPS DIRECT VENT FIREPLACE NOTE DVVK 4FV KIT MAXIMUM HEIGHT INCLUDING FIREPLACE IS 13 TO EXTEND VENT RUN AN ADDITIONAL VENT EXTENSION KIT IS NECESSARY...

Page 28: ...eter by 6 ft MF07ALA2F006 1 5 4 7 x 48 Rigid Pipe Assembly MF100554 1 6 Firestop Thimble Assembly MF100124 1 7 Roof Flashing 0 12 to 6 12 MF100091 1 8 7 Flex Adapter Collar with Gasket MF100524 1 9 7...

Page 29: ...installed to the Termination Cap 10 Apply sealant to the outside of the flue pipe adapter and connect to the flex flue pipe Then insert the adapter into the fireplace flue Secure flue adapter to the f...

Page 30: ...adhered to The graph showing the relationship between vertical and horizontal side wall venting will help to determine the various vent lengths allowable The horizontal vent run refers to the total le...

Page 31: ...3 feet 90cm horizontally from the center line of the regulator I clearance to service regulator vent outlet 6 feet 1 8m minimum J clearance to non mechanical air supply inlet to building or the combus...

Page 32: ...W OR 45 ELBOW 90 ELBOW CEILING FIRESTOP WALL STRAP PIPE LENGTH VENT SYSTEM IDENTIFICATION Figure 48 Special Venting Components Simpson Duravent See Empire Comfort Systems Retail Price List for Simpson...

Page 33: ...side of wall for hole Attention Wall firestop hole is off set towards bottom of wall opening Secure with nails or screws Continue the vent run through the firestop See Figure 50 WALL FIRESTOP HOLE IS...

Page 34: ...A NAILS 4 REQUIRED CEILING FIRESTOP A B VENTING FRAMING AND FINISHING continued Vent Size A B 6 5 8 10 10 8 10 1 2 10 1 2 Vent Size A B 6 5 8 10 10 8 10 1 2 10 1 2 Vent Size A B 6 5 8 10 10 8 10 1 2 1...

Page 35: ...l NOTE Wood screws can and should be replaced with appropriate fasteners for use on stucco brick concrete or other types of siding CAUTION Ifexteriorwallsarefinishedwithvinylsiding ormaterials that co...

Page 36: ...o the outside of the flue pipe adapter and connect to the flex flue pipe Then insert the adapter into the fireplace flue Secure flue adapter to the fireplace flue with a minimum of two screws provided...

Page 37: ...rees adjoining roof lines steep pitched roofs and other similar factors can result in poor draft or down drafting In these cases increasing the vent height may solve this problem Figure 60 When termin...

Page 38: ...e structure built to enclose the gas appliance and or it s vent system Vertical vent runs on the outside of a building may be but are not required to be installed inside a chase FEMALE LOCKING LUG MAL...

Page 39: ...t Number R9227 Part Number R9372 BOTTOM RIGHT CENTER LOG E BOTTOM RIGHT LOG F Part Number R9225 Part Number R9229 FRONT LEFT LOG G CENTER LOG H Part Number R9223 Part Number R9373 TOP LEFT LOG I TOP C...

Page 40: ...o prevent skin irritation from ceramic fibers After handling logs wash your hands gently with soap and water to remove any traces of fiber The positioning of logs is critical to safe and clean operati...

Page 41: ...Left Log G on C Log pin End of G Log will rest on firebox bottom 11 Place Center Log H on pin on A Log with Y branches resting on D and E logs 12 Place Top Left Log I on two left pins on B Log 13 Plac...

Page 42: ...wool pieces side by side Do not stack more than one layer of embers across the burner ports See Figure 63 18 Replace glass door onto firebox 19 Secure the two glass frame spring clamps at bottom of fi...

Page 43: ...ottom Left Log D R9372 Bottom Left Center Log E R9225 Bottom Right Center Log F R9229 Bottom Right Log G R9223 Front Left Log H R9373 Center Log I R9230 Top Left Log J R9231 Top Center Log K R9232 Top...

Page 44: ...ne 1 to two 2 minutes before you turn the gas control knob from the PILOT position to the ON position This time period allows the millivolts electrical current to build up to a sufficient level allowi...

Page 45: ...s fail in the remote and immediate heat is desired turn the REMOTE OFF ON switch from the REMOTE position to the ON position Electric 120 volt Operated Remote Control FREC Connectthegreenandred stripp...

Page 46: ...R REMOTE OFF ON SWITCH REMOTE OFF ON THERMOPILE IF ANY OF THE ORIGINAL WIRE AS SUPPLIED WITH THIS UNIT MUST BE REPLACED IT MUST BE REPLACED WITH NO 18 150 C WIRE OR ITS EQUIVALENT GAS VALVE THERMOCOUP...

Page 47: ...a pilot which must be lighted by hand When lighting the pilot follow these instructions exactly B Before lighting smell all around the appliance area for gas Be sure to smell next to the floor becaus...

Page 48: ...onnectionsfromthethermopileatthegas valve terminals are tight and the thermopile is fully inserted into the pilot bracket Check the thermopile with a millivolt meter Take the reading at TH TP TP termi...

Page 49: ...2 Flashes 3 unsuccessful ignition trials 3 Flashes Main burner flame failed 4 times during a single heating cycle 4 Flashes Interrupt power for 5 seconds to reset control Steady Flash Flame detected o...

Page 50: ...ULT CAUSING PROPERTY DAMAGE PERSONAL INJURY OR LOSS OF LIFE 1 STOP Read the safety information above 2 Turn off all electric power to the appliance 3 Open bottom louver assembly or open the valve acce...

Page 51: ...niter continues to spark for several seconds and then locks out module will show two blinks on indicator light Disconnect power to fireplace junction box and check that the Hot Black wire is connected...

Page 52: ...ht Be careful as you remove main burner in order to protect the electrodes from being damaged 10 Remove air shutter from orifice fitting 11 Remove natural gas main burner orifice from orifice fitting...

Page 53: ...E LP GAS CONVERSION Model AIR SHUTTER SETTINGS BURNER ORIFICE Opening A Propane LP Orifice DVX36 FULL OPEN 1 65 MM DVX42 FULL OPEN 1 80 MM REGULATOR FITTING NOTE STAMPED WITH GAS TYPE SET FOR USE Maxi...

Page 54: ...ion when servicing controls Wiring errors can cause improper and dangerous operation Verify proper operation after servicing Figure 73 Provided on the intermittent pilot wiring harness are two 2 strip...

Page 55: ...cian to inspect the appliance and to replace any part of the control system and any gas control which has been under water Lighting Instructions 1 Stop Read the safety information above 2 Set the ther...

Page 56: ...valves in the gas line to the appliance D Do gas leak test ahead of gas control if piping has been disturbed Gas Leak Test Paint pipe joints with rich soap and water solution Bubbles indicate gas lea...

Page 57: ...til the timed trial for ignition period ends Then the module goes into safety lockout Lockout de energizes the first main valve operator and closes the first main valve in the gas control stopping pil...

Page 58: ...ther heavily insulated wire A Close the manual gas valve B Disconnect the ignition cable at the SPARK terminal on the module Warning Whenperformingthefollowingsteps donottouchstripped end of jumper or...

Page 59: ...30784 2 1112 Page 59 INTERMITTENT PILOT TROUBLESHOOTING continued...

Page 60: ...normal operation after a one minute delay Check transformer andAC line for proper input voltage to the control Check with full system load on the transformer 6 2 Failed trial for ignition resulting i...

Page 61: ...s in the OFF position the appli ance will operate from an appliance mounted rocker switch 3 or optional wall switch connected to the two 2 BROWN wires on the Control Module 3 When the remote off switc...

Page 62: ...any physical damage such as bent terminals missing parts stripped threads or evidence of exposure to excessive heat Follow the operating instructions provided by the manufacturer of your heating appli...

Page 63: ...ns for operation of the remote control system MOTOR COMM G LIGHTS AUX FAN MAIN PILOT Learn MOTOR COMM POWER IPI Continuous Pilot Off On Remote Off S I ADJ GND Stepper Motor ORANGE WHITE BLACK ORANGE G...

Page 64: ...sembly 3 Locate On Off gas cock and turn clockwise to OFF Do not force 4 Close bottom louver assembly RF STANDING PILOT LIGHTING INSTRUCTIONS 1 STOP Read the safety information above 2 Turn OFF electr...

Page 65: ...s surface Also initial paint curing may deposit a slight film on the glass It is therefore recommended that the glass be cleaned two or three times with a non abrasive household cleaner and warm water...

Page 66: ...ket 16 R9342 R9342 R9342 R9342 Accent Lamp Bezel 17 R9390 R9390 R9390 R9390 Accent Lamp Wire Harness 19 R9942 R9942 R9942 R9942 Wire Assembly 20 10088 10088 10088 N A Rheostat Bracket 21 18879 18879 1...

Page 67: ...49 R7649 R7649 Fan Control Switch 53 23501 23501 23501 23501 Blower Heat Shield 54 23694 23694 23694 23694 Air Shutter Shield 55 R1109 Bushing Flush 56 R1995 Transformer 57 R7615 R5160 Cord Set 58 R81...

Page 68: ...ket 16 R9342 R9342 R9342 R9342 Accent Lamp Bezel 17 R9390 R9390 R9390 R9390 Accent Lamp Wire Harness 19 R9942 R9942 R9942 R9942 Wire Assembly 20 10088 10088 10088 N A Rheostat Bracket 21 18879 18879 1...

Page 69: ...49 R7649 R7649 Fan Control Switch 53 23501 23501 23501 23501 Blower Heat Shield 54 23694 23694 23694 23694 Air Shutter Shield 55 R1109 Bushing Flush 56 R1995 Transformer 57 R7615 R5160 Cord Set 58 R81...

Page 70: ...9 14 15 16 22 11 10 23 21 20 BLOWER ASSEMBLY 48 49 52 51 50 3 6 6 6 53 66 67 36 29 30 42 37 35 34 32 43 31 33 54 40 39 41 RF VALVE ASSEMBLY 38 60 61 62 59 63 64 65 39 40 46 47 44 45 MILLIVOLT VALVE A...

Page 71: ...10 Installation of FBB4 variable speed blower assembly is completed Wiring The appliance when installed must be electrically grounded in accordance with local codes or in the absence of local codes wi...

Page 72: ...HEN INSTALLED MUST BE ELECTRICALLY GROUNDED IN ACCORDANCE WITH LOCAL CODES OR IN THE ABSENCE OF LOCAL CODES WITH THE NATIONAL ELECTRICAL CODE ANSI NFPA 70 LATEST EDITION Afactory installed junction bo...

Page 73: ...sed Note Do not handle the lamp bulb with bare fingers protect with clean dry cloth The lamp will pull straight out of the socket When re installing ensure integrity of gasket seal THE FIREBOX MUST BE...

Page 74: ...ame Arch with hinges Decorative Door Leaf Arch Decorative Door Mission Arch Decorative Door Plain Arch Outside Frame Kits STD Louvers 45 Degree Window Trim Decorative Frame Arch without hinges only Bl...

Page 75: ...reet Hartford CT 06114 Phone 860 722 2433 Toll Free 800 243 9360 Fax 860 293 0479 Toll Free Fax 800 274 2004 Websites www fwwebb com www victormfg com Parts Heater Hearth and Grills MASTER PARTS DISTR...

Page 76: ...dark cremed coffee bricks with charcoal mortar in running bond courses plus an accent band of diagonal bricks Clearance to Combustibles Back 0 0 mm Side 0 0 mm Floor 0 0 mm Top Stand off 0 0 mm Top Fr...

Page 77: ...imensions Dimension DVX36FP DVX42FP A 34 3 4 882 7mm 34 3 4 882 7 B 39 990 6mm 43 1092 2mm C 19 7 8 505mm 19 7 8 505mm D 25 635mm 25 635mm E 36 914 4mm 40 1016mm G 26 1 2 673 1mm 26 1 2 673 1mm H 40 3...

Page 78: ...wner The appliance must be installed by a qualified installer and operated in accordance with the instructions furnished with the appliance A bill of sale cancelled check or payment record should be k...

Page 79: ...30784 2 1112 Page 79 APPLIANCE SERVICE HISTORY Date Dealer Name Service Technician Name Service Performed Notes...

Page 80: ...s Empire Comfort Systems Inc 918 Freeburg Ave Belleville IL 62220 If you have a general question about our products please e mail us at info empirecomfort com If you have a service or repair question...

Reviews: