Empire Abrasive Equipment Company
2.2 Start Up
Step 1:
Check that all pipe and hose connections are tightly fastened and air tight.
Check that all safety pins are properly installed in all quick couplings.
Step 2:
Perform maintenance checks per section
5.0 Maintenance
.
Step 3:
Check that the dust drum under the dust collector is empty and has been
installed properly. It must be sitting squarely on the dust drum platform and centered
under the cover. The dust drum and cover must create an air tight seal.
Step 4:
Turn on the plant compressed air supply. Turn the cabinet snap switch to the
On position. The cabinet lights will illuminate and the dust collector fan will start.
Step 5:
Place the parts to be blast treated inside the blast cabinet. The parts must be
free of oil, grease, and moisture. Close and latch the cabinet load doors.
Step 6:
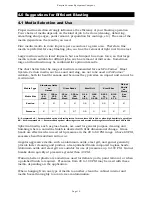
Set the blast air pressure regulator to the desired pressure. Recommended
blast pressure ranges for various media types are listed in the table in section
4.1
Media Selection and Use
.
Do not exceed 125 psi blast pressure.
2.3 Blasting
Step 1:
Insert each hand into a cabinet glove and grip the suction gun or pressure
nozzle assembly firmly. Aim the nozzle at the part to be blast treated.
Step 2:
Step on the foot treadle to start the blast. After a few seconds the abrasive
flow will stabilize and you will be ready for blasting.
Step 3:
Do not pump the foot treadle. It will decrease blast efficiency and cause
premature wear of system components.
Step 4:
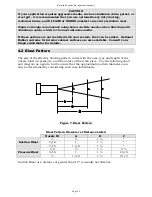
Hold the gun or nozzle at a 90-degree angle to the part at a distance that
produces the fastest results. This distance may vary from 3 to 18 inches, depending
on the work piece and the desired finish. See section
4.2 Blast Pattern
.
Step 5:
During the blasting process, periodically check the Minihelic pressure gauge
located above and to the right of the cabinet window. This gauge indicates the
condition of the filters. If the gauge pressure is 4 psi or greater, clean the filters as
outlined in section
2.4 Dust Collector Cartridge Cleaning
.
Step 6:
The reclaimer screen will require periodic cleaning. The frequency of cleaning
will depend on the volume of debris produced.
Step 7:
For pressure systems, all the media in the pressure vessel will be used up
after an extended period of blasting. The operator must release the foot treadle to stop
the blast and depressurize the vessel. After a wait of approximately 2 minutes, media
will fill the pressure vessel and blasting can resume.
Step 8:
When blasting of the part is complete, blast additional parts or follow the
instructions in section
2.5 Equipment Shut Down
to shut the system down.
Page 13

