background image

Summary of Contents for LM-1902

Page 1: ......

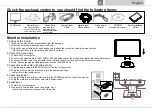
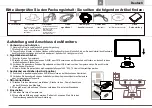
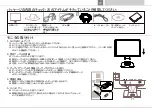
Page 2: ...signal cable 2 1 Switch off your computer 2 2 Connect the signal cable to the D SUB or DVI port at the rear of the monitor and tighten the connector screws 2 3 Connect the other end of signal cable t...

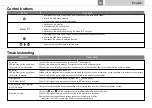
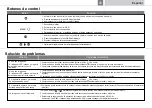
Page 3: ...nitor is switched on press the button again 2 Check if the power cord is properly connected to the monitor and power outlet 3 Check if there is electricity coming from the power outlet plug in another...

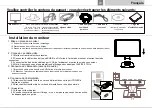
Page 4: ...2 1 Mettez votre ordinateur hors tension 2 2 Connectez le c ble vid o sur le port SUB D ou DVI situ l arri re du moniteur et serrez les vis du connecteur 2 3 connectez l autre bout du c ble au port V...

Page 5: ...rifiez que le cordon d alimentation est bien correctement connect au moniteur et la prise lectrique 3 V rifiez que la prise lectrique fournit bien de l lectricit branchez un autre appareil pour voir...

Page 6: ...halten Sie den Computer aus 2 2 Schlie en Sie das Signalkabel an den D SUB oder DVI Anschluss an der R ckseite des Monitors an ziehen Sie dann die Schrauben am Stecker fest 2 3 Verbinden Sie das ander...

Page 7: ...ob das Netzkabel richtig in Monitor und Steckdose eingesteckt ist 3 berzeugen Sie sich davon dass die Steckdose Strom f hrt schlie en Sie zum Testen einfach ei anderes Ger t an die Steckdose an 1 Pr...

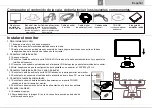
Page 8: ...l 2 1 Apague el equipo 2 2 Conecte el cable de se al al puerto D SUB o DVI situado en la parte posterior del monitor y apriete los tornillos del conector 2 3 Conecte el otro extremo del cable de se al...

Page 9: ...r est encendido Pulse el bot n de nuevo 2 Compruebe que el cable de alimentaci n est enchufado correctamente al monitor y a la toma de corriente 3 Compruebe si la electricidad proviene de la toma de c...

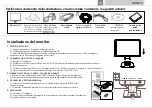
Page 10: ...segnale 2 1 Spegnere il computer 2 2 Collegare il cavo del segnale alla porta D SUB o DVI situata nella parte posteriore del monitor e stringere le viti del connettore 2 3 Collegare l altra estremit d...

Page 11: ...sia acceso Premere il tasto 2 Verificare che il cavo elettrico sia collegato correttamente al monitor e alla presa di corrente 3 Verificare che la presa di corrente eroghi energia attaccare un altro d...

Page 12: ...11 LCD CD ROM 1 1 1 1 2 1 3 2 2 1 2 2 D SUB DVI 2 3 VGA 2 4 1440 900 75Hz 3 3 1 3 2 4 4 1 AC 4 2 5 5 1 5 2 POWER AUDIO DVI D SUB...

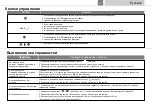
Page 13: ...12 MENU 1 2 OSD 3 1 2 OSD 3 4 1 2 OSD 3 1 LED LED 1 2 3 1 2 3 1 2 1 2 4 1 2 3 WXGA 1440 900 60Hz...

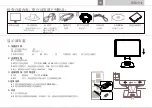
Page 14: ...13 1 1 1 1 2 1 3 2 2 1 2 2 D SUB DVI 2 3 VGA 2 4 1440 900 75 3 3 1 AUDIO 3 2 4 4 1 POWER 4 2 5 5 1 5 2 POWER AUDIO DVI D SUB...

Page 15: ...14 MENU 1 2 OSD 3 1 2 3 4 3 1 2 OSD 3 1 1 2 3 1 2 3 1 2 1 2 4 1 2 3 WXGA 1440 900 60...

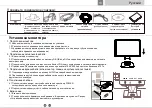
Page 16: ...15 LCD CD ROM 1 1 1 1 2 1 3 2 2 1 2 2 D SUB DVI 2 3 VGA 2 4 1440 900 75Hz 3 3 1 AUDIO 3 2 4 4 1 POWER 4 2 5 5 1 5 2 POWER AUDIO DVI D SUB...

Page 17: ...16 MENU 1 2 OSD 3 1 2 OSD 3 4 1 2 OSD 3 1 LED LED 1 2 3 1 2 3 1 2 1 2 4 1 2 3 WXGA 1440 900 60Hz...

Page 18: ...17 LCD l CD ROM 1 1 1 1 2 1 3 2 2 1 2 2 D SUB DVI 2 3 VGA 2 4 1440 900 75Hz 3 3 1 AUDIO 3 2 4 4 1 POWER 4 2 5 5 1 5 2 POWER AUDIO DVI D SUB...

Page 19: ...18 MENU 1 2 OSD 3 1 2 OSD 3 4 3 1 2 OSD 3 1 LED LED 1 2 3 1 2 3 1 2 1 2 4 1 2 3 WXGA 1440 900 60Hz...

Reviews: