background image

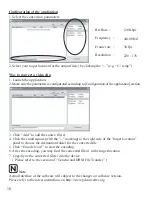
Bit Rate :

Frequency :

Frame rate :

Resolution :

.

2. Select your target location for the output file(s) by clicking the “...” (e.g. “C:\ temp”).

18

Configuration of the application

1. Select the conversion parameters

Way to convert a video clip

1. Launch the application.
2. Make sure the parameters is configurated according to [Configuration of the application] section.

128Kbps

44100 HZ

30 fps

220 : 176

.

3. Click “Add” to add the source file(s).
4. Click the small square (with the "..." marking) to the right side of the "target Location"

panel to choose the destination folder for the converted file.

5. Click “Encode Now!” to start the encoding.
6. After the encoding, you may find the converted file(s) in the target location.
7. Copy/Sync the converted file(s) into the device.

( Please refer to the section of “General and DRM File Transfer” )

Note

:

Actual Interface of the software will subject to the changes on software version.
Please refer to the latest instructions on http://www.pdconverter.org

Summary of Contents for Intuix C230

Page 1: ......

Page 2: ...d video collection Highlights of the player include 1 Plays MP3 and WMA files Music library group music files by album name artist name song title genre year and playlist in conjunction with Windows Media Player Software Playlists WMP playlist created by PC Plays video files after using the Video Conversion software available from the PDConverter website Views photo and slideshow while enjoying yo...

Page 3: ... hardware and user manual of this device without prior notice 4 To make copies publish transfer store in a traceable system or translate to any other language without written authorization from the supplier is strictly prohibited TRADEMARKS Windows ME Windows 2000 Windows XP and Window Media Device are the registere d trademarks of Microsoft Corp This product is not sponsored endorsed or approved ...

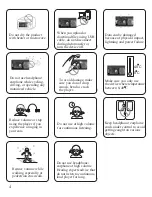
Page 4: ... and smoky areas Avoid contact with water and other liquid Do not use water or chemicals to clean the player Clean the surface with a soft cloth Do not clean with chemical or detergent Do not use excessive force on the buttons or attempt to disassemble the device Keep out of direct sunlight extreme heat or cold Do not drop or subject the device to impact Keep the player away from strong magnets Do...

Page 5: ...ny motorized vehicle Do not use at high volume for continuous listening Keep headphone earphone cords under control to avoid getting caught on various objects Do not dry the product with heater or microwave When you upload or download files using USB cable do not disconnect during data transfer or turn the device off Data can be damaged because of physical impact lightning and power failure To avo...

Page 6: ......

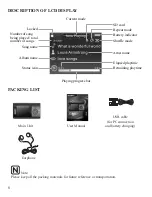
Page 7: ...ist name SD card Repeat mode Shuffle mode Battery indicator Playing progress bar Album name Status icon Elapsed playtime Remaining playtime PACKING LIST User Manual Main Unit Earphone USB cable for PC connection and battery charging Note Please keep all the packing materials for future reference or transportation ...

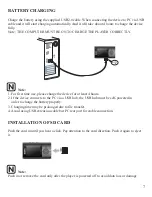
Page 8: ...charge the device for at least 4 hours 2 If the device connects to the PC via a USB hub the USB hub must be self powered in order to charge the battery properly 3 Charging time may be prolonged due to file transfer 4 Avoid using USB extension cable but PC rear port for stable connection Note Push in or remove the card only after the player is powered off to avoid data loss or damage INSTALLATION O...

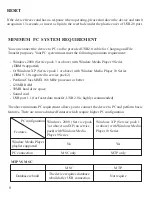
Page 9: ...he above minimum PC requirement allows you to connect the device to PC and perform basic features There are some advanced features which require higher PC configuration 8 Windows 2000 Service pack 3 or above and XP no service pack with Windows Media Player 9 Series Window Media Player playlist supported Features PC configuration PC connection MSC only MTP only No Yes Windows XP Service pack 1 or a...

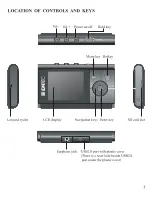
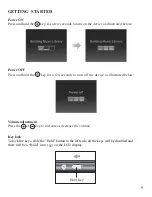
Page 10: ...wer OFF Press and hold the key for a few seconds to turn off the device as illustrated below Volume adjustment Press the or key to increase or decrease the volume Key lock To lock the keys slide the Hold button to the left side all the keys will be disabled and there will be a Hold icon on the LCD display Hold Key ...

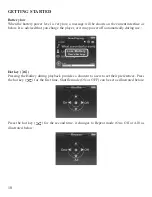
Page 11: ...er or it may power off automatically during use 10 Hotkey Pressing the Hotkey during playback provides a shortcut to users to set their preferences Press the hot key for the first time Shuffle mode ON or OFF can be set as illustrated below Press the hot key for the second time it changes to Repeat mode One Off or All as illustrated below Low Battery Please Recharge ...

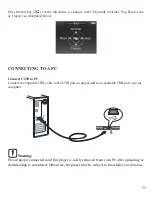
Page 12: ...CTING TOA PC Connect C230 to PC Connect the supplied USB cable to the USB port on player and to an available USB port on your computer Warning Please keep it connected until this player is safely removed from your PC after uploading or downloading is completed Otherwise the player may be subject to fatal failure or data loss ...

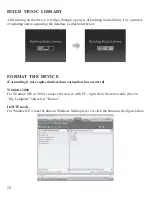
Page 13: ...ng the database as illustrated below FORMAT THE DEVICE Formatting is not required unless data corruption has occurred Windows 2000 For Window ME or 2000 connect the device with PC right click the removable drive in My Computer and select Format In MTP mode For Window XP it must be done in Windows Media player 10 click the button as the figure below ...

Page 14: ...ibrary 1 Go to http www pdconverter org and select the download tab 13 PD Video Converter specification 1 Input format WMV wmv AVI avi MPEG mpeg dat 2 Output format AVI video codec Xvid Aud io codec mp3 3 O S support Microsoft Windows 2000 XP Vista ...

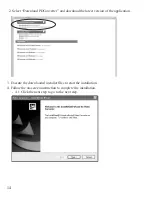
Page 15: ...er and download the latest version of the application 3 Execute the downloaded installer files to start the installation 4 Follow the on screen instruction to complete the installation 4 1 Click the next step to go to the next step ...

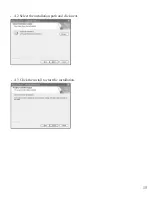
Page 16: ...15 4 2 Select the installation path and click next 4 3 Click the install to start the installation ...

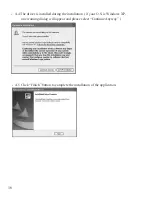
Page 17: ...he driver is installed during the installation if your O S is Windows XP one warning dialog will appear and please select Continue Anyway 4 5 Click Finish button to complete the installation of the application ...

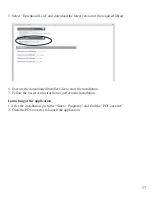
Page 18: ...6 Execute the downloaded installer files to start the installation 7 Follow the on screen instruction to perform the installation Launching of the application 1 After the installation go to the Start Programs and find the PDConverter 2 Click the PDConverter to launch the application ...

Page 19: ... 176 3 Click Add to add the source file s 4 Click the small square with the marking to the right side of the target Location panel to choose the destination folder for the converted file 5 Click Encode Now to start the encoding 6 After the encoding you may find the converted file s in the target location 7 Copy Sync the converted file s into the device Please refer to the section of General and DR...

Page 20: ......

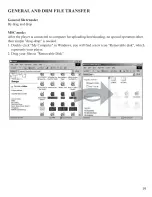
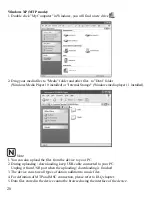
Page 21: ...ed Note 1 You can also upload the files from the device to your PC 2 During uploading downloading keep USB cable connected to your PC Unplug it from USB port when the uploading downloading is finished 3 The device can store all types of data in addition to music files 4 For definition of MTP and MSC connection please refer to FAQ chapter 5 Data files stored in the device cannot be browsed using th...

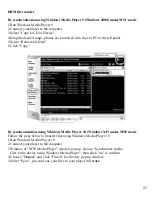
Page 22: ...sk 6 Click Copy By synchronization using Windows Media Player 10 Windows XP under MTP mode Follow the steps below to transfer files using Windows Media Player 10 1 Run Windows Media Player 10 2 Connect your player to the computer 3 Window of MTP Media Player window pop up choose Synchronize media files to the device using Windows Media Player then click ok to confirm 4 Choose Manual and click Fini...

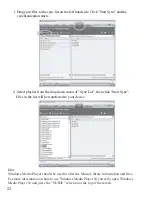
Page 23: ...wn menu of Sync List then click Start Sync Files in the list will be transferred to your device 22 Hint Windows Media Player should be used to alter the Music Library Information and files For more information on how to use Windows Media Player 10 correctly open Windows Media Player 10 and press the GUIDE selection at the top of the screen ...

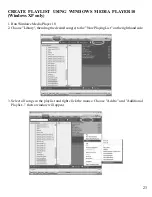
Page 24: ...P only 1 Run Windows Media Player 10 2 Choose Library then drag the desired song s to the Now Playing List on the right hand side 3 Select all songs in the playlist and right click the mouse Choose Add to and Additional Playlist then a window will appear 23 ...

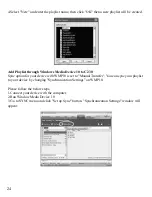
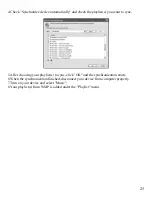
Page 25: ...Sync option for your device with WMP10 is set to Manual Transfer You can sync your playlist to your device by changing Synchronization Settings on WMP10 Please follow the below steps 1 Connect your device with the computer 2 Run Window Media Device 10 3 Go to SYNC menu and click Set up Sync button Synchronization Settings window will appear 24 ...

Page 26: ...t to sync 5 After choosing your playlist s to sync click OK and the synchronization starts 6 When the synchronization finished disconnect your device from computer properly 7 Turn on your device and select Music 8 Your playlist s from WMP is added under the Playlist menu 25 ...

Page 27: ... Specification Microsoft has developed the Media Transfer Protocol MTP to manage content on any portable device with storage It is based upon an existing protocol Picture Transfer Protocol PTP and can be implemented to be fully compatible with that protocol The primary purpose of MTP is to facilitate communication between devices that connect to a computer or other host exchange data and then disc...

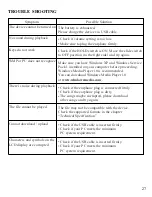
Page 28: ...Check if the earphone plug is connected firmly Check if the earphone plug is dirty The songs maybe corrupted please download other songs and try again WMP or PC does not recognize Make sure you have Windows XP and Windows Service Pack 1 installed on your computer before proceeding Windows Media Player 10 is recommended You can download Windows Media Player 10 at www windowsmedia com Keys do not wo...

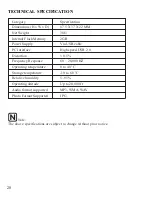
Page 29: ...a USB cable PC Interface High speed USB 2 0 Distortion 0 5 Frequency Response 60 20 000 HZ Operating temperature 0 to 40 C Storage temperature 10 to 60 C Relative humidity 5 95 Operating altitude Up to 20 000 ft Audio format supported MP3 WMA WA V Photo Format Supported JPG Note The above specifications are subject to change without prior notice ...

Reviews: