background image


                                                                                  18 / 29 

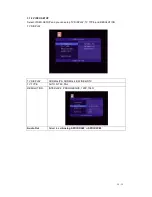
3.5.1 DVD Playback 

DVD DISC files stored on the internal HDD can be played directly on the player. Enter the 

VIDEO_TS folder, and then press the DVD button on the remote control to begin playback. 


Press the navigational buttons to select options while navigating the DVD root menu. Press the 

MENU button to return to the root menu during playback. 


Note: The VIDEO_TS and AUDIO_TS directories need to be copied together to one same 

folder on the HDD. 


3.6 Storage device 


In the main interface, press the DEVICE button to enter storage device interface. When there 

is more than one partition, you can select the specific partition you want; when a U-disk or 

other portable device is plug-in, you can select USB device to access them.


Summary of Contents for Movie Cube K230

Page 1: ...Home Multimedia Center Movie Cube K230 User s Manual Version 1 2 ...

Page 2: ...anel 14 2 3 Rear Panel 14 2 4 Side Panel 14 3 Functions 15 3 1 Main Interface 15 3 2 Movie Playback 15 3 3 Photo Playback 16 3 4 Music Playback 16 3 5 1 DVD Playback 18 3 6 Storage device 18 3 7 Setup Menu 19 4 Upgrading the Firmware 21 5 Appendixes 22 5 1 Specifications 22 5 2 Frequently Asked Questions 22 5 3 Copyrights and Trademarks 24 5 4 Warranty 25 5 5 License information 25 ...

Page 3: ...ion up to D1 quality Music Playback supports MP3 WMA DRM Pro and Advanced Profile not supported OGG files Photo Playback supports JPG JPEG files supports slide show mode USB HOST direct playback files from U disk and external USB HDD Card Reader supports memory cards SD MMC MS MS PRO We hope that this product will bring you a lot of enjoyment We are committed to apply multimedia technology in your...

Page 4: ...ence The design of this player has followed the FCC CE standard and has followed the following rules 1 This player may not cause harmful interference 2 This player could accept some interference received including interference that may cause undesired operation 1 3 4 Repair If the player has a problem you should take it to an appointed repair center and let the specialists do the repair never repa...

Page 5: ...llage Electronic products are vulnerable when using please avoid shaking or hitting the player and do not press the buttons too hard Do not let the player come into contact with water or other liquid Do not disassemble the player repair the player or change the design of the player any damage done will not be included in the repair policy Do not press the buttons of the player too hard Avoid hitti...

Page 6: ...r Note you can not switch ON the player with the POWER button of the remote control This measure is done to be compliant with the European regulations on power consumption 1 4 1 Connect to Computer 1 Make sure the player is powered on 2 Plug in the squarish connector of the USB cable to this player s USB DEVICE port 3 Plug in the rectangular connector of the USB cable to computer ...

Page 7: ...powered on 2 Plug in the USB Pen Drive or USB HDD etc to the USB host port of this player 1 4 3 Memory card connection Memory card can be used by inserting to the card slot 1 Follow the picture to insert the memory card to the card slot properly 2 Insert the card by following the arrow pointer in the picture ...

Page 8: ...e and plug in the 3 color connector to the TV s A V IN jack In this way you can enjoy the content in the player on TV or other display devices 1 4 4 2 SCART TV 1 Follow the picture and plug one connector on the SCART cable to the player s SCART socket 2 Follow the picture and plug the other connector on the SCART cable to the TV s SCART socket ...

Page 9: ...Pb Pr Video out First method use the audio output from the A V OUT jack Second method use the audio output from the S PDIF Coaxial or Optical jack In this way you can also enjoy videos music and photos in the player on TV 1 4 4 4 HDMI OUT 1 Follow the picture and plug one connector on your HDMI cable to the player s HDMI jack 2 Follow the picture and plug the other connector on your HDMI cable to ...

Page 10: ...ink connector on your optical fiber to the player s S PDIF Optical jack not supplied 2 Follow the picture and plug in the other connector on your optical fiber to the digital audio device not supplied 1 4 6 Power connection 1 Follow the picture and connect the AC adaptor to the player s DC IN jack 2 Follow the picture and plug in the AC adaptor to the power outlet ...

Page 11: ... the indicator will turn on the blue light 2 Power off In playback and other interface press the POWER button to turn off the player when power off the player will prompt you that the system is being shut down After the system is shut down the indicator light of the POWER button on the front panel will turn red 3 Language control The system language of this player can be set to English or other la...

Page 12: ...3 DOWN 14 MENU 15 A B 16 FR 17 FF 18 MOVIE 19 MUSIC 20 PHOTO 21 FILE 22 STOP 23 DISPLAY 24 PLAY PAUSE 25 PREV 26 RIGHT 27 NEXT 28 COPY DIR 29 TV SYSTEM 30 ZOOM 31 DVD 32 DEVICE 33 MUTE No Button Function 1 POWER Press and hold 2 sec to power on off the player 2 SETUP Enter the setup menu 3 SLIDE Select to set photo slide show 4 SLOW Enter slow motion when playback 5 REPEAT Setup the repeat mode 6 ...

Page 13: ...er movie interface from other interface 19 MUSIC Enter music interface from other interface 20 PHOTO Enter photo interface from other interface 21 FILE Enter file interface from other interface 22 STOP During playback press this button to stop the playback 23 DISPLAY Press to display the elapsed time 24 PLAY PAUSE Playback Pause 25 PREV In file list mode press this button to return to the previous...

Page 14: ... to turn on off mute function 2 2 Front Panel 1 Infrared indicator 2 POWER indicator 3 Infrared remote receiver 4 POWER button 2 3 Rear Panel 1 DC IN jack 2 S PDIF OPTICAL jack 3 Y Pb Pr OUT jack 4 A V OUT jack 5 HDMI jack 6 SCART TV jack 2 4 Side Panel 1 USB HOST port A Type 2 USB DEVICE port B Type 3 Card slot ...

Page 15: ...vie interface only supported video files and folders will be displayed This player supports DAT VOB AVI and MPG video files Select a video file to start playback due to size of the video the loading process might take a while You can access the following functions during playback PLAY PAUSE Press to play pause the playback FR FF Press to fast reverse fast forward the current playback Press repeate...

Page 16: ...default you can press the PLAY PAUSE button to stop the slideshow then you can access the following functions Direction Button Press UP DOWN LEFT RIGHT button to remove the image ZOOM Press this button to activate the zoom mode You can press FF FR buttons to zoom in out REPEAT Select to choose between ONE FOLDER and DISK STOP Press this button to stop the playback and return to the photo interface...

Page 17: ...SK DISPLAY Press to setup the display time turn off time display playback time time remaining STOP Press to stop the playback and return to the audio interface 3 5 File Enter File interface all supported video audio image files and folder will be displayed you can also access all the functions corresponding to each file type SLIDE Put pictures and music files in the same folder Enter the folder mo...

Page 18: ...ting the DVD root menu Press the MENU button to return to the root menu during playback Note The VIDEO_TS and AUDIO_TS directories need to be copied together to one same folder on the HDD 3 6 Storage device In the main interface press the DEVICE button to enter storage device interface When there is more than one partition you can select the specific partition you want when a U disk or other porta...

Page 19: ... change the system language It supports English French German Italian Spanish etc SCREEN SAVER You can turn screen saver on off The time interval of screensaver is 1 min which means if the player didn t receive any button signal within 1 min the player will goes into screensaver mode Slide Time Select to set the interval time of photo slide show 5S 10S or 15S Slide Mode Select to set the transitio...

Page 20: ...IDEO SETUP and you can setup TV DISPLAY TV TYPE and RESOLUTION TV DISPLAY TV DISPLAY NORMAL PS NORMAL LB WIDE HDTV TV TYPE AUTO NTSC PAL RESOLUTION INTERLACE PROGRESSIVE 720P 1080I Audio Out Select to set Analog SPDIF RAW or SPDIF PCM ...

Page 21: ...e the file name Step 2 Power on the player and connect it with TV Step 3 Connect the USB Pen Drive Plug the USB Pen Drive into one of the USB HOST ports of the player Firmware installation will then start You will see a short message Write Erase on the left upper corner on the TV screen Please wait for about 1 minute and installation will be completed Then the blue indicator on the front cover wil...

Page 22: ... Hard Disk 3 5 SATA HDD up to 1TB File System FAT FAT32 NTFS Operating Temperature 5 C to 35 C Power AC DC Adapter 12V 1 5A Dimension 180x220x40mm Weight Approx 650g w o HDD Note The specifications and design of this product are subject to change without notice 5 2 Frequently Asked Questions Question 1 My computer does not recognize my player Answer 1 Make sure the player is powered on If it is of...

Page 23: ... are normal and will not do any harm to the player Question 4 I used my player to transfer files back and forth between different computers Will defragmenting the player hard disk do any harm to it Answer Defragmenting the player hard disk may be useful after having transferred many files to and from the player It is never harmful to use the defragment on the player Make sure no other programs are...

Page 24: ...s 2000 XP can view a FAT32 partition within the capacity of 128GB but the format tool in Windows 2000 XP can only format FAT32 partition within the capacity of 32GB If you need to format any FAT32 partition beyond the capacity of 32GB please use other third party format tools like Norton Partition Magic 8 0 Question 10 Why is there no sound on movie or music playback when using Y Pb Pr component o...

Page 25: ...ct contains Free Software which is licensed under the GNU General Public License Version 2 GPL You will find hereinafter a copy of the GPL license text We offer valid for at least 3 years to send you the source code of the GPL software Please contact us at Dexxon Data Media gplsourcecodes dexxon eu We will charge a fee for the physical act of transferring a copy GNU GENERAL PUBLIC LICENSE TERMS AN...

Page 26: ...s interactively when run you must cause it when started running for such interactive use in the most ordinary way to print or display an announcement including an appropriate copyright notice and a notice that there is no warranty or else saying that you provide a warranty and that users may redistribute the program under these conditions and telling the user how to view a copy of this License Exc...

Page 27: ...m with the major components compiler kernel and so on of the operating system on which the executable runs unless that component itself accompanies the executable If distribution of executable or object code is made by offering access to copy from a designated place then offering equivalent access to copy the source code from the same place counts as distribution of the source code even though thi...

Page 28: ... which is implemented by public license practices Many people have made generous contributions to the wide range of software distributed through that system in reliance on consistent application of that system it is up to the author donor to decide if he or she is willing to distribute software through any other system and a licensee cannot impose that choice This section is intended to make thoro...

Page 29: ...UT WARRANTY OF ANY KIND EITHER EXPRESSED OR IMPLIED INCLUDING BUT NOT LIMITED TO THE IMPLIED WARRANTIES OF MERCHANTABILITY AND FITNESS FOR A PARTICULAR PURPOSE THE ENTIRE RISK AS TO THE QUALITY AND PERFORMANCE OF THE PROGRAM IS WITH YOU SHOULD THE PROGRAM PROVE DEFECTIVE YOU ASSUME THE COST OF ALL NECESSARY SERVICING REPAIR OR CORRECTION 12 IN NO EVENT UNLESS REQUIRED BY APPLICABLE LAW OR AGREED T...

Reviews: