Endon
LS9 0SE
201
60323
These assembly diagrams are intended as a guide – if in doubt consult a qualified electrician.
Assembly / user instructions
O170 10v1
5.
Diagram C
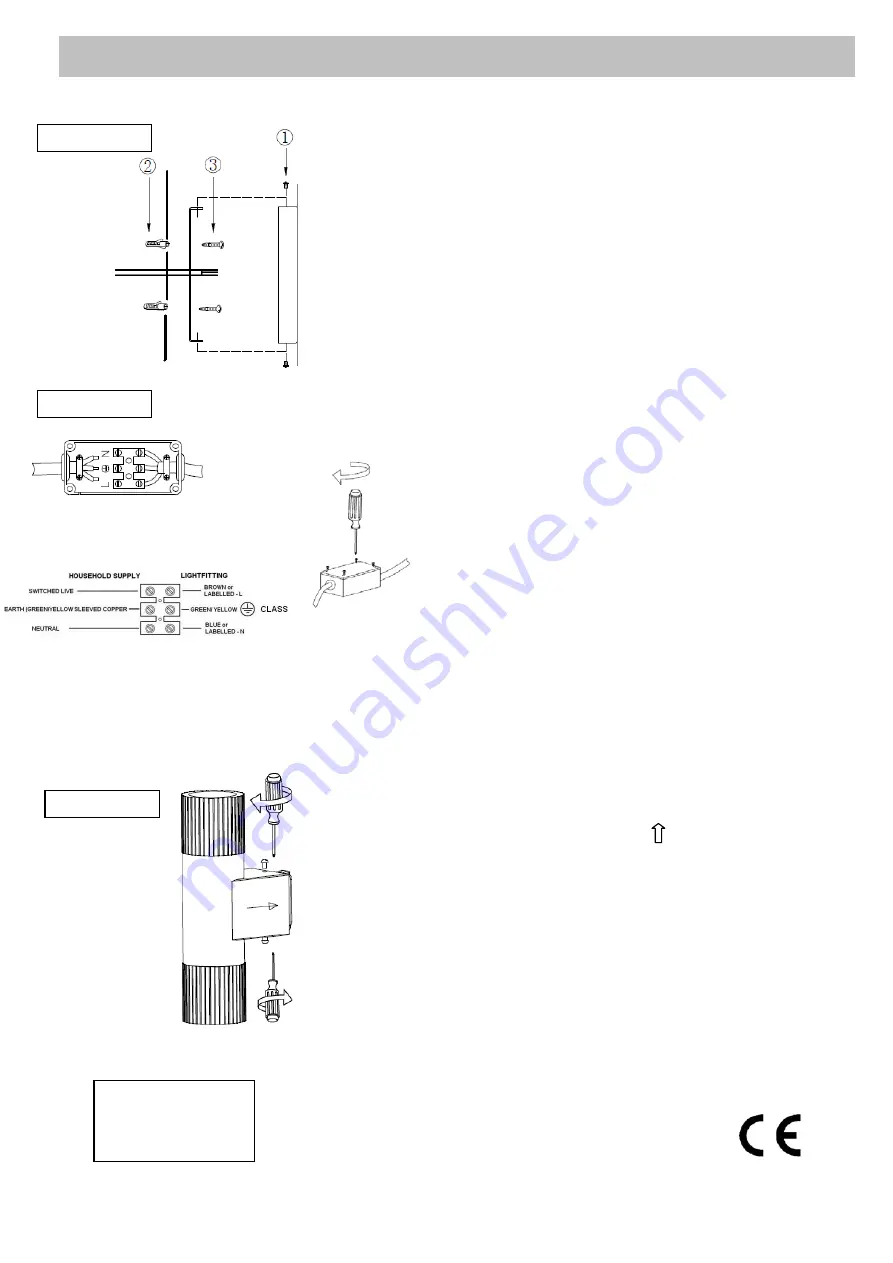
. Re-position the fitting over the wall
bracket -
MAKING SURE THAT THE FITTING IS
THE CORRECT WAY UP AS PER THE ARROW
INSIDE THE BACKPLATE
- and secure with the 2
side screws, removed in 2 above. Make sure that all
the internal cables and connections are inside the
back plate taking care not to trap or strain the internal
cables.
6. Turn on the power and test.
Diagram A
Diagram B
Diagram C
1.
Diagram A
. Determine the position of your light
fitting taking into account the exit position of the
cable. Ensure that the mounting surface is solid,
preferably a brick or block wall and ensure that
there are no other cables or pipes beneath the
surface. Use appropriate fixings. Wall plugs are
shown here. Ensure the fixings used can support
the weight of the wall light.
2.
Remove the fixing bracket, by undoing the 2 top
screws (1), retain these for re-use.
3. Use the fixing bracket as a template to mark the
screw holes. Make sure the bracket is vertical.
Fix the bracket to the wall – the use of plugs (2)
and screws (3) are shown here.
4.
Diagram B
. Support your fitting and connect the
house wiring to the terminal block. The cable
entry grommets must be securely in place to
ensure that the water ingress protection is
maintained.
NOTE:
This is a Class I fitting and
must be earthed.
Secure the terminal box lid –
again this is to ensure that water does not enter
the terminal block wiring.
Wiring details


