Endon Lighting
LS9 0SE
These assembly diagrams are intended as a guide – if in doubt consult a qualified electrician.
Assembly / user instructions
20150309 W28 24
Diagram A
Diagram B
Diagram C
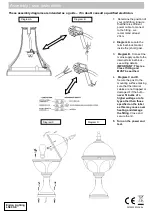
1. Determine the position of
your light fitting. Ensure
that there is sufficient
power cable to connect
to the fitting – we
recommend at least
20cm.
2.
Diagram A
. Locate the
terminal block bracket
inside the (short) post.
3.
Diagram B.
Connect the
mains supply cable to the
internal terminal block –
see wiring details.
IMPORTANT:
This is a
Class I fitting and
MUST be earthed
.
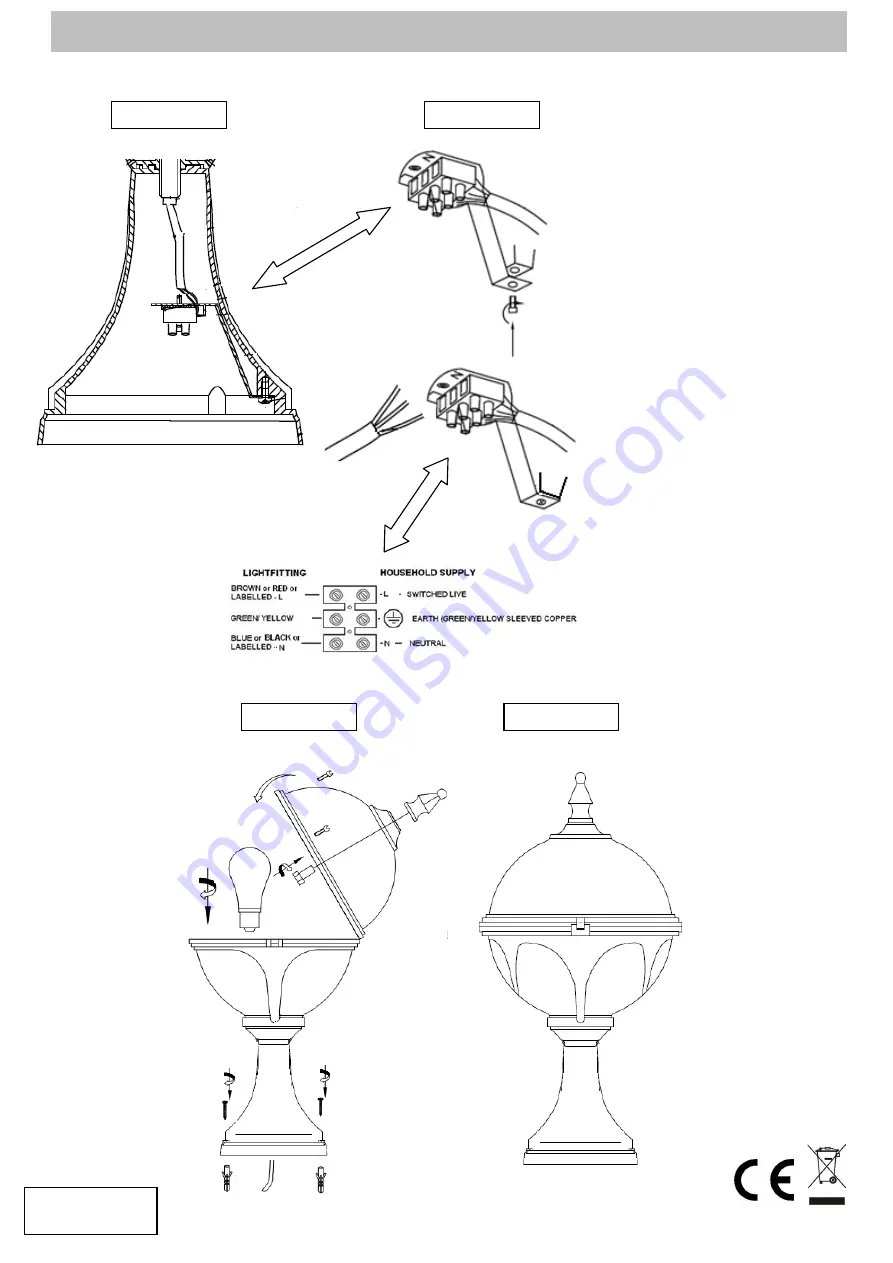
4.
Diagram C and D
.
Secure the post to the
mounting surface making
sure that the internal
cables are not trapped or
damaged. Fit the bulb –
never fit bulbs of a
higher wattage or of a
type other than those
specified on the label
as this may cause over
heating
and damage
the fitting
. Close and
secure the lid.
5. Turn on the power and
test.
Diagram D


