Micropilot M FMR244 with FOUNDATION Fieldbus
Mounting
Hauser
19
3.4.3
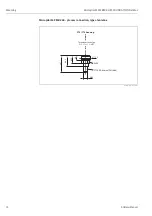
Installation in stilling well
Optimum mounting position
L00-FMR244xx-17-00-00-en-004
Standard installation
For installations in a stilling well, follow the engineering hints on Page 13 and note the following
points:
• Marker is aligned toward slots.
• Install the device using the threaded boss (AF 60) only. Observe the max. torque of 20 Nm.
• After mounting, the housing can be turned 350° in order to simplify access to the display and the
terminal compartment.
• Measurements can be performed through an open full bore ball valve without any problems.
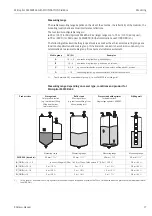
Recommendations for the stilling well
At the construction of a stilling well, please note the following points:
• Metal (no enamel coating, plastic coating on request).
• Constant diameter.
• Stilling well diameter not larger than antenna diameter.
• Weld seam as smooth as possible and on the same axis as the slots.
• Slots offset 180° (not 90°).
• Slot width respectively diameter of holes max. 1/10 of pipe diameter, de-burred. Length and
number do not have any influence on the measurement.
• At any transition (i.e. when using a ball valve or mending pipe segments), no gap may be created
exceeding 1 mm.
• The stilling well must be smooth on the inside (average roughness Rz
≤
6.3
µ
m). Use extruded
or parallel welded stainless steel pipe. An extension of the pipe is possible with welded flanges or
pipe sleeves. Flange and pipe have to be properly aligned at the inside.
• Do not weld through the pipe wall. The inside of the stilling well must remain smooth. In case of
unintentional welding through the pipe, the weld seam and any unevenness on the inside need
to be carefully removed and smoothened. Otherwise, strong interference echoes will be generated
and material build-up will be promoted.
90°
90°
60
mark at threaded boss
G 1½”
or
1½ NPT
AF 60
max. torque
20 Nm
Caution!
Use only the
threaded boss


