Operating instructions
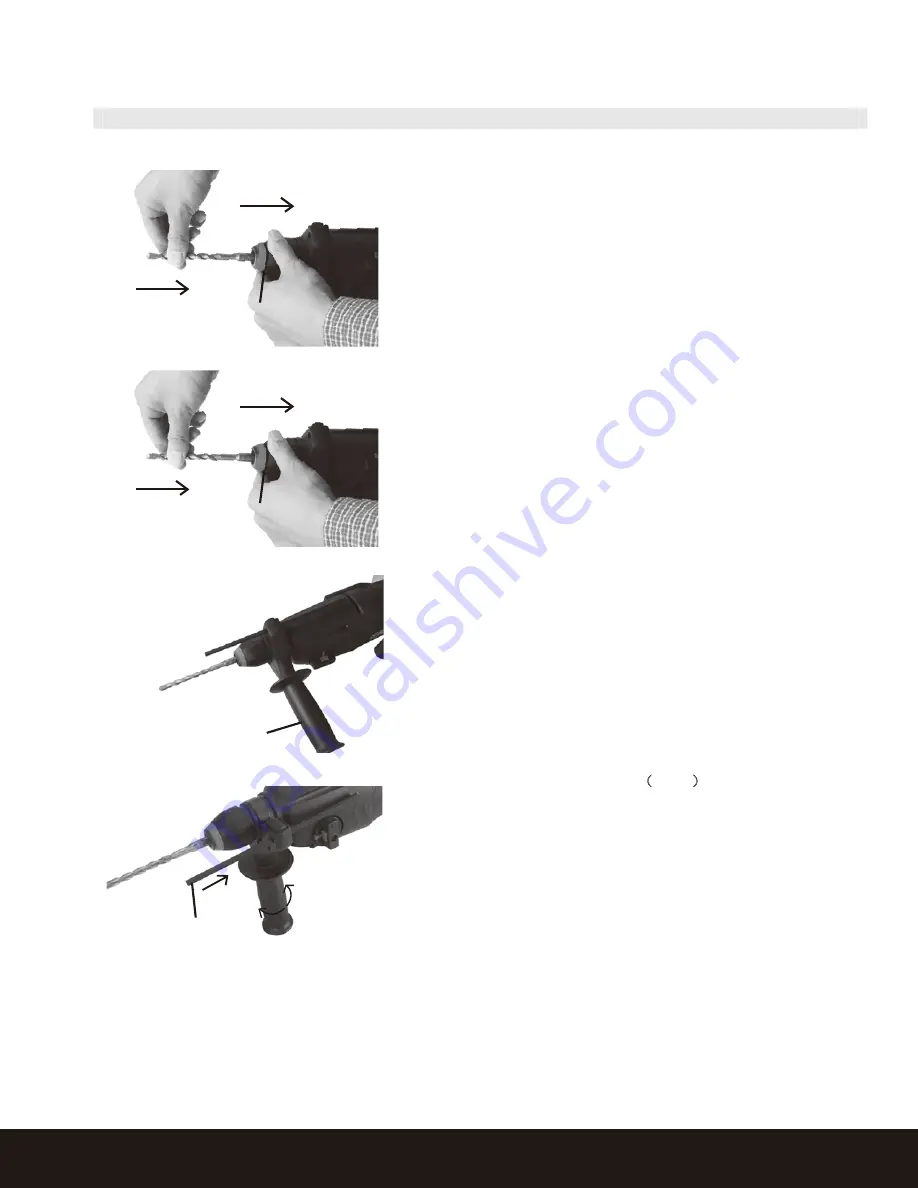
1. FITTING AND REMOVING THE DRILL BITS
NOTE:
The device is supplied with a SDS-plus chuck.
1. Clean the tip of the accessory and lubricate it lightly
with a light oil or lubricant before insertion.
2. Pull back and hold the fastening sleeve.
3. Insert accessory in SDS plus chuck while turning
and pushing it until it engages.
4. Make sure the bit has been locked by pulling and
turning. (Fig.1)
NOTE:
The accessory requires freedom of movement
which causes eccentricity when tool is off-load; however,
the accessory automatically centers itself during operation
without affecting drilling precision.
Removing the SDS-plus Tool
1. Pull back and hold the fastening sleeve. (Fig.2)
2. Turning and pulling the accessory and then remove it
from SDS plus chuck.
2.INSTALLING THE AUXILIARY HANDLE
Drag the handle on the tool head.
Turn the handle clockwise to lock and tighten securely
(Fig.3).
The auxiliary handle can be mounted on the left or right side
of the machine.
Depending on the working method, the auxiliary handle can
be adjusted in different positions.
CAUTION!
The machine should be used only with both handles.
Do not continue to use an auxiliary handle if it is damaged.
3.INSTALLING THE DEPTH STOP
(
Fig.4
)
The drilling depth can be set with the depth gauge.
Insert a drill bit into the chuck and clamp it.
Loosen the auxiliary handle and insert the depth gauge into
the intended hole.
Move the depth gauge until the distance between the tips of
drilling bit and depth gauge corresponds with the required
drilling depth.
Tighten the auxiliary handle by turning the grip of the handle
clockwise in its desired position.
Fig.1
Fig.2
Fig.3
Fig.4
Fastening Sleeve
Fastening Sleeve
Depth Stop
Auxiliary Handle
750W ROTARY HAMMER ENB569DRL


