background image


42 

 
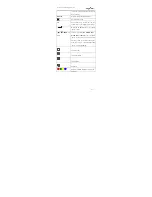
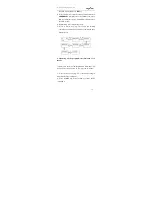
1.  Press  SET  key  for  more  than  3  seconds  before 

releasing it. 

2.  Press the UP or DOWN key to select Macro in the 

LCD menu and then press OK. 

3.  Press  the  UP  or  DOWN  key  to  select  Macro  1  or 

Macro  2  or  Macro  3  in  the  LCD  menu,  then  press 
OK. 

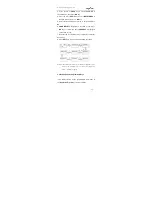
4.  SETUP is displayed on the LCD screen, press OK to 

confirm. 

SELECT KEY is displayed on the LCD screen.   

5.  You  can  select  the  device  and  function  key  for  a 

successive 

operation 

(eg. 

TV+POWER+MUTE+AV,DVD+PLAY,VCR+RECOR
D,etc. That means you want to switch the TV set on 
and the sound off, switch the TV set and input to AV 
input, to start the DVD to play a disc while the VCR 
starts recording at the same time). 

6.  Press OK to save the setting. Success is displayed 

on the LCD screen. 

7.  You can press any device key to exit set-up, or press 

the EXIT key to switch to the last status or use the 
UP or DOWN key to select another set-up. 


REMARK: 

1. 

A maximum of 10 commands can be set up in a macro. 

2. 

Ensure that all the keys can transmit signals; otherwise even if you 

have  programmed  these  Keys  into  the  macro,  the  macro  will  not 

Summary of Contents for Unniversal 4100

Page 1: ...iversal 4100 controls almost all the device functions which have been set It is not intended to replace all the functions of your original remote control The Unniversal 4100 large blue backlight LCD shows you the actual operation device status the hour and the ambient temperature in Cº The LCD also displays if the batteries are low and have to be replaced This universal remote control features a q...

Page 2: ...replacing batteries Please keep this user manual for future reference Device Code Assignment Bank for Device Initial code Total of codes TV TV 048 488 VCR VCR 075 182 DVB Satellite Cable DVB 413 413 DVD DVD DVR 026 190 CD CD 035 124 TUNER TUNER 039 114 TAPE TAPE 067 134 AUX AMP LD VCD 032 204 Total codes 1849 ...

Page 3: ...ginal TV remote and TV SAT key on your original satellite remote control MENU Functions just like the Menu or OSD on screen display or Memory key on your original remote control CH Channel UP and DOWN VOL Volume UP and DOWN REW Fast rewind PLAY Play your CD DVD and etcetera FFWD Fast forward REC Record STOP Stop the operation PAUSE Pause SHOW VIEW Show View function scans all channels to have a qu...

Page 4: ...ntrol Works like the ENTER key on your original remote control OK EXIT Functions just like the UP DOWN LEFT RIGHT OK and EXIT Keys on your original remote control for menu function During Unniversal 4100 set up mode they will be used as a cursor for confirming and exiting remote control programming Television video TV and text mixed Teletext mode Page hold Red green Bellow and blue keys are for TV...

Page 5: ...nd name is displayed on the LCD screen 4 Press UP or DOWN key to select the device brand name e g Your TV set brand ACME 5 Check whether the keys are functioning correctly e g Power CH CH VOL VOL Mute If none of the new remote control keys function correctly or the majority of the keys do not function correctly try out another code by pressing or key until all basic functions operates correctly 6 ...

Page 6: ...not be used for normal menu functions until you exit set up 4 If the device has been locked it has to be unlocked before you can carry out the set up 2 1 SET UP BY AUTO SEARCH If set up via brand name and code has been unsuccessful or if you can not find the brand name on the remote control screen you can also use the Auto Search function to find the right code for your device 1 Switch on the devi...

Page 7: ...evice reacts press any key to stop the search 6 Check whether majority of the keys function correctly or not If the majority of the keys do not function correctly please press UP or DOWN key to select another code 7 Once you are satisfied with the code simply press OK to save it SUCESS is displayed on the LCD screen and the set up is exited You can press device key again to exit SET UP or use UP o...

Page 8: ...ds before releasing it 4 Press UP or DOWN keys to select to CODE SETUP in the LCD menu and press the OK key 5 The screen shows the DEV SEARCH in the LCD menu press the UP or DOWN keys to select CODE SETUP in the LCD menu and press OK key 6 Subsequently press the device key of the device which you wish to control eg TV DVD and then press OK Now enter the 3 digit code eg 003 for Lifetec TV set 7 Pre...

Page 9: ...nd the pre programmed code list The default code list may provide all required functions but it is still possible to add a small number of additional functions for your new remote control Use the LEARN key to program commands or the Delete key to delete programmed commands or select Delete Dev to delete all the commands for a single device or Delete All to delete all the programmed commands of all...

Page 10: ...LEARN KEY in the LCD menu and then press OK The SELECT KEY is displayed on the LCD screen 5 Select the target key which you wish to program e g Power WAITING is displayed on the LCD screen 6 Aim the IR window of the original remote control at the IR receiver window of your new remote control Distance approx 50mm 7 Press the original remote control key eg Power until SUCCESS is displayed If failed ...

Page 11: ...e codes formats from this remote control 4 It is possible to learn approx 100keys totally for 8 devices 3 2 Deleting programmed Key If you wish to delete a programmed command proceed as below 1 Press the device key e g TV of the device at which the command is to be deleted 2 Press and hold the SET key for more than 3 seconds before releasing it 3 Press the UP or DOWN key to select Learning in the ...

Page 12: ...other keys 7 Press a device key e g TV to exit the deleting operation once all the desired remote commands have been deleted 3 3 Deleting all the programmed commands for a Device If you wish to delete all the programmed commands in a device at once and not one by one proceed as follows 1 Press the device key eg TV of the device that you want to delete the commands 2 Press the SET key for more than...

Page 13: ...press OK key to confirm this query SUCCESS is displayed on the LCD screen 7 Repeat step 5 to delete all the commands of another device key 8 Press EXIT key to quit from the deleting operation Remark It will take about 3 minutes for delete all commands in one device If the commands are not so many we suggest you delete commands one by one 3 4 Deleting all the programmed Keys If you wish to delete a...

Page 14: ...he UP or DOWN key to select DELETE ALL in the LCD menu and then press OK 4 SURE DELET is displayed on the LCD screen press OK to confirm this query SUCCESS is displayed on the LCD screen 4 THE MACRO FUNCTION 4 1 Setting up macros Carry out successive operations for your home entertainment centre with the aid of the macro function Set up a macro as follows ...

Page 15: ... MUTE AV DVD PLAY VCR RECOR D etc That means you want to switch the TV set on and the sound off switch the TV set and input to AV input to start the DVD to play a disc while the VCR starts recording at the same time 6 Press OK to save the setting Success is displayed on the LCD screen 7 You can press any device key to exit set up or press the EXIT key to switch to the last status or use the UP or ...

Page 16: ...o key and 1 key or 2 3 key and then release them The remote control will send out a sequent IR commands that you programmed before 4 3 Deleting Macro 1 Press SET key for more than 3 seconds before releasing it 2 Press the UP or DOWN key to select Macro in the LCD menu and then press OK 3 Press the UP or DOWN key to select Macro 2 in the LCD menu and then press OK 4 Press the UP or DOWN key to sele...

Page 17: ...it 2 Press the UP or DOWN key to select CONFIGURE in the LCD menu and then press the OK 3 Press the UP or DOWN key to select TIME SETUP in the LCD menu and then press the OK 4 Press the or key to move the cursor to select hour or minute or AM PM then press the number key to set hour and minute and press the or key to select AM or PM 5 Press OK key to save the setting and SUCCESS is displayed on th...

Page 18: ... than 3 seconds before releasing it 2 Press the UP or DOWN key to select CONFIGURE in the LCD menu and then press the OK 3 Press the UP or DOWN key to select VOL LOCK in the LCD menu and then press the OK 4 Press the device key to select the device which you want to fix eg AUX 5 Press the or key to change to the ON or OFF mode 6 Press OK key to save the setting and SUCCESS is displayed on the LCD ...

Page 19: ...ce code The device code cannot be subsequently changed via brand name and code or automatic search You can set it to OFF to quit this function 1 Press the SET key for more than 3 seconds before releasing it 2 Press the UP or DOWN key to select CONFIGURE in the LCD menu and then press the OK 3 Press the UP or DOWN key to select DEV LOCK in the LCD menu and then press the OK 4 Press the device key t...

Page 20: ...n press any device key to exit the set up or press exit key to return to the last status or use the UP or DOWN key to select another set up REMARK It is possible to fix all device codes however these device codes can not be changed via brand name code or automatic search Set up 5 4 Background Light If the backlight has been switched on it lights up if you press any key 1 Press the SET key for more...

Page 21: ...r press EXIT key to return to the last status or use the UP or DOWN key to select another set up 5 5 Setting the contrast If you are not satisfied with the screen contrast setting of your remote control check the steps below to change it 1 Press the SET key for more than 3 seconds before releasing it 2 Press the UP or DOWN key to select CONFIGURE in the LCD menu and then press the OK key 3 Press t...

Page 22: ... When the LED of the device button flashes and it goes into Show View mode The remote control automatically scans all channels for a brief quick view REMARK 1 The remote control must be pointed at the device until Show View mode finished 2 If you want to exit the show view mode please press any key 5 7 ALL OFF You can turn off or turn on all devices using this button only Press and hold the ALL OF...

Page 23: ...han 3 seconds before releasing it 2 Press the UP or DOWN key to select CONFIGURE in the LCD menu and then press the OK key 3 Press the UP or DOWN key to select CLEAR ALL in the LCD menu and then press OK SURE CLEAR is displayed on the LCD screen 4 Press OK to delete all the settings and to return to the factory original settings 6 TECHNICAL SPECIFICATIONS Power supply 3 x 1 5V AAA batteries not in...

Page 24: ...ranty period of 24 months In the case of Surge protection the warranty period is 60 months WARRANTY PROCEDURE 1 Visit the Support section at http support energysistem com and select your product to view the FAQ Frequently Asked Questions The solution to your problem is very likely to have been already published there You will also be able to download user manuals user guides drivers and updates 2 ...

Page 25: ...n you call 4 Alternatively you may prefer to contact the distributor from which you purchased the product presenting them with the receipt or invoice DESIGN AND SPECIFICATIONS ARE SUBJECT TO CHANGE WITHOUT NOTICE Trademarks All company brand and product names are trademarks or registered trademarks of their respective companies 2008 by Energy Sistem All rights reserved ...

Reviews: