27
Call 1-
800-347-9575
for Technical Support
4.7 Pump Discharge (Outlet) Tubing Installation
Now that you have installed the burner, you will install the fuel discharge tubing (not provided).
4.7.1 Pump Discharge Tubing Installation
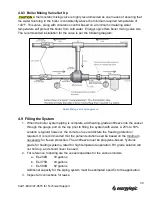
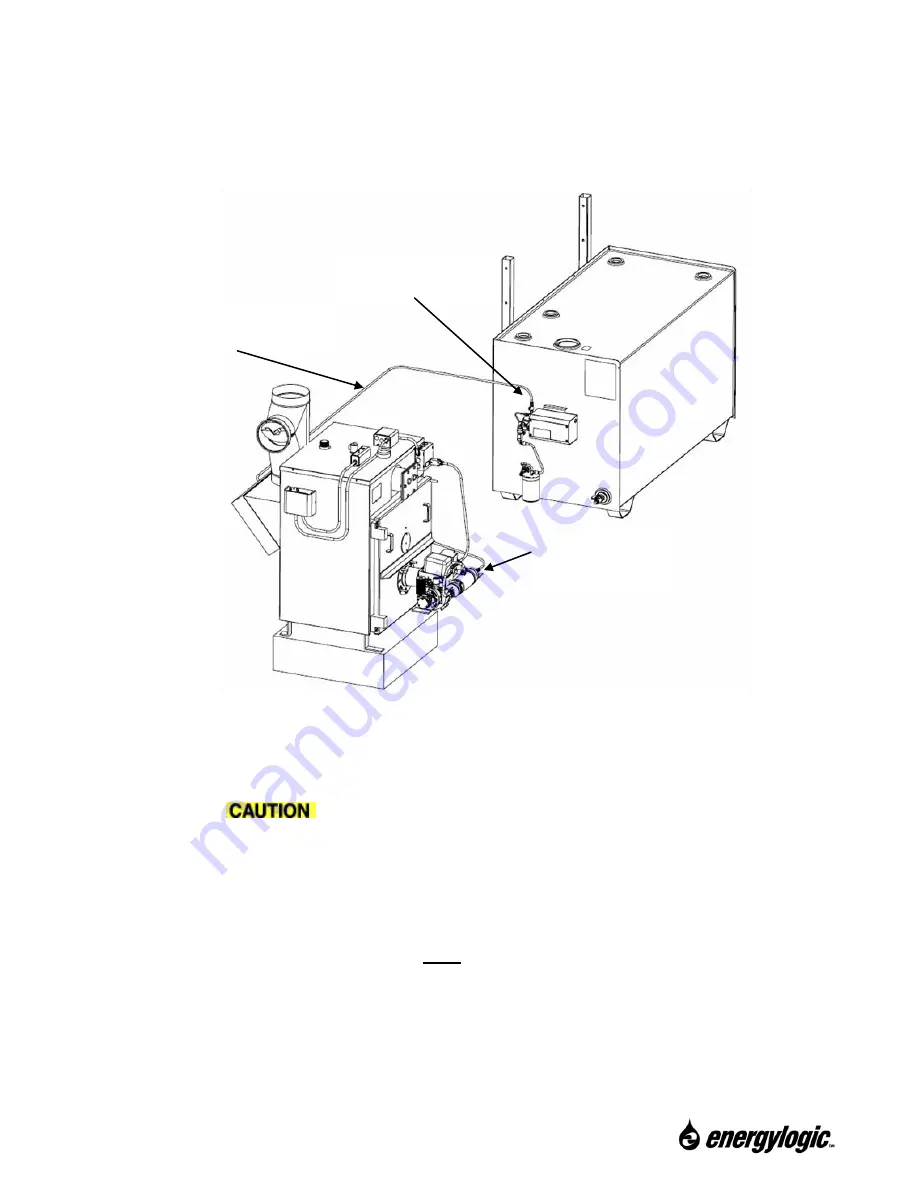
The tubing is installed as follows (refer to figure):
1. Remove the cap on the fuel pump discharge (outlet) port.
2. You will need to provide 3/8 inch outer diameter copper tubing and 45 Degree flare
fittings.
Be careful not to kink or place sharp bends in the fuel tubing. Do not
form any loops in the tubing, trapped air will cause issues with performance.
3. Slide a flare fitting over one end of the copper tubing and use a flaring tool to flare the
end of the tube. Make sure the flare is smooth, with no cracks.
4. Thread (do not tighten) the flare fitting to the fuel pump outlet fitting.
5. Route the fuel tubing. Refer to guidelines in the next section.
6. Remove the preheater inlet cap. Note
:
The preheater was tested during manufacturing.
A small amount of oil may be present when the cap is removed.
7. Cut the tubing to the correct length, slide on a flare fitting, and flare the end.
8. Thread (do not tighten) the fuel tubing fitting to the preheater inlet.
9. Tighten the fuel line flare fittings. Make sure to use a backup wrench.
Pump discharge (outlet)
tubing.
Preheater inlet
Connection
Fuel Metering Pump
Connection
Routing of Discharge Fuel Tubing - Tank Mount


