62
Call 1-
800-347-9575
for Technical Support
8.5.7 Solenoid Valve Cleaning
How often?
Once per year or if the solenoid valve is blocked with debris (higher operating pressure will be
seen on the pressure gauge).
Tools Required:
5/16 inch and 7/16 inch wrenches, flat-blade screwdriver, small wire brush or pipe cleaner,
pocket pick, parts washer fluid, shop air gun, rubber gloves, safety glasses.
Replacement Parts:
Solenoid O-ring (PN 20293199). Nucleus w/ Spring (PN 20293198).
Personally verify that the main power is turned off and locked out at the circuit
breaker.
Small parts
– do not drop / lose.
Procedure - All Models (refer to figures):
1. Wear all safety equipment.
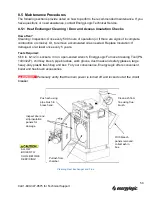
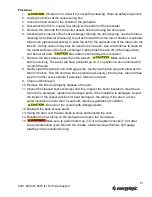
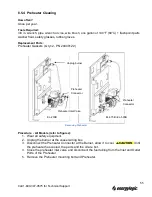
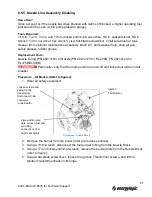
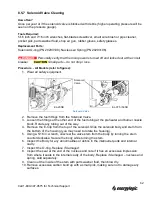
2. Remove the fuel fittings from the Solenoid Valve.
3. Loosen the fittings at the other end of the fuel tubing at the preheater and burner nozzle
block. Rotate any tubing out of the way.
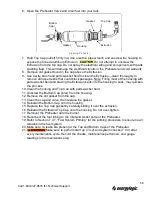
4. Remove the E-Clip from the top of the solenoid. Slide the solenoid body and stem from
the bottom of the housing (you may need to rotate the housing).
5. Using a 5/16 in. wrench, unscrew the valve stem from the body by turning the stem
counterclockwise. Secure the body while turning the stem.
6. Inspect the Body for any abnormalities or debris in the inlet/outlet ports and internal
cavity.
7. Inspect the O-ring. Replace if damaged.
8. Inspect the seal at the end of the nucleus and note if it has an excessive impression
from where it seals in the internal cavity of the body. Replace if damaged
– nucleus and
spring, sold separately.
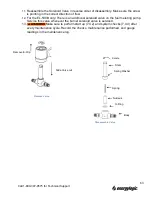
9. Clean out the inside of the stem with parts washer fluid, then blow dry.
10. Remove excessive carbon build up with a small pick, making sure not to damage any
surfaces.
EL-200B
EL-375 / 500B
Solenoid
Valve
Solenoid Valve


