background image

- 2 -

Limited Warranty

Please read this limited warranty carefully. Warranty is subject to void under following criteria:

1. The serial number label or warranty seal is defaced, modified, or removed.

2. Taking apart of the product and/or modifica�on of any component or cable without 

ENERMAX’s wri�en authoriza�on.

3. Ignoring connector’s faulty-inser�on-preven�on design by a�aching a connector to a device 

under incorrect orienta�on.

4. Damage caused by natural phenomena or uncontrollable forces, such as lightning, flooding, 

fire, earthquake, or misuse, abuse, negligence, accident, wear and tear, mishandling, 

misapplica�on.

5. ENERMAX is only liable for limited warranty service of ENERMAX product. ENERMAX is not 

liable for other damage or loss of �me, interest, commercial opportunity due to using defect 

product of ENERMAX.

This ENERMAX Technology Corpora�on product is warranted to be free from defects in 

material and workmanship for a period of two (2) years from the date of purchase. ENERMAX 

Technology Corpora�on agrees to repair or replace the product, at its own op�on and at no 

charge, if, during the warranty period, it is returned to nearest ENERMAX Technology 

Corpora�on subsidiary/agent with all shipping charges prepaid and if inspec�on reveals that 

the product is defec�ve. Please present the proof of purchase for reques�ng RMA. Charges for 

removing or installing the product are excluded under the terms of this warranty agreement. 

This warranty shall not apply to any product, which has been subject to connec�on to a faulty 

power source, altera�on, negligence, or accident, or to any product, which has been installed 

other than in accordance with these instruc�ons. In no event shall ENERMAX Technology 

Corpora�on, or its subsidiaries, or agents be liable for damages for a breach of warranty in an 

amount exceeding the purchase price of this product.

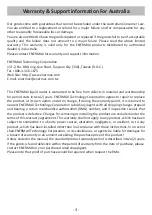
If you are uncertain whether or not your ENERMAX liquid cooler is defec�ve, please contact 

your dealer/reseller for support!

Web Site: h�p://www.enermax.com

E-mail: enermax@enermax.com.tw

ENERMAX Technology Corpora�on, 15F-2, No. 888, Jing-Guo Road, Taoyuan City (330), Taiwan 

(R.O.C.), Tel. +886-3-316-1675, Fax. +886-3-346-6640 

©2019 ENERMAX Technology Corpora�on. All rights reserved. Specifica�ons are subject to 

change without prior no�ce. Actual product and accessories may differ from illustra�ons. 

Omissions and prin�ng errors excepted. Content of delivery might differ in different countries 

or areas. Some trademarks may be claimed as the property of others. Reproduc�on in any 

manner without the wri�en permission of ENERMAX is strictly forbidden.

Summary of Contents for LIQMAX III ELC-LMT120-HF

Page 1: ......

Page 2: ...1 Index 2 3 4 5 7 17 Limited Warranty Warranty Support informa on for Australia Speci ca on Part List Intel Installa on AMD Installa on...

Page 3: ...shipping charges prepaid and if inspec on reveals that the product is defec ve Please present the proof of purchase for reques ng RMA Charges for removing or installing the product are excluded under...

Page 4: ...s own op on and at no charge if during the warranty perod it is returned to nearest ENERMAX Technology Corpora on subsidiary agent with all shipping charges prepaid and bearing a return merchandize au...

Page 5: ...ght W O fan Warranty Cold Plate Pump Radiator Tube Bracket Fan ELC LMT120 HF Copper Ceramic Bearing 50 000 hrs 3100 rpm 10 12 V 0 18 A 154 x 120 x 27 mm Aluminum Rubber 400 mm 690 g Intel LGA 2066 201...

Page 6: ...L Intel Clip x 1 M AMD Clip x 1 Cooler x 1 Fan x 1 Back Plate x 1 Posi on Screw x 4 Square Spacer x 1 Stand o x 4 Case Screw x 8 Fan Screw x 8 Intel LGA 2011 2066 Screw x 4 Thermal Grease x 1 Bracket...

Page 7: ...6 Intel Installa on...

Page 8: ...the chassis Schrauben Sie den L er und den Radiator am Geh use fest Fixez le ven lateur et le radiateur sur le ch ssis Fissare la ventola e il radiatore al case Fijar el ven lador y el radiador a la c...

Page 9: ...to nella piastra posteriore come mostrato nella gura so o Se la pia aforma CPU Intel LGA2011 2011 3 2066 si prega di passare al punto 3 2 Inserte los tornillos de montaje en el agujero correspondiente...

Page 10: ...Intel sous la carte m re l aide des vis du support Installare la piastra posteriore Intel nella parte posteriore della scheda madre ssare la piastra posteriore con il montante Instalar la placa poster...

Page 11: ...support Intel LGA2011 2011 3 2066 la carte m re Fissare i montan per Intel LGA2011 2011 3 2066 alla scheda madre Fije los tornillos de pilar para Intel LGA2011 2011 3 2066 a la placa madre Przykr p y...

Page 12: ...er CPU Ober che Appliquez une couche uniforme de p te thermique sur la surface du CPU Applicare in modo uniforme la pasta termica sulla super cie della CPU Aplicar de forma uniforme la pasta t rmica e...

Page 13: ...En ernen Sie die Schutzfolie von der K hlpla e der Pumpe Re rez le lm protecteur de la plaque froide Rimuovere la pellicola di protezione dalla piastra di ra reddamento Quite la pel cula de protecci...

Page 14: ...iert sind Placez la pompe sur le CPU et serrez les vis ressort jusqu ce que les quatre coins soient bien x s Posizionare la pompa sulla CPU e ssare le vi no a che tu e qua ro gli angoli siano ssa Colo...

Page 15: ...onne ore di alimentazione della pompa alla scheda madre Avviso se notate che il socket PWM o il socket per la ventola della CPU non forniscono un tensione su ciente per alimentare la pompa si prega di...

Page 16: ...oard Schlie en Sie den 4 Pin PWM Stecker des L ers am Mainboard an Branchez le connecteur du ven lateur la carte m re Collegare il conne ore della ventola alla scheda madre Conecte el conector del ven...

Page 17: ...16 AMD Installa on...

Page 18: ...he chassis Schrauben Sie den L er und den Radiator am Geh use fest Fixez le ven lateur et le radiateur sur le ch ssis Fissare la ventola e il radiatore al case Fijar el ven lador y el radiador a la ca...

Page 19: ...e Enlevez les clips Intel pr install s et xez les clips AMD la pompe Rimuovere il clip Intel preinstallato e installare il clip AMD alla pompa Quitar el clip Intel preinstalado e instalar el clip AMD...

Page 20: ...u sur la plaque arri re Inserire le vi di montaggio nel foro appropriato nella piastra posteriore per il socket della vostra CPU Sistemare il distanziatore sul foro centrale della piastra posteriore I...

Page 21: ...la plaque arri re AMD sous la carte m re l aide des vis du support Installare la piastra posteriore AMD nella parte posteriore della scheda madre ssare la piastra posteriore con il montante Instalar...

Page 22: ...r CPU Ober che Appliquez une couche uniforme de p te thermique sur la surface du CPU Applicare in modo uniforme la pasta termica sulla super cie della CPU Aplicar de forma uniforme la pasta t rmica en...

Page 23: ...En ernen Sie die Schutzfolie von der K hlpla e der Pumpe Re rez le lm protecteur de la plaque froide Rimuovere la pellicola di protezione dalla piastra di ra reddamento Quite la pel cula de protecci n...

Page 24: ...rt sind Placez la pompe sur le CPU et serrez les vis ressort jusqu ce que les quatre coins soient bien x s Posizionare la pompa sulla CPU e ssare le vi no a che tu e qua ro gli angoli siano ssa Coloqu...

Page 25: ...nne ore di alimentazione della pompa alla scheda madre Avviso se notate che il socket PWM o il socket per la ventola della CPU non forniscono un tensione su ciente per alimentare la pompa si prega di...

Page 26: ...ard Schlie en Sie den 4 Pin PWM Stecker des L ers am Mainboard an Branchez le connecteur du ven lateur la carte m re Collegare il conne ore della ventola alla scheda madre Conecte el conector del ven...

Page 27: ...avec la fonc on RGB branchez le c ble RGB Sync 4 broches la carte m re Se la scheda madre SUPPORTA la funzione RGB Collegare il cavo RGB Sync alla scheda madre Si la placa base SOPORTA la funci n RGB...

Page 28: ...Sep 2019 2019 ENERMAX TECHNOLOGY CORPORATION All right reserved Speci ca ons are subject to change without prior no ce Some trademarks may be claimed as the property of others...

Reviews: