10
7.0 BATTERY
7.1 General Information
The cutter is powered by a lithium-ion battery
manufactured by D
e
WALT. The battery should be fully
charged before the tool is used.
Batteries and chargers are available from Enerpac and
from selected D
e
WALT distributors and retailers.
To ensure optimum performance and safe operation,
use only the D
e
WALT batteries and chargers of the
proper specifications. Refer to Sections 2.4 and 2.5 of
this manual for additional information.
NOTICE
A separate battery and charger instruction
manual is published by
D
e
WALT
. Refer to this manual for
detailed use and care information and important safety
precautions. Be sure this manual is read and understood
by all persons operating the cutter.
7.2 Battery Charge Indicator
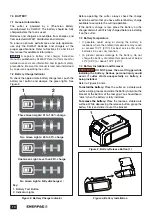
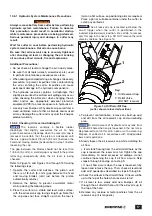
To check the approximate battery charge level, push the
battery test button and observe the green lights. See
Figure 2.
2
1
Three Green Lights: 51 to 100% charge
Two Green Lights: 26 to 50% charge
No Green Lights: Fully discharged
One Green Light: Less than 25% charge
Figure 2, Battery Charge Indicator
Key:
1. Battery Test Button
2. Indicator Lights
Before operating the cutter, always check the charge
level to be certain that you have sufficient battery charge
available to complete the cutting operation.
If the battery charge is low, place the battery on the
charger and wait until it is fully charged before reinstalling
it on the cutter.
7.3 Battery Temperature
• If possible, avoid using or storing the battery in
locations where the ambient temperature may reach
or exceed 104ºF [40ºC]. For best service life, store
batteries in a cool, dry location.
• To prevent serious damage to the battery, do not
charge the battery at ambient temperatures of below
40ºF [4.5ºC] or above 104ºF [40ºC].
7.4 Battery Installation and Removal
NOTICE:
WARNING
DO NOT press the on-off trigger while
installing the battery. Serious personal injury could
occur if cutter starts unexpectedly as battery is
being installed.
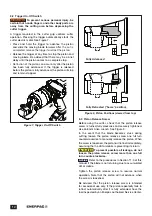
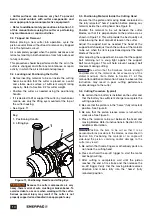
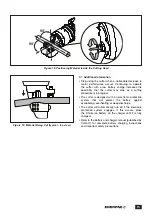
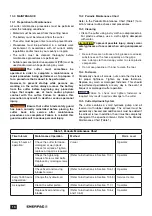
Refer to Figures 3 and 4.
To install the battery:
Place the cutter on a stable work
surface. Align grooves and slide the battery fully onto the
bracket at the bottom of the tool grip. You should hear a
“click” when the battery is fully installed.
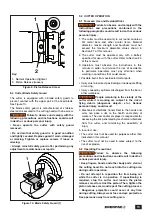
To remove the battery:
Place the tool on a stable work
surface. While depressing the release button, grasp the
battery firmly and slide it out of the bracket.
1
Figure 3, Battery Release Button (1)
Figure 4, Battery Installation
Three Green Lights: 51 to 100% charge
Two Green Lights: 26 to 50% charge
One Green Light: Less than 25% charge
No Green Lights: Fully discharged
Summary of Contents for EBC20B
Page 25: ...25 Notes...
Page 26: ...26 Notes...
Page 27: ...27 Notes...
Page 28: ...199 Gateway Ct Columbus WI 53925 USA www enerpac com Made in Italy WWW ENERPAC COM...


