12
9.6 Positioning Material Inside the Cutting Head
Be sure that the piston and moving blade are located
in the fully retracted “home” position before placing the
chain inside the cutting head. See Figure 7.
Place the chain between the cutter blades, so that it is
perpendicular to the piston axis, as shown in Figure 10.
Position the link to be cut between the blades, so as to
minimize the cutting section. This will provide the best
quality cut while placing the least amount of load on the
cutter.
90°
90°
Figure 10, Positioning Material Inside Cutting Head
NOTICE
Be certain that the parameters of the chain to
be cut do not exceed maximum allowable limits.
Refer to
Section 2.1
of this manual for additional information.
Failure to observe this instruction may result in poor
cutting performance and/or damage to the cutter.
9.7 Cutting Procedure (typical)
1. Make sure the correct fixed blade is installed for
the diameter of the chain being cut. See Using the
Correct Fixed Blade in Section 9.5.
2. Connect the cutter to the electrical outlet.
3. Be sure that the piston is in the “home” (fully retracted)
position. See Figure 7.
4. Be sure that the piston release lever is turned fully
clockwise to position 1. See Figure 8.
5. Open the cutter safety guard. See Opening and
Closing the Safety Cutter Guard in Section 8.2.
6. Place the material to be cut between the fixed and
moving blades. Refer to instructions in Section 9.4 for
additional information.
NOTICE
Some chains contain large links which will
extend above the tops of the blades when the chain is
positioned in the cutting head.
For these chains, the cutting process will need to be
performed twice. Cut one side of the chain link by
following the process described in steps 7 through 10
of this procedure. After the first cut has been made, flip
the chain over and repeat steps 7 through 10 to cut the
other side of the link.
7. Close the cutter safety guard. See Opening and
Closing the Safety Cutter Guard in Section 8.2.
8. Be certain that hands, fingers or other body parts are
not inside the cutting head.
9. Press and hold the trigger to start the motor and begin
cutting.
10. After cutting is completed, release the trigger and
then move the piston release lever counterclockwise
to position 2. See Figure 8.
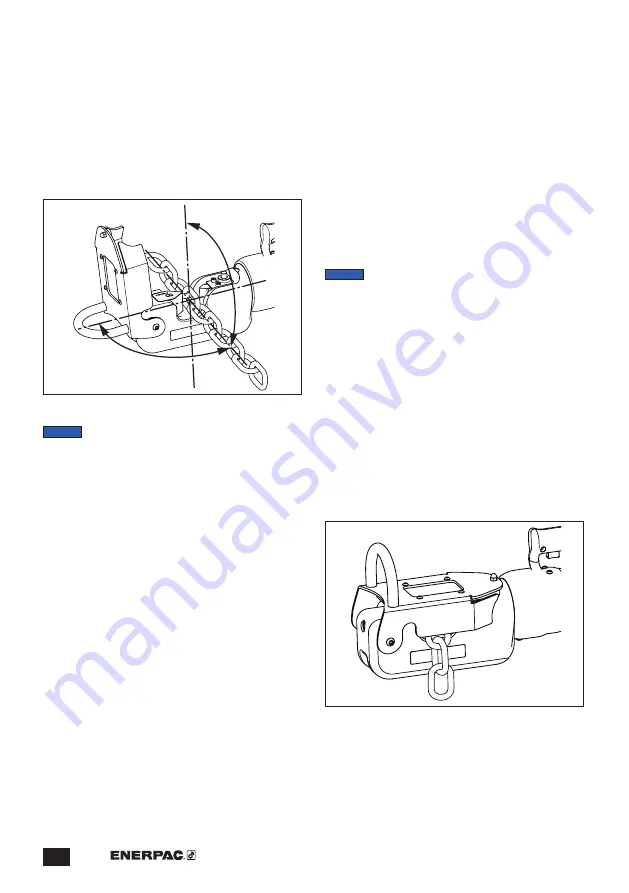
Figure 11, Material Being Cut (typical)
Summary of Contents for ECCE26
Page 24: ...WWW ENERPAC COM...


