6
171 635 04 05-01
03. INSTALLATION
Acceptance inspection
Ensure that everything is delivered and that there is no transport damage.
If there is anything wrong with the delivery, please report it to the supplier.
Any transport damage should be reported to the forwarding company.
Preparations for installation
Ensure that the size and capacity range of the burner are suitable for the
boiler. Power data on the data plate refer to the minimum and maximum
power of the burner.
Distribution of oil
To ensure satisfactory operation it is essential that the oil distribution
system is correct. Observe the following:
- See Pump instructions for choice of tube diameter, tube length and
height difference.
- Fix the tubing with a minimum number of screw i ttings.
- Fix the tubes so that the oil hoses are not subjected to tensile stress
or sharp bending when swinging out the burner or removing it for
service.
- Fit the oil i lter so that the i lter cartridge can easily be replaced, see
Oil i lter Bentone.
Electrical connections
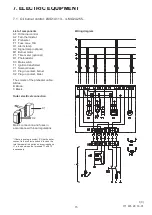
The main power switch must be turned off before beginning the electrical
installation. If the boiler has a 7-pole contact device type Eurostecker it will
most often i t the burner direct. Otherwise use the accompanying contact
device. The operating thermostat and maximum thermostat, and also
any i re-door switch, can then be connected in series with the incoming
phase or be connected between T1 and T2. In the i rst case T1 and T2
are to be strapped.
If another electrical connection is used than the one recommended by
Bentone, there might be a risk of material damage or personal injury.
Choice of nozzle
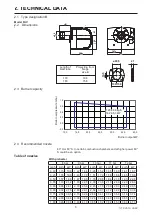
See under Technical Data: Recommended nozzle and table of nozzles.
Setting of the shrouded disc and air fl ow
The burner is pre-set on delivery in relation to the nozzle provided. If the
size of the nozzle is changed the burner can be initially set according
to “Basic settings”. Note that it is only a question of a basic setting that
should be trimmed when the burner is started. This should include a
l uegas analysis and measurement of soot.
!
Warning
3. INSTALLATION
3.1 Acceptance inspection
3.2 Preparations for installation
3.3 Distribution of oil
3.4 Electrical connections
3.5
Setting of the shrouded disc and air low
Summary of Contents for Bentone B1FUV Classic
Page 19: ...19 9 DECLARATION OF CONFORMITY...
Page 21: ...21...
Page 22: ...22...
Page 23: ...23...
Page 24: ...Enertech AB P O Box 309 SE 341 26 Ljungby www bentone se www bentone com...


