176
After completing
the setup wizard
After completing the setup wizard, the integrated heat
pump can be activated. Be sure to pull out the heat pump
transport support rod. (picture 1). Store the transport sup-
port rod for future use. The heat pump is activated from
inside the electrical control box of the Pallas HP eAir unit.
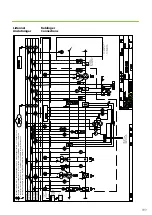
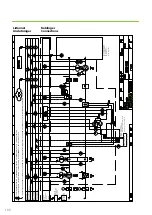
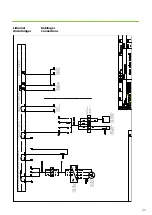
Flip the circuit breaker F1 to on position. (pictures 2 and 3).
Before activating the Pallas HP eAir EnergyBUS unit integ-
rated heat pump, the hydronic system for the EnergyBUS
system and the integrated heat pump plate heat exchan-
ger must be filled with water, and any air trapped in the
EnergyBUS system must be purged.
Before activating the integrated heat pump be sure to
check that the condensation water drains are properly
connected. And that there are no loose or foreign objects
inside the ventilation unit that can prevent the draining of
condensation water.
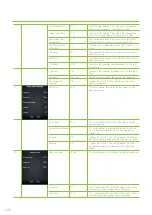
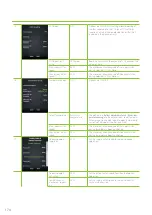
Switch off eAir web
Disables the eAir web web service.
Re-connect eAir
web
Enables a switched off eAir web web service.
Reset PIN code
Generates a new PIN code to the eAir web web
service.
21
DHCP
ON
Options are ON/OFF.
IP address
Gateway IP address
Subnet mask
DNS IP address
2
3
1
Summary of Contents for Pallas eAir EnergyBUS KIW
Page 8: ...8 Kanavaliitännät ulkoilma poistoilma jäteilma tuloilma ...
Page 46: ...46 ...
Page 47: ...47 Ammattilaisen asennusohje ...
Page 48: ...48 Installationsanvisningar för ventilationsaggregat Svenska Pallas HP eAir ...
Page 54: ...54 Kanalanslutningar uteluft frånluft avluft tilluft ...
Page 92: ...92 ...
Page 93: ...Installationsanvisningar för yrkesfolk 93 ...
Page 94: ...94 Installeringsinstruksjoner for ventilasjonsenheten Norsk Pallas HP eAir ...
Page 100: ...100 Kanalanslutningar uteluft avtrekk avkast tilluft ...
Page 138: ...138 ...
Page 139: ...Installasjonsinstrukser for fagfolk 139 ...
Page 140: ...140 Installation instructions for the ventilation unit English Pallas HP eAir ...
Page 146: ...146 Duct connections outdoor air extract air exhaust air supply air ...
Page 183: ...Installation instructions for professionals 183 ...
Page 184: ...184 ...
Page 194: ...194 Koblinger Connections ...
Page 205: ...205 ...


