background image


45925A 

Printed in Canada 

2022-10-06 


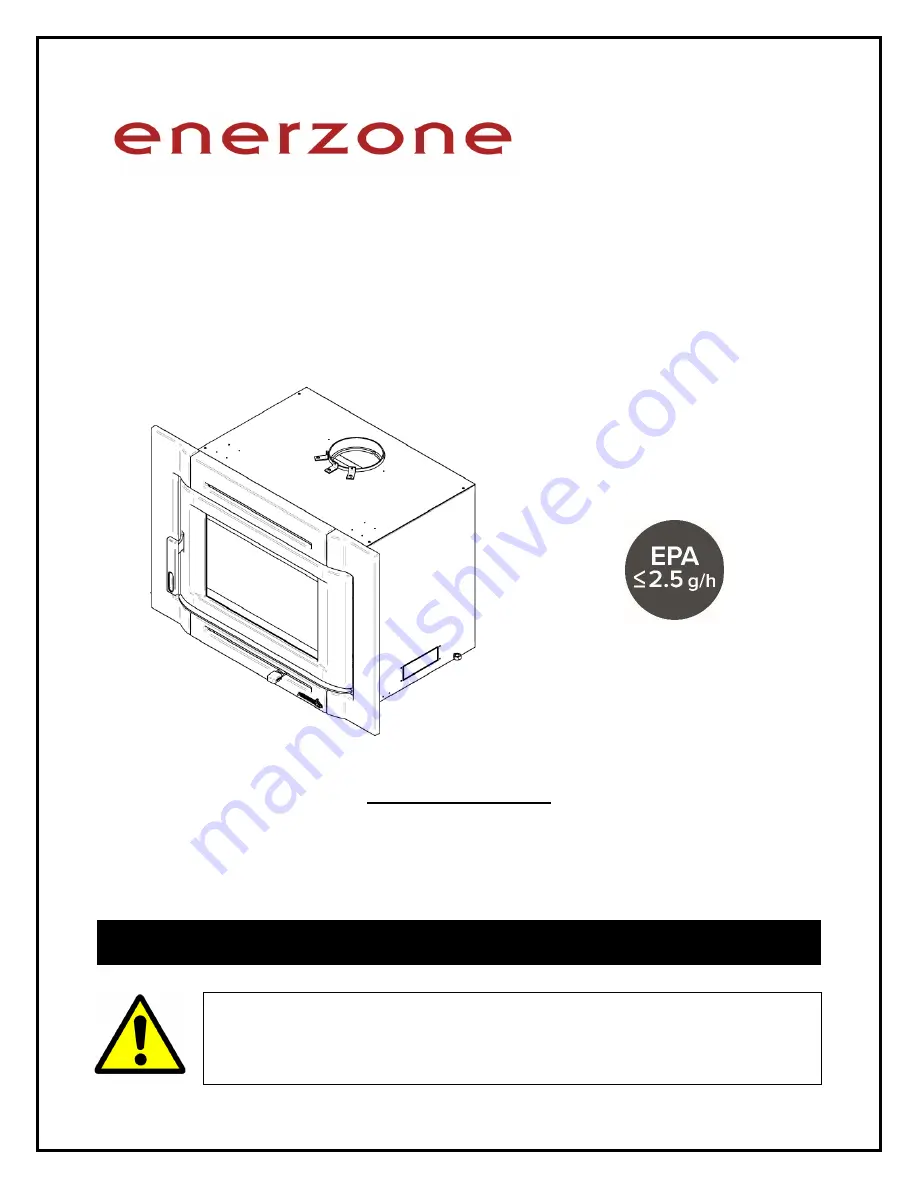
INSTALLATION 

AND OPERATION 

MANUAL


Destination 2.3 

Insert 

(EB00044 model)


US ENVIRONMENTAL 

PROTECTION AGENCY PHASE II 

CERTIFIED WOOD 

INSERT COMPLIANT WITH 2020 

CORD WOOD STANDARD 


Safety tested according to ULC S628, 

UL 737 and UL 1482 Standards  

by an accredited laboratory 


www.enerzone-intl.com 

Stove Builder International Inc. 

250, rue de Copenhague, St-Augustin-de-Desmaures 

(Quebec) Canada  G3A 2H3 

After-sale service: 1-877-356-6663      E-mail: tech@sbi-international.com    

READ AND KEEP THIS MANUAL FOR REFERENCE 

This manual is available for free download on the manufacturer’s web site. It is a copyrighted 

document. Re-sale is strictly prohibited. The manufacturer may update this manual from 

time to time and cannot be responsible for problems, injuries, or damages arising out of the 

use of information contained in any manual obtained from unauthorized sources. 

Summary of Contents for Destination 2.3

Page 1: ...International Inc 250 rue de Copenhague St Augustin de Desmaures Quebec Canada G3A 2H3 After sale service 1 877 356 6663 E mail tech sbi international com READ AND KEEP THIS MANUAL FOR REFERENCE This manual is available for free download on the manufacturer s web site It is a copyrighted document Re sale is strictly prohibited The manufacturer may update this manual from time to time and cannot be...

Page 2: ...ly installed combustible materials near it may overheat To reduce the risk of fire follow the installation instructions in this manual exactly Contact local building or fire officials about restrictions and installation inspection requirements in your area Please read this entire manual before you install and use your new insert You may need to get a building permit for the installation of this in...

Page 3: ... Good Firewood 14 3 1 1 What is Good Firewood 14 3 1 2 Tree Species 14 3 1 3 Log Length 15 3 1 4 Piece Size 15 3 1 5 How to Dry Firewood 15 3 1 6 Judging Firewood Moisture Content 16 3 2 Manufactured Logs 16 4 Operating the Insert 16 4 1 Before Operating the Insert 16 4 2 The Use of a Fire Screen 17 4 3 Blower Operation 17 5 Burning Wood Efficiently 18 5 1 The First Fires 18 5 2 Lighting Fires 18 ...

Page 4: ...imney Cleaning is Necessary 27 6 2 2 How Often Should You Clean the Chimney 27 6 2 3 Cleaning the Chimney 27 PART B INSTALLATION 28 7 Masonry Fireplace Requirements 28 8 Safety Information and Standards 29 8 1 Regulations Covering Insert Installation 29 9 Clearances to Combustible Material 30 9 1 Certification Label 30 9 2 Masonry fireplace throat damper 30 9 3 Installation of a Combustible Mantel...

Page 5: ...ndix 4 Installing the Optional Fire Screen 47 Appendix 5 Log retainers installation 48 Appendix 6 Installation of Secondary Air Tubes and Baffle 49 Appendix 7 Removal instructions 51 Appendix 8 Exploded Diagram and Parts List 52 ENERZONE LIMITED LIFETIME WARRANTY Erreur Signet non défini Dealer _______________________________________________ Installer ______________________________________________...

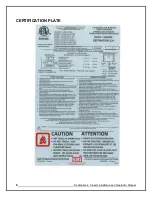
Page 6: ...6 Destination 2 3 Insert Installation and Operation Manual CERTIFICATION PLATE ...

Page 7: ...e the insert unattended when the door is opened with or without fire screen NEVER USE GASOLINE LANTERN FUEL NAPHTHA FUEL OIL MOTOR OIL KEROSENE CHARCOAL LIGHTER FLUID OR SIMILAR LIQUIDS OR AEROSOLS TO START A FIRE IN THIS INSERT KEEP ALL SUCH LIQUIDS OR AEROSOLS WELL AWAY FROM THE INSERT WHILE IT IS IN USE Do not store fuel within heater minimum installation clearances Burn only seasoned natural f...

Page 8: ...eating area firebox volume maximum burn time and maximum heat output 2 The overall firebox calculation is an approximation and is not intended to be used for loading This volume includes a buffer zone to allow an easier fuel insertion prevent ash spillage and allow the air wash to work properly 3 The maximum heat output dry cordwood is based on a loading density varying between 15 lb ft3 and 20 lb...

Page 9: ...ard safety UL 1482 UL 737 Canadian standard safety ULC S628 East west through the door you see the longitudinal sides of the logs north south through the door you see the tips of the logs Mobile home Canada or manufactured home USA The US department of Housing and Urban Development describes manufactured homes better known as mobile homes as followed buildings built on fixed wheels and those trans...

Page 10: ...10 Destination 2 3 Insert Installation and Operation Manual 2 3 Dimensions ...

Page 11: ...n the air control pull the air control handle completely High This will increase the burn rate To close the air control push the air control handle completely Low This will decrease the burn rate 2 4 2 High burn rate Open the air control completely Place height small pieces 2 x 2 of wood in the firebox crossing them at the greatest possible angle Criss cross 10 to 16 kindling wood pieces on the sm...

Page 12: ...connect to that area although to a lower temperature This is called zone heating and it is an increasingly popular way to heat homes or spaces within homes Zone heating can be used to supplement another heating system by heating a particular space within a home such as a basement family room or an addition that lacks another heat source Houses of moderate size and relatively new construction can b...

Page 13: ...ing on your insert is very thin Its VOC content Volatile Organic Compounds is very low VOCs can be responsible for smog so all the paint used during the manufacturing process meets the latest air quality requirements regarding VOC reduction or elimination The air tubes are stainless steel which can also be recycled The C Cast baffle is made of an aluminosilicate fibre material that is compressed w...

Page 14: ... firewood from various tree species is the density of the wood Hardwoods are denser than softwoods People who live in the coldest regions of North America usually have only spruce birch and poplar other low density species to burn and yet they can heat their homes successfully Homeowners with access to both hardwood and softwood fuel sometimes use both types for different purposes For example soft...

Page 15: ...range of sizes makes starting and rekindling fires much easier Often the firewood purchased from commercial suppliers is not split finely enough for convenient stoking It is sometimes advisable to resplit the wood before stacking to dry 3 1 5 How to Dry Firewood Firewood that is not dry enough to burn is the cause of most complaints about wood inserts Continually burning green or unseasoned wood p...

Page 16: ...h lighter in weight than wet wood Split a piece and if the fresh face feels warm and dry it is dry enough to burn if it feels damp it is too wet Burn a piece wet wood hisses and sizzles in the fire and dry wood does not A wood moisture meter can be bought to test your firewood 3 2 Manufactured Logs Do not burn manufactured logs made of wax impregnated sawdust or logs with any chemical additives Ma...

Page 17: ...ential causes of smoke spillage are described in Section 10 The Venting System of this manual See Appendix 4 Installing the Fire Screen for installation instructions 4 3 Blower Operation A blower is already installed on this insert It is located underneath the insert behind the bottom faceplate Its function is to increase airflow through the heat exchanger and improve hot air circulation in the ro...

Page 18: ... is no longer any paint smell from the insert Once the paint smell disappears your insert is ready for serious heating 5 2 Lighting Fires Each person who heats with wood develops their own favorite way to light fires Whatever method you choose your goal should be to get a hot fire burning quickly A fire that starts fast produces less smoke and deposits less creosote in the chimney Here are three p...

Page 19: ... is not necessary to build up the fire gradually since the firebox is loaded before the fire is lit A top down fire can burn for two hours or more The top down method works properly only if well seasoned wood is used Three or four full sized split pieces of dry firewood are placed in the firebox Then 4 or 5 more finely split pieces of firewood 2 to 3 50 mm to 75 mm in diameter are placed on the to...

Page 20: ...t radiated from one piece helps to ignite the pieces next to it Each load of wood should provide several hours of heating The size of each load may vary depending on the amount of heat required Burning in cycles means the insert door does not need to be opened while the wood is flaming This is an advantage since it is preventing smoke leaking from the insert when the door is opened as a full fire ...

Page 21: ...components so they reflect heat back to the fire and Heats the chimney so it can produce strong steady draft for the rest of the cycle Although it is important to fire each new load hot to prepare for a clean burn do not allow the fire to burn at full intensity for more than a few minutes DO NOT LEAVE THE INSERT UNATTENDED WHILE A NEW LOAD IS BEING FIRED HOT DO NOT OVERFIRE When you burn a new loa...

Page 22: ...the insert and should provide enough heat for four hours or more Small fires like this are a good time to use softer wood species so there will be less chance of overheating the house 5 4 2 Long Lasting Low Output Fires Sometimes you will want to build a fire to last up to eight hours but don t need intense heat In this case use soft wood species and place the logs compactly in the firebox so the ...

Page 23: ...n of efficient insert operation It is preferable to build a smaller fire that will provide three or four hours of heating than to fully load the firebox for a much longer burn Shorter burn cycles make it easier to match the heat output of the insert to the heat demand of the space 5 4 5 Logs Orientation In a relatively square firebox the wood can be loaded north south ends of the logs visible or e...

Page 24: ... try to clean the glass when the insert is hot In spring and fall when the insert runs at lower temperatures light brown stains may form especially in the lower corners of the glass This indicates that the fire has been smoky and some of the smoke has condensed on the glass It also indicates incomplete combustion of the wood which also means more smoke emissions and faster formation of creosote in...

Page 25: ...ondition of the door gasket by closing and latching the door on a strip of paper Test all around the door If the paper slips out easily anywhere it is time to replace the gasket Use the correct replacement gasket that you can purchase from your retailer The diameter and density of the gasket is important to getting a good seal Place the door face down on something soft like a cushion of rags or pi...

Page 26: ...ss the next section onto the gasket Do not stretch the gasket as you place it Continue until you get to the start and trim the gasket to length Now pinch the gasket to the glass in a U shape all around the glass Reinstall the glass being careful to centre the glass carefully in the door Do not over tighten the screws The two main causes of broken door glass are uneven placement in the door and ove...

Page 27: ...your chimney It is important therefore to check the build up in your chimney monthly when getting used to the new insert until you determine the rate of creosote formation Even if creosote forms slowly in your system the chimney should be cleaned and inspected at least once each year Contact your local municipal or provincial fire authority for information on how to handle a chimney fire Have a cl...

Page 28: ...teel including the damper plate may be removed from the smoke shelf and adjacent damper frame if necessary to accommodate the insert s chimney liner provided that their removal will not weaken the structure of the fireplace and chimney and will not reduce protection for combustible materials to less than that required by the building code CHIMNEY CAPS Mesh type chimney caps must have provision for...

Page 29: ...KS OR MORTAR FROM THE EXISTING FIREPLACE WHEN INSTALLING THE INSERT TO BE INSTALLED AS A FREESTANDING ROOM HEATER WITH THE CLEARANCES IN THE MANUFACTURER S INSTALLATION INSTRUCTIONS IT IS STRICTLY FORBIDDEN TO INSTALL THIS ROOM HEATER IN ANY FACTORY BUILT FIREPLACE 8 1 Regulations Covering Insert Installation When installed and operated as described in these instructions the Destination 2 3 wood i...

Page 30: ...afe and compliant installation The model and the serial number can also be found on the label The certification label is usually located on the side of the insert towards the front The faceplate may need to be removed to see it Therefore it is recommended to note the insert serial number on page 4 of this manual It will be needed to identify the version of the appliance in the event replacement pa...

Page 31: ...27 mm higher than the combustible floor in front of it and a floor protection must extend at least 16 406 mm USA and at least 18 457 mm Canada without an R value If the hearth elevation is lower than 5 127 mm the non combustible floor protector in front of the insert should have an R value equal or greater than 1 00 and shall extend 23 584 mm in front of the unit To determine the need to add floor...

Page 32: ...g If the value D is negative or zero additional floor protection in front of the unit is not needed because the masonry fireplace hearth extension is large enough If the value D is positive an additional floor protection in front of the hearth extension at least equivalent to the result D must be added 9 4 1 Installation Raised of 5 and Less If non combustible material floor protection needs to be...

Page 33: ... from the floor protection a non combustible material without an R value must extend at least 16 406 mm in USA or 18 457 mm in Canada in front of the unit 9 4 3 R Value There are two ways to calculate the R value of the floor protection First by adding the R values of materials used or by the conversion if the K factor and thickness of the floor protection are given ...

Page 34: ...50 0 950 Mineral wool insulation 0 320 3 120 Limestone 6 5 0 153 Ceramic board Fibremax 0 450 2 2 Horizontal still air 1 8 0 135 0 920 Information as reported by manufacturers and other resources Horizontal still air can t be stack to accumulate R values each layer must be separated with another non combustible material Example Required floor protection R of 1 00 Proposed materials four inches of ...

Page 35: ...H 27 686 mm I 27 686 mm Q 84 213 cm MINIMUM MASONRY OPENING J 23 3 4 603 mm K 28 7 8 733 mm L 19 5 8 498 mm MAXIMUM THICKNESS O 5 127 mm P 12 305 mm Where a fresh air intake is needed we suggest you add a minimum of 4 to the width of the minimum masonry opening If projection kit is used L 17 5 8 or 15 5 8 If installed without projection kit L 19 5 8 ...

Page 36: ...the flue gas can be seen as the fuel the chimney uses to create draft 10 2 Block Off Plate To reduce the possibility of a cold air back draft from the masonry chimney into the room the installation of a sheet metal block off plate A is recommended When fabricating the block off plate cut the pipe hole slightly larger than the liner diameter and pass the liner through the hole Install the block off...

Page 37: ...igid or flexible to ensure satisfactory performance To ensure an optimal draft we also strongly recommend adding a minimum of 12 rigid liner between the top of the masonry chimney and the rain cap In all cases liners should be installed in accordance with the liner manufacturer s instructions including instructions for extension above the masonry Use Listed Chimney Liners UL 1777 CAN ULC S635 or S...

Page 38: ...nstructions In order to connect the chimney liner starter adapter to the flue outlet install three brackets with the three screws all provided in the user manual on top of the insert The long end of the brackets must be attached to the insert Insert the chimney liner into the flue collar of the unit and secure the liner to the brackets with three self tapping screws not included The dealer may off...

Page 39: ...r reloading When installing a liner offset adapter secure the three brackets provided in the user manual on top of the insert The long end of the brackets must be attached to the insert Then follow the instructions in the manual provided with the liner offset adapter kit 10 6 Minimum Chimney Height The top of the chimney should be tall enough to be above the air turbulence caused when wind blows a...

Page 40: ...heated space of the house meaning the negative pressure low in the house will pull outside air down the chimney through the insert and into the room Even the finest insert will not work well when connected to this chimney 10 8 Supply of Combustion Air In Canada wood inserts are not required to have a supply of combustion air from outdoors because research has shown that these supplies do not give ...

Page 41: ... in particular if smoke puffs from the insert the air duct should be disconnected from the insert to determine if it is the cause of the problem In some windy conditions negative pressure at the duct weather hood outside the house wall may draw hot exhaust gases from the insert backwards through the duct to outdoors Check the outdoor air duct for soot deposits when the full system is cleaned and i...

Page 42: ...cated on the left or right side of the convection air jacket Choose the side that is best for your installation Then install the fresh air kit adapter B using 4 screws C Secure the flexible pipe1 E to the adapter B using one of the adjustable pipe clamps D Secure the other end of the pipe to the outside wall termination F using the second adjustable pipe clamp D The outside wall termination F must...

Page 43: ...late kit follow the instructions included with these options before beginning the installation of the cast iron faceplate 1 Remove the steel faceplate already installed on the insert 2 Put together the steel face plate with the two parts of the cast iron faceplate 3 Pull gently on the blower switch assembly It is very important not to disconnect the wires 4 Approach the faceplate and screw the blo...

Page 44: ...nstall the faceplate on the insert being careful not to pinch the blower switch wires 6 Remove the air control wooden handle 7 Slightly unscrew the two screws at the bottom of the insert Hook the bottom faceplate and screw it back in place Reinstall the wood handle ...

Page 45: ...eplacement 1 Slightly loosen screws B 2 Lift the faceplate A by 1 2 then pull it towards you to remove 3 Slightly loosen the 4 wings nut C then pull the blower assembly D towards you to remove it from the convection air jacket Make sure to disconnect the wiring as it is accessible ...

Page 46: ...46 Destination 2 3 Insert Installation and Operation Manual ...

Page 47: ...or opening Lean the upper part of the fire screen against the top door opening making sure to insert the top fire screen brackets behind the primary air deflector as in DETAIL A Lift the fire screen upwards and push the bottom part towards the insert then let the fire screen rest on the bottom of the door opening Warning Never leave the insert unattended while in use with the fire screen ...

Page 48: ...48 Destination 2 3 Insert Installation and Operation Manual Appendix 5 Log retainers installation 1 2 3 ...

Page 49: ...ght end of the secondary air tube into the rear right channel hole Then lift and insert the left end of the tube into the rear left channel 2 Align the notch in the left end of the tube with the key of the left air channel hole Using a Wise grip hold the tube and lock it in place by turning the tube as shown in DETAIL A Make sure the notch reaches the end of the key way ...

Page 50: ...l 3 Repeat steps 1 and 2 for the two tubes in the back then install the baffle before installing the two front tubes 4 To remove the tubes use the above steps in reverse order Note that secondary air tubes B can be replaced without removing the baffle board A ...

Page 51: ...instructions Remove the faceplate assembly A using the reverse steps of Appendix 2 If installed take off the backing plates B and C and the projection kit by removing the front screws securing them to the insert Remove the screws that secure the chimney liner to the fixation brackets E Unscrew the leveling bolts F located on each side of the insert Pull out the insert from the fireplace opening to...

Page 52: ...52 Destination 2 3 Insert Installation and Operation Manual Appendix 8 Exploded Diagram and Parts List ...

Page 53: ...E BACKING PLATE 50 X 6 1 11 AC01321 BOTTOM FACEPLATE BACKING PLATE 44 X 6 1 12 AC01322 29 X 44 FACEPLATE BACKING PLATE KIT 1 12 AC01332 29 X 50 FACEPLATE BACKING PLATE KIT 1 13 AC01323 2 OR 4 PROJECTION KIT FOR INSERT 1 14 AC09145 BLACK WOODEN DOOR HANDLE 1 15 30123 SCREW 8 32 X 5 8 PAN QUADREX ZINC 2 16 30766 WOODEN CAP HANDLE 1 17 30094 HEX SCREW WASHER HEAD 1 4 20 X 3 4 F ZINC TYPE 2 18 SE65079...

Page 54: ... 1 53 44092 3 POSITION ROCKER SWITCH 1 54 PL65752 SWITCH BRACKET 1 55 PL65629 JUNCTION BOX COVER 1 56 60013 POWER CORD 96 X 18 3 type SJT 50 pcs per carton 1 57 PL65627 JUNCTION BOX 1 58 30413 SNAP BUSHING 1 59 PL65626 FAN WIRE GUIDE 1 60 30484 WING NUT 1 4 20 4 61 44028 CERAMIC THERMODISC F110 20F 1 62 PL65632 THERMODISC CASING 1 63 PL65746 FAN BOTTOM FIXATION PLATE 1 64 44075 TANGENTIAL BLOWER 1...

Page 55: ...Destination 2 3 Insert Installation and Operation Manual 55 ...

Page 56: ...56 Destination 2 3 Insert Installation and Operation Manual ...

Reviews: