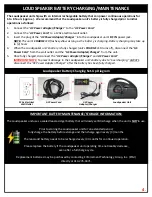
LOUDSPEAKER OVERVIEW/CONTROLS
4
5
9
3
6
7
1
3
4
7
8
2
5
6
1
The
WIRELESS AUDIO RECIEVER
PLUG
allows unit to receive/
project audio signals transmitted
by the “
VHF Wireless Transmitter
Pack
.”
IMPORTANT NOTE
:
The
WIRELESS AUDIO RECIEVER PLUG
must
be inserted into the
LINE IN
jack for the unit to be capable of
receiving audio signals
transmitted by the “
VHF Wireless
Transmitter Pack
” (illustrated
below).
If the
WIRELESS AUDIO RECIEVER
PLUG
is
not
inserted into the
LINE
IN
jack, the unit will
not
receive/project audio signals
transmitted by the “
VHF Wireless
Transmitter Pack.”
See the
“
REMOTE/RF WIRELESS
OPERATIONS
” section of this
manual for more information.
2
COMPARTMENT FOR BATTERY
AND SHOULDER STRAP
To insert the battery, open the
compartment’s cover. The
bottom half of the compartment
is used for the battery. Open
the latch to access the battery
compartment.
Insert battery as follows:
The terminals
must
face the unit
with the positive terminal (red)
on the side of the unit’s control
panel (to the left, as seen from
the rear panel). Insert battery
and close the latch. Close the
battery compartment.
IMPORTANT NOTE
:
The unit
ships with an internal
rechargeable battery that can
power continuous operations for
6 to 8 hours (approx.). We
recommend that battery is fully
charged prior to initial
operations. See the
“
LOUDSPEAKER BATTERY
CHARGING/MAINTENANCE
”
section of this manual for more
information
The rotary
MIC LEVEL
dial
allows operator to adjust the
volume projection level of the
unit.
POWER
switch turns the
unit on and off. When
turned on, the LED of the
switch lights up.
LOW BAT
LED indicates
that the rechargeable
battery needs to be
charged.
CHARGE
LED flashes
yellow as long as the
rechargeable battery is
charging. It turns off when
the battery is fully charged.
Connect the supplied
“
Handheld Microphone
with ¼” (6.35mm) Plug
”
to the
MIC IN
jack for
“
LOCAL/ WIRED
OPERATIONS
.”
Connect an external audio
source (Digital Voice
Recorder, CD player, MP3
player, etc.) to the
LINE IN
jack for “
LOCAL/WIRED
OPERATIONS
.”
Connect the power supply
via the polarized
DC IN
connector. A fitting power
adapter is supplied. Use
the device only with the
included power supply.
9
8
2.

