REMOTE/RF WIRELESS OPERATIONS:
To project an external audio source (Digital Voice Recorder, CD player, MP3 player, etc.) wirelessly through the
Loudspeaker unit, please follow the instructions below:
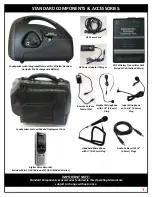
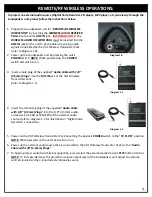
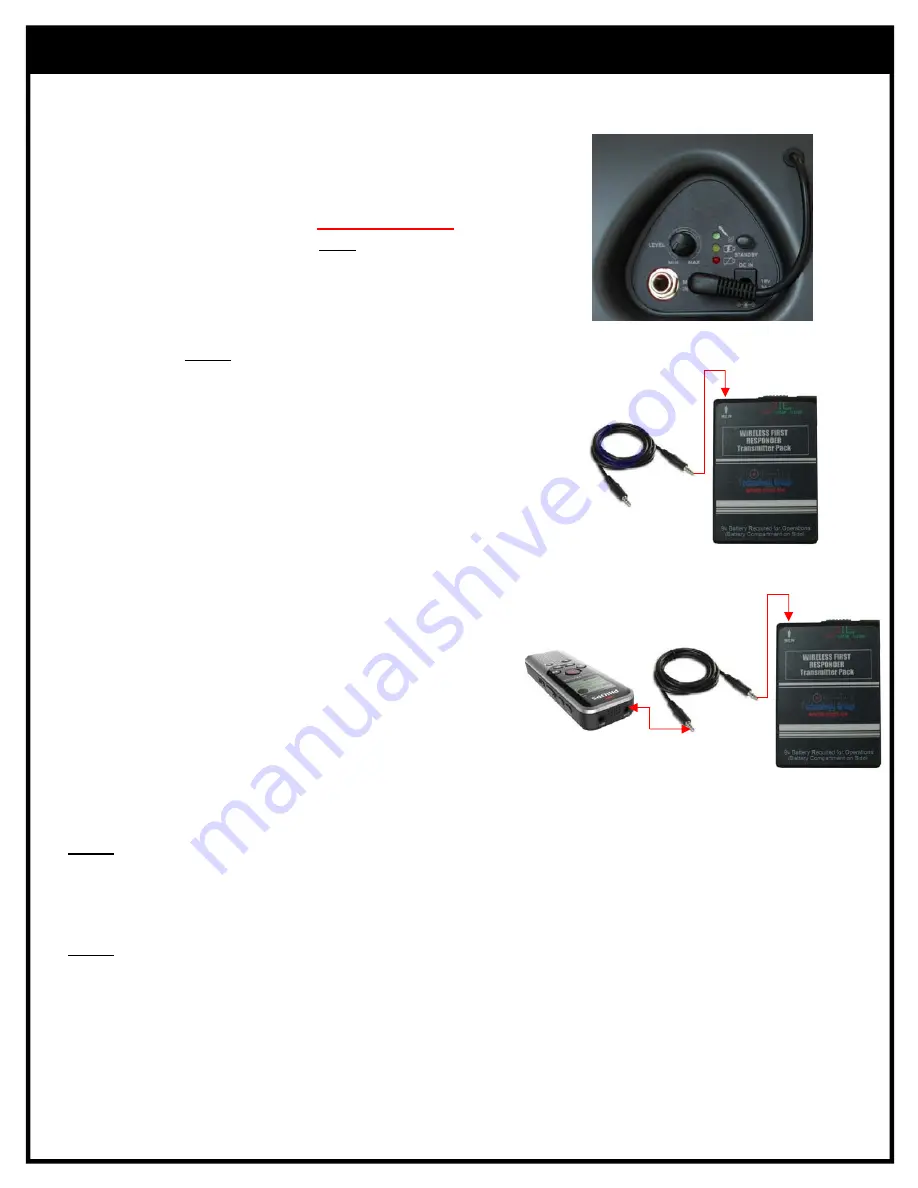
1. Prepare the Loudspeaker unit for “
REMOTE/RF WIRELESS
OPERATIONS
” by inserting the
WIRELESS AUDIO RECEIVER
PLUG
into the unit’s
LINE IN
jack.
IMPORTANT NOTE
:
The
WIRELESS AUDIO RECIEVER PLUG
must be inserted into the
LINE IN
jack for the unit to be capable of receiving audio
signals transmitted by the VHF Wireless Transmitter Pack
(refer to diagram 1.0).
Diagram 1.0
2. Power up the Loudspeaker unit by pressing the unit’s
POWER
switch.
NOTE:
When powered up, the
POWER
switch LED will turn on.
5. Power on the VHF Wireless Transmitter Pack by setting the device’s
POWER
switch to the “
TX F1 ON
” position.
NOTE:
When powered on the unit’s LED will turn on.
6. Power up the external audio source that is connected to the VHF Wireless Transmitter Pack via the “
Audio
Cable with 1/8” (3.5mm) Plugs
.”
7. To begin wireless audio transmission/projection, press/select the external audio device’s
PLAY
button/control.
NOTE:
To increase/decrease the projection volume output level of the Loudspeaker unit, adjust the volume
controls located on the connected external audio source.
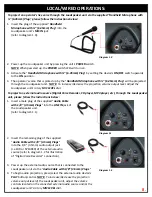
3. Insert a male plug of the supplied “
Audio Cable with 1/8”
(3.5mm) Plugs
” into the
MIC IN
jack of the VHF Wireless
Transmitter Pack
(refer to diagram 1.1).
4. Insert the remaining plug of the supplied “
Audio Cable
with 1/8” (3.5mm) Plugs
” into the 1/8” (3.5mm) audio
output jack (i.e EAR or SPEAKER) of the external audio
source (refer to diagram 1.2 for illustration of “Digital Voice
Recorder” connection).
Diagram 1.1
Diagram 1.2
7.


