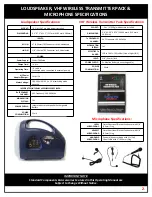
LOUDSPEAKER BATTERY CHARGING:
The Loudspeaker and its internal/integrated VHF Wireless Receiver are powered by a 12v rechargeable battery.
1.
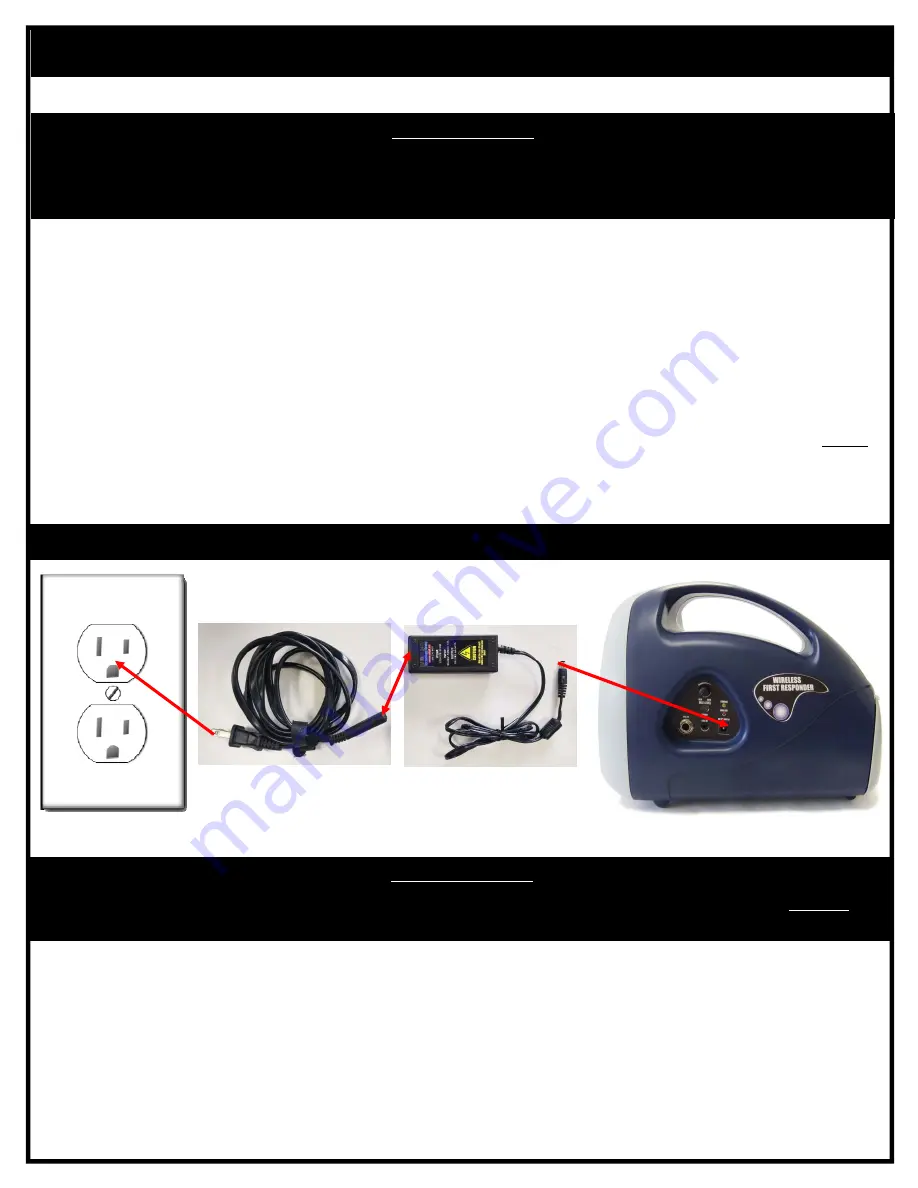
Connect the “
AC Power Adapter/Charger
”
to the “
AC Power Cord
.”
2.
Connect the “
AC Power Cable
”
to a 120v electrical wall outlet.
3.
Insert the plug of the “
AC Power Adapter/Charger
”
into the Loudspeaker unit’s “
DC IN
” power jack (located
on side).
4.
Leave the Loudspeaker unit connected to the external power supply until the battery is fully charged.
NOTE:
Battery charging may take up to (4) hours. The charge level of the battery may be checked by pressing the
Loudspeaker unit’s "
CHECK BATTERY LEVEL
" button (located on top).
5.
Once fully charged, disconnect the “
AC Power Adapter/Charger
” and
AC Power Cord
.“
IMPORTANT NOTE:
To help prevent damage to the Loudspeaker unit’s rechargeable battery due to “overcharging,” ALWAYS
disconnect the “AC Power Adapter/Charger” from the unit once battery charging is complete.
When the Loudspeaker unit’s 12v rechargeable battery is fully charged, the unit may be operated for approx. 6 to 8
hours. An unlimited Loudspeaker operating time may be achieved when the Loudspeaker is connected to an
external power supply via the “
AC Power Adapter/Charger
” and “
AC Power Cord
.”
To charge the Loudspeaker unit’s 12v rechargeable battery, please follow these steps:
Loudspeaker Battery Charging Set‐Up Diagram
IMPORTANT NOTE:
To maximize the ability for the Loudspeaker unit’s battery to properly maintain a charge, please follow the
“LOUDSPEAKER BATTERY CHARGING” procedures provided below prior to initial operations and consequently
each time the unit has been deployed/used.
AC Power
Adapter/Charger
AC
Power Cord
120v Electrical
Wall Outlet
Loudspeaker
4.


