background image

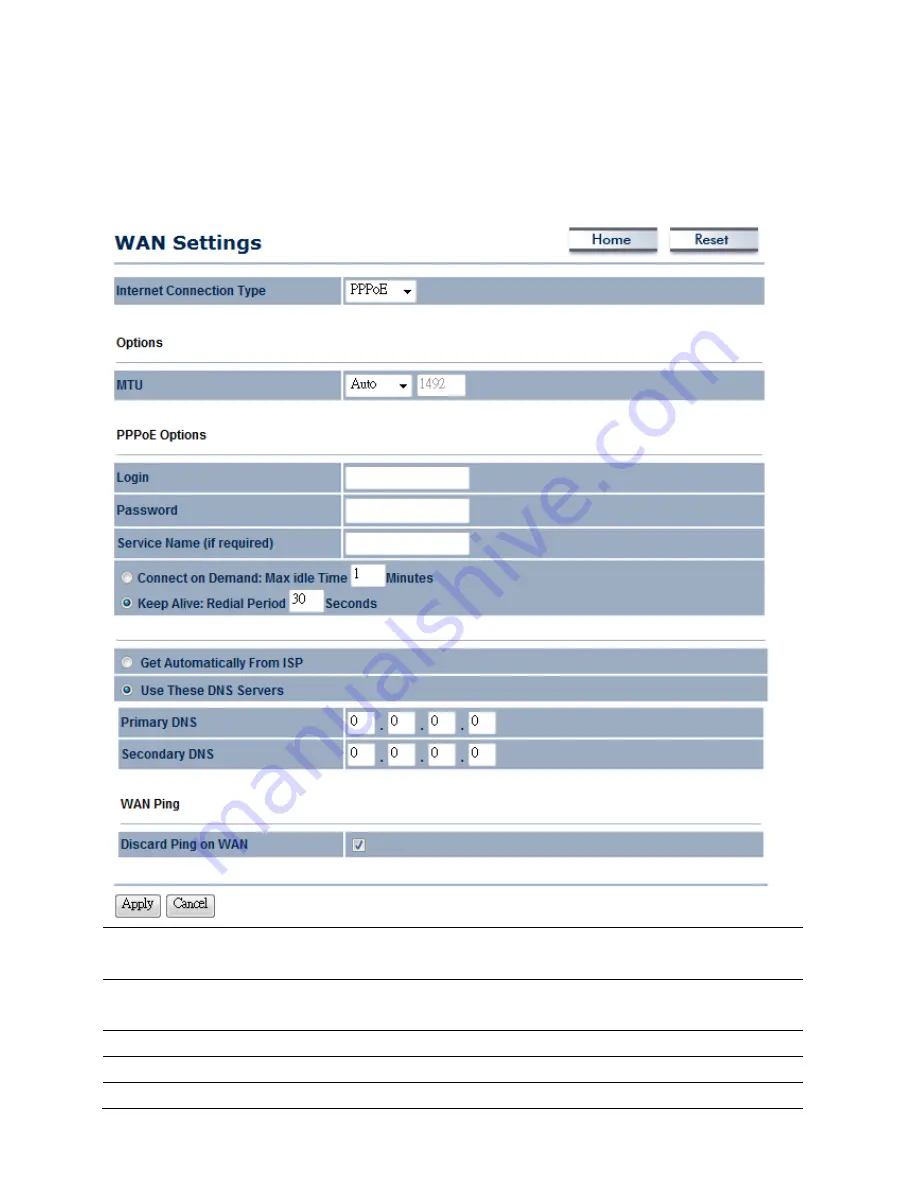
8.1.3 PPPoE (Point-to-Point Protocol over Ethernet) 

Select 

PPPoE

 as your WAN connection type if your ISP provides a Username and Password. If 

the PPPoE is a DSL service, please remove the PPPoE software from your computer as the 
software is not necessary with the use of the ENH200EXT. 


Internet Connection 
Type 

Select 

PPPoE

 to begin configuration of the PPPoE connection. 

MTU 

Specify the Maximum Transmit Unit size. EnGenius recommends 
that it remains in Auto. 

Login 

Specify the 

Username

 that is given by your ISP. 

Password 

Specify the 

Password

 that is given by your ISP. 

Service Name 

Specify the 

Service Name

 that is given by your ISP. 

Summary of Contents for ENH200EXT

Page 1: ...LONG RANGE WIRELESS ACCESS POINT CLIENT BRIDGE Model ENH200EXT User Manual Version 2 0 ...

Page 2: ...ODE 14 3 CONFIGURING YOUR COMPUTER FOR TCP IP 16 3 1 CONFIGURING MICROSOFT WINDOWS 7 16 3 2 CONFIGURING MICROSOFT WINDOWS VISTA 18 3 3 CONFIGURING MICROSOFT WINDOWS XP 20 3 4 CONFIGURING APPLE MAC OS X 21 3 5 LOGGING INTO THE ENH200EXT 22 4 STATUS 23 4 1 SAVE LOAD 23 4 2 MAIN 24 4 3 WIRELESS CLIENT LIST 25 4 4 SYSTEM LOG 25 4 5 CONNECTION STATUS 26 4 6 DHCP CLIENT TABLE 26 5 SYSTEM 27 5 1 SWITCHIN...

Page 3: ...c IP 50 8 1 2 DHCP Dynamic IP 52 8 1 3 PPPoE Point to Point Protocol over Ethernet 54 8 1 4 PPTP Point to Point Tunneling Protocol 56 8 2 LAN SETTINGS ROUTER MODE 58 8 3 VPN PASS THROUGH 59 8 4 PORT FORWARDING 60 8 5 DMZ 61 9 MANAGEMENT SETTINGS 62 9 1 ADMINISTRATION 62 9 2 MANAGEMENT VLAN 63 9 3 SNMP SETTINGS 64 9 4 BACKUP RESTORE SETTINGS 65 9 5 FIRMWARE UPGRADE 65 9 6 TIME SETTINGS 66 9 7 LOG 6...

Page 4: ...CONTACTING TECHNICAL SUPPORT 74 APPENDIX B SPECIFICATIONS 75 APPENDIX C GLOSSARY 77 APPENDIX D STATEMENTS OF CONFORMITY 82 D 1 FEDERAL COMMUNICATION COMMISSION INTERFERENCE STATEMENT 82 D 2 INDUSTRY CANADA STATEMENT 83 D 3 EUROPE DECLARATION OF CONFORMITY 84 ...

Page 5: ...nd highlight special messages Formats Caution This symbol represents a vital message and it is critical for the device or settings Note This symbol represents an important message for the settings Tip This symbol represents an alternative choice that can save time or resources The following equipment is required to setup the ENH200EXT Before you start_______________________________________________...

Page 6: ...including Wi Fi Protected Access WPA PSK WPA2 PSK 64 128 152 bit WEP Encryption and IEEE 802 1x with RADIUS The ENH200 is an ideal choice to pair with the ENH200EXT in a client bridge topology The ENH200EXT utilizes a proprietary PoE adapter Only use the supplied PoE adapter Damage may occur if another PoE adapter is used 1 1 Features The following list describes the design and scope of the ENH200...

Page 7: ... Features High Speed Data Rate Up to 150Mbps Capable of handling heavy data payloads such as HD video streaming High Output Power up to 27 dBm Extended range and excellent coverage IEEE 802 11b g n Compliant Fully interoperable with IEEE 802 11 b g n compliant devices Multi Function Users can use different modes in various environments Point to point Point to multipoint Wireless Connectivity Allow...

Page 8: ...supports up to 4 SSIDs on your access point The following options can be set to each SSID Public or private SSID Authentication VLAN identifier RADIUS accounting identifier Profile isolation for infrastructure network VLAN Specify a VLAN number for each SSID to separate the services among clients QoS Use this feature to limit the incoming or outgoing throughput Wi Fi Protected Access Wi Fi Protect...

Page 9: ...sing a power adapter other than the one included with the ENH200EXT may cause damage to the device 1 4 System Requirement The following conditions are the minimum system requirements A computer with an Ethernet interface and operating under Windows XP Vista 7 or Linux An Internet browser that supports HTTP and JavaScript 1 5 Hardware Overview Physical Interface 1 x Port with PoE support 1 x SMA Co...

Page 10: ...N ENH200EXT is connected to the network but not sending or receiving data Blink ENH200EXT is sending or receiving data WLAN Green Access Point or Client Bridge Mode OFF ENH200EXT radio is off and the device is not sending or receiving data over the wireless LAN ON ENH200EXT radio is on and the device is not sending or receiving data over the wireless LAN Blink ENH200EXT radio is on and the device ...

Page 11: ... Point Mode the ENH200EXT functions like a central connection for any stations or clients that support the IEEE 802 11b g n standards Stations and clients must utilize the same SSID and Security Password to associate while within the range The ENH200EXT supports 4 different SSIDs simultaneously ...

Page 12: ...S Link Settings WDS functionality can support up to 8 different AP MAC addresses Not every Access Point supports WDS in Access Point Mode It is recommended to use ENH200EXTs if you would like to utilize this functionality 2 3 Client Bridge Mode In the Client Bridge Mode the ENH200EXT functions like a wireless client connecting to an Access Point wirelessly and enabling Internet connectivity wherev...

Page 13: ...de the ENH200EXT can wirelessly connect to different LANs by simply configuring the MAC Address and Security Settings of other AP s in the WDS list This mode is used when two or more wired LANs are located within a small distance and communication between them is desired The best solution is using ENH200EXTs to wirelessly connect the wired LANs WDS Bridge Mode can establish up to 4 WDS links the n...

Page 14: ...nections otherwise enable the Spanning Tree Function 2 5 Client Router Mode In the Client Router Mode the ENH200EXT features an active DHCP server that allows WLAN clients to share the same Internet connection Ideally have clients wirelessly connect to an AP WISP and connect to LANs via Ethernet Client Router Mode is different from the AP Router Mode It is not a common application however useful w...

Page 15: ......

Page 16: ...r notebook Therefore follow the steps below to assign an IP address to a client s Ethernet adapter 3 1 Configuring Microsoft Windows 7 Use the following procedure to configure a computer running Microsoft Windows 7 1 In the Start menu search box type ncpa cpl 2 When the Network Connections List appears right click the Local Area Connection icon and click Properties 3 In the Networking tab click In...

Page 17: ... e 192 168 1 10 the subnet mask of the ENH200EXT and the default gateway which is the ENH200EXT s IP address 192 168 1 1 Note the subnet mask must match that of the ENH200EXT and the IP address must be on that subnet 5 Click the OK button to save your changes and close the dialog box 6 Click the OK button again to save your changes ...

Page 18: ...con 2 Click View Network Status and tasks and then click Manage Networks Connections 3 Right click the Local Area Connection icon and click Properties 4 Click Continue The Local Area Connection Properties dialog box appears 5 In the Local Area Connection Properties dialog box verify that Internet Protocol TCP IPv4 is checked Then select Internet Protocol TCP IPv4 and click the Properties button Th...

Page 19: ... e 192 168 1 10 the subnet mask of the ENH200EXT and the default gateway which is the ENH200EXT s IP address 192 168 1 1 Note the subnet mask must match that of the ENH200EXT and the IP address must be on that subnet 7 Click the OK button to save your changes and close the dialog box 8 Click the OK button again to save your changes ...

Page 20: ...on Properties dialog box appears 5 In the Local Area Connection Properties dialog box verify that Internet Protocol TCP IP is checked Then select Internet Protocol TCP IP and click the Properties button The Internet Protocol TCP IP Properties dialog box appears 6 In the properties dialog box click Use the following IP address to configure your computer for Static TCP IP Enter an IP address i e 192...

Page 21: ... 2 Verify that the NIC connected to the ENH200 is selected in the Show field 3 In the Configure field on the TCP IP tab select Manually 4 Click Apply Now to apply your settings and close the TCP IP dialog box 5 Enter an IP address i e 192 168 1 10 the subnet mask of the ENH200EXT and the Router which is the ENH200EXT s IP address 192 168 1 1 Note the subnet mask must match that of the ENH200EXT an...

Page 22: ...ur address bar If you have changed the ENH200EXT LAN IP address make sure you enter the correct IP Address 3 After successfully connecting to the ENH200EXT a browser pop up with a Windows Security notice will appear Please enter the correct Username and Password 4 The default Username and Password are both admin If you have changed the Username and Password please enter the correct Username and Pa...

Page 23: ... Each option is described in detail below 4 1 Save Load This page allows viewing of the modified settings The changes will show in the Unsaved changes list You can decide to cancel Revert all the changes or to Save Apply the new settings You cannot cancel specific settings You can only save all of the settings or revert to the previously saved state ...

Page 24: ...n such as operating mode system up time firmware version serial number kernel version and application version are displayed in the System section LAN IP address subnet mask and MAC address are displayed in the LAN section In the Wireless section the frequency and channel are displayed Since this device supports multiple SSIDs the details of each SSID such as ESSID and its security settings are dis...

Page 25: ... strength for each client is displayed Click on the Refresh button to refresh the client list 4 4 System Log Click on the System Log link under the Status drop down menu The device automatically records events in its internal memory When there is not enough internal memory for all of the most recent events events are deleted in descending chronological order so that the latest events may be retain...

Page 26: ...tus Wireless Mode Current Channel Security Data Rate Current noise level and Signal strength 4 6 DHCP Client Table Click on the DHCP Client List link under the Status drop down menu This page displays the list of Clients that are associated to the ENH200EXT through DHCP The MAC addresses and signal strength for each client is displayed Click on the Refresh button to refresh the client list ...

Page 27: ... the broadcast SSID this will be shown in SNMP management Country Region Select a Country Region to conform to local regulations Operation Mode Select an operation mode via a Radio Button Click Accept to confirm the changes Accept does not apply the changes you must go to Status Save Load to apply the new settings Please refer to Chapter 4 1 for more information If you would like to use Access Poi...

Page 28: ...e settings could lower the performance or affect the stability of your network Before continuing please make sure you have chosen the correct operating mode 6 1 Wireless Settings This section contains the basic wireless settings Please read the description carefully and consult Chapter 10 for more detailed information 6 1 1 Access Point Mode ...

Page 29: ... enable Auto channel selection AP Detection AP Detection can help to select a best channel by scanning the nearby area Current Profile Configure up to four different SSIDs it allows for the division of clients into separate groups to access the network Press Edit to configure the profile and place a check to enable an additional SSID Profile Isolation Restrict client communications with different ...

Page 30: ...o hide the SSID Clients will not be able to see the broadcast SSID in Site Survey Station Separation Select the Radio button to allow deny clients to communicate with one another Wireless Security Please refer to the Wireless Security section Save Cancel Press Save to save the changes or Cancel to return previous settings ...

Page 31: ...elect the AP to establish a connection Prefer BSSID Specify the MAC address if known The Prefer BSSID check box will be automatically filled in when an AP in the Site Survey is selected WDS Client Select a Radio button to Enable Disable WDS Client Wireless Security Please refer to Chapter 6 2 for details Accept Cancel Press Accept to confirm the changes or Cancel to return previous settings Accept...

Page 32: ...ss Points Click the BSSID if you would like to connect with it Wireless Security Please refer to the Wireless Security section Refresh Press Refresh to scan again If the Access Point is suppressing its own SSID the SSID section will be blank the SSID must be entered manually ...

Page 33: ...ty and speed Extension Channel Specify the upper channel or lower channel selection It may influence the Auto channel function Channel Frequency The channel availability is determined by the country s regulations Accept Cancel Press Accept to confirm the changes or Cancel to return to the previous settings Accept does not apply the changes you must go to Status Save Load to apply the new settings ...

Page 34: ...Press Accept to confirm the changes or Cancel to return to the previous settings Please make note of the following 1 Accept does not apply the changes you must go to Status Save Load to apply the new settings Please refer to Chapter 4 1 for more information 2 You must enter the MAC address of the Access Point whose wireless coverage you would like to extend Not all Access Point supports this featu...

Page 35: ...scan nearby APs and then select the AP to establish a connection Prefer BSSID Specify the MAC address if known Prefer BSSID text box will be automatically filled in when an AP in the Site Survey is selected Wireless Security Please refer to Chapter 6 2 for details Accept Cancel Press Accept to confirm the changes or Cancel to return to the previous settings Accept does not apply the changes you mu...

Page 36: ...ints Click the BSSID if you would like to connect with an AP Wireless Security Please refer to the Wireless Security section Refresh Press Refresh to scan again If the Access Point is suppressing its own SSID the SSID section will be blank the SSID must be entered manually ...

Page 37: ...Type in Open System or Shared Input Type Select Input Type in Hex or ASCII Key Length Select Key Length in 64 128 152 bit password length Default Key Select the default index key for wireless security Key1 Specify password for security key index No 1 Key2 Specify password for security key index No 2 Key3 Specify password for security key index No 3 Key4 Specify password for security key index No 4...

Page 38: ...ion Select Both TKIP or AES for encryption type Passphrase Specify the security password Group Key Update Interval Specify Group Key Update Interval time 802 11n does not allow WEP WPA PSK WPA PSK TKIP security mode The wireless transmit mode will drop from 802 11n to 802 11g ...

Page 39: ...tion Select Both TKIP or AES for encryption type Passphrase Specify the security password Group Key Update Interval Specify Group Key Update Interval time 802 11n does not allow WEP WPA PSK WPA PSK TKIP security mode The wireless transmit mode will drop from 802 11n to 802 11g ...

Page 40: ...r encryption type Passphrase Specify the security password Group Key Update Interval Specify Group Key Update Interval time Using WPA PSK Mixed can allow multiple security modes at the same time 802 11n does not allow WEP WPA PSK WPA PSK TKIP security mode The wireless transmit mode will drop from 802 11n to 802 11g ...

Page 41: ...s Server IP address Radius Port Specify Radius Port number the default port is 1812 Radius Secret Specify Radius Secret that is given by the Radius Server Group Key Update Interval Specify Group Key Update Interval time 802 11n does not allow WEP WPA PSK WPA PSK TKIP security mode The wireless transmit mode will drop from 802 11n to 802 11g ...

Page 42: ...us Server IP Address Radius Port Specify Radius Port number the default port is 1812 Radius Secret Specify Radius Secret that is given by the Radius Server Group Key Update Interval Specify Group Key Update Interval time 802 11n does not allow WEP WPA PSK WPA PSK TKIP security mode The wireless transmit mode will drop from 802 11n to 802 11g ...

Page 43: ... Radius Server IP Address Radius Port Specify Radius Port number the default port is 1812 Radius Secret Specify Radius Secret that is given by the Radius Server Group Key Update Interval Specify Group Key Update Interval time 802 11n does not allow WEP WPA PSK WPA PSK TKIP security mode The wireless transmit mode will drop from 802 11n to 802 11g ...

Page 44: ...may cause issues for wireless connectivity RTS CTS Threshold Specify Threshold package size for RTC CTS Smaller thresholds will cause RTS CTS packets to be sent more often consuming more of the available bandwidth In addition if heavy traffic occurs the wireless network is more robust in the event of interference or collisions Distance Specify distance range between AP and Clients Farther distance...

Page 45: ...ffic Limit Specify the wireless transmission speed for outgoing traffic Accept Cancel Press Accept to confirm the changes or Cancel to return previous settings Please make note of the following 1 Changing Wireless Advanced Settings may lower the wireless connection quality Please keep all settings as default unless you understand the modifications which you have made 2 Accept does not apply the ch...

Page 46: ...access permission s of the client The default setting is Disable Wireless MAC Filters 0 ACL Mode ACL Mode can deny or allow specific clients to access the network Select Disable Deny MAC in the list or Allow MAC in the list from the drop down list MAC Address Filter Specify the MAC address manually Add Press Add to add the MAC address in the table Apply Press Apply to apply the changes ...

Page 47: ...you would like to extend the wireless coverage of into the MAC address filter Mode Select Disable or Enable from the drop down list Accept Cancel Press Accept to confirm the changes or Cancel to return previous settings Accept does not apply the changes you must go to Status Save Load to apply the new settings Please refer to Chapter 4 1 for more information The MAC address of the AP that you woul...

Page 48: ...ify Subnet Mask Default Gateway Specify Default Gateway Primary DNS Specify Primary DNS Secondary DNS Specify Secondary DNS Accept Cancel Press Accept to confirm the changes or Cancel to return previous settings Please make note of the following 1 Obtain an IP address automatically is not a DHCP server This setting allows the ENH200EXT to automatically request an IP address when it is connected to...

Page 49: ...ecify Bridge Max Age in seconds Bridge Forward Delay Specify Bridge Forward Delay in seconds Priority Specify the Priority number smaller numbers have greater priority Accept Cancel Press Accept to confirm the changes or Cancel to return previous settings Accept does not apply the changes you must go to Status Save Load to apply the new settings Please refer to Chapter 4 1 for more information ...

Page 50: ...e are four different types of WAN connections Static IP DHCP PPPoE and PPTP Please contact your ISP to determine the connection type 8 1 1 Static IP Select Static IP in WAN connection if your ISP gives all the of the necessary information about IP address Subnet Mask Default Gateway Primary DNS and Secondary DNS ...

Page 51: ...mary DNS Specify Primary DNS IP Secondary DNS Specify Secondary DNS IP Discard Ping on WAN Place a check to Enable or Disable ping from WAN Accept Cancel Press Accept to confirm the changes or Cancel to return previous settings Accept does not apply the changes you must go to Status Save Load to apply the new settings Please refer to Chapter 4 1 for more information If the router s MTU is set too ...

Page 52: ...nection Type Select DHCP to begin configuration of the DHCP connection Account Name Specify Account Name which is provided by ISP Domain Name Specify Domain Name which is provided by ISP MTU Specify the Maximum Transmit Unit size EnGenius recommends that it remains in Auto Get Automatically From ISP Select the Radio button for the DNS servers to be obtained automatically from the DHCP server ...

Page 53: ...el to return previous settings Accept does not apply the changes you must go to Status Save Load to apply the new settings Please refer to Chapter 4 1 for more information If the router s MTU is set too high downstream packets will be fragmented If the router s MTU is set too low the router will fragment packets unnecessarily and in extreme cases may be unable to establish connections In either ca...

Page 54: ...puter as the software is not necessary with the use of the ENH200EXT Internet Connection Type Select PPPoE to begin configuration of the PPPoE connection MTU Specify the Maximum Transmit Unit size EnGenius recommends that it remains in Auto Login Specify the Username that is given by your ISP Password Specify the Password that is given by your ISP Service Name Specify the Service Name that is give...

Page 55: ...P server Use These DNS Servers Select the Radio button for setup the Primary DNS and Secondary DNS servers manually Discard Ping on WAN Place a check to Enable or Disable ping from WAN Accept Cancel Press Accept to confirm the changes or Cancel to return previous settings Accept does not apply the changes you must go to Status Save Load to apply the new settings Please refer to Chapter 4 1 for mor...

Page 56: ...P Point to Point Tunneling Protocol Select PPTP as your WAN connection type if your ISP provides information regarding IP Address Subnet Mask Default Gateway Optional DNS Optional Server IP Username and Password ...

Page 57: ...e Radio button to keep internet connection always on Specify the redial period once the internet lose connection Get Automatically From ISP Select the Radio button for the DNS servers to be obtained automatically from the DHCP server Use These DNS Servers Select the Radio button for setup the Primary DNS and Secondary DNS servers manually Discard Ping on WAN Place a check to Enable or Disable ping...

Page 58: ...HCP server Starting IP Address Specify DHCP server starting IP address Ending IP Address Specify DHCP server ending IP address WINS Server IP Specify the WINS Server IP address Accept Cancel Press Accept to confirm the changes or Cancel to return previous settings Accept does not apply the changes you must go to Status Save Load to apply the new settings Please refer to Chapter 4 1 for more inform...

Page 59: ... a check to enable PPTP protocol passes through WAN L2TP Pass Through Place a check to enable L2TP protocol passes through WAN IPSec Pass Through Place a check to enable IPSec protocol passes through WAN Accept Cancel Press Accept to confirm the changes or Cancel to return previous settings Accept does not apply the changes you must go to Status Save Load to apply the new settings Please refer to ...

Page 60: ...common port numbers please consult the Internet Add Entry Press Add Entry to add a rule of Port Forwarding Accept Press Accept to confirm the changes Accept does not apply the changes you must go to Status Save Load to apply the new settings Please refer to Chapter 4 1 for more information Service Name Specify a name for current Port Forwarding rule Protocol Select a protocol from drop down list B...

Page 61: ...lnerable to any incoming traffic including unsolicited or malicious traffic because DMZ opens all of the ports DMZ Hosting Select Enable or Disable DMZ from drop down list DMZ Address Specify an IP address of DMZ Accept Cancel Press Accept to confirm the changes or Cancel to return previous settings Accept does not apply the changes you must go to Status Save Load to apply the new settings Please ...

Page 62: ...user name and password for the device By default this device is configured with a username and password of admin For security reasons it is highly recommended that you create a new user name and password Name Specify Username for login Password Specify a Password for login Confirm Password Re enter the Password for confirmation Remote Management Select the Radio button to Enable or Disable Remote ...

Page 63: ... they behave as if they were on a separate Local Area Network LAN Computers on a VLAN do not have to be physically located next to one another on the LAN Management VLAN ID If your network includes VLANs and if tagged packets need to pass through the Access Point specify the VLAN ID in this field If not select the No VLAN tag radio button Accept Cancel Press Accept to confirm the changes or Cancel...

Page 64: ... Specify the contact details of the device Location Specify the location of the device Community Name Specify the password for access the SNMP community for read only access Community Name Specify the password for access the SNMP community for read and write access Trap Destination IP Address Specify the IP address that will receive the SNMP trap Trap Destination Community Name Specify the passwor...

Page 65: ...ved Settings from a File ENH200EXT can restore a previous setting that has been saved Click on Browse to select the file and Restore Revert to Factory Default Settings Click on Factory Default button to reset all the settings to the factory default values 9 5 Firmware Upgrade Click on the Firmware Upgrade link under the Management menu This page is used to upgrade the firmware of the device Make s...

Page 66: ...p the date and time Automatically Get Date and Time Specify the Time Zone from the drop down list and Place a check to specify the IP address of the NTP Server manually or use the default NTP Server Save Apply Cancel Press Save Apply to confirm the changes or Cancel to return previous settings Pressing Save Apply will change the settings immediately It is not reversible unless the settings are cha...

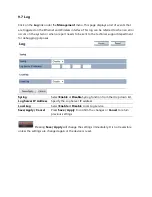
Page 67: ...cal support department for debugging purposes Syslog Select Enable or Disable Syslog function from the drop down list Log Server IP Address Specify the Log Server IP address Local Log Select Enable or Disable Local Log service Save Apply Cancel Press Save Apply to confirm the changes or Cancel to return previous settings Pressing Save Apply will change the settings immediately It is not reversible...

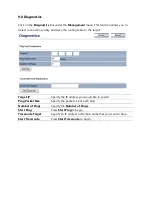
Page 68: ...ting table to the target Target IP Specify the IP address you would like to search Ping Packet Size Specify the packet size of each ping Number of Pings Specify the Number of Pings Start Ping Press Start Ping to begin Traceroute Target Specify an IP address or Domain name that you want to trace Start Traceroute Press Start Traceroute to begin ...

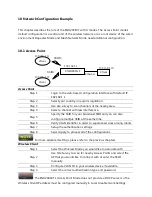
Page 69: ...at the same time Step 6 Verify VLAN identifier in order to separate services among clients Step 7 Setup the authentication settings Step 8 Select Apply to process all of the configurations For more advanced settings please refer to the previous chapters Wireless Client Step 1 Select the Wireless Mode you would like to associate with Step 2 Use Site Survey to scan for nearby Access Points and selec...

Page 70: ...ct your country or region s regulation Step 3 Select Operation Mode to Client Bridge from System Properties Step 4 Use site survey to scan channels of the nearby area Step 5 Select the AP that you would like to associate with Step 6 Setup the authentication settings that match to the Access Point s settings Step 7 Select Apply to process all of the configurations The Client Bridge s IP settings mu...

Page 71: ...roperties Step 4 Set the device s IP settings under System IP Settings Step 5 Set the WLAN settings under Wireless Network Step 6 Configure WDS Link Settings under Wireless Step 7 Specify the MAC address of the AP which you would like to connect with Step 8 Press Apply under Save Reload to process all of the configurations Step 9 Verify the device s settings by browsing to Status Main View the WDS...

Page 72: ...n s regulation Step 3 Select Operation Mode to Client Router from System Properties Step 4 Change your Local Area Network setting to Obtain an IP Address Automatically Step 5 Use site survey to scan channels of the nearby area Step 6 Select the AP that you would like to associate with Step 7 Setup the authentication settings that match the Access Point s settings Step 8 Configure your WAN connecti...

Page 73: ...pressing To use the software method click Restore to Factory Default in the Management menu Why do I not see traffic pass after I connect the ENH200EXT to a PoE switch The ENH200EXT uses a proprietary PoE injector and will not work with standard 802 3af compliant PoE switches What is the default IP address of the ENH200EXT The default IP address is 192 168 1 1 I plugged the PoE to the Ethernet por...

Page 74: ...er issues that cannot be resolved using this manual please contact your vendor where you purchase the device If you cannot contact your vendor you may also contact EnGenius Customer Service department in the region where you purchased the device Before you contact your local EnGenius office please prepare the following information Product model name and serial number The place where you purchased ...

Page 75: ...ticator Hide SSID in beacons MAC address filtering up to 50 field Wireless STA Client connected list Power Requirements Active Ethernet Power over Ethernet Proprietary PoE design Power Adapter 24VAC 0 6A Antenna Antenna Connector N A RP SMA Package Contents Wireless Long Range 11N AP CB ENH200EXT PoE Injector EPE 24R Power Adaptor CD with User s Manual QIG Mounting Set Special Screw Set Certificat...

Page 76: ...22 75 802 11n 2 412 2 472GHz MCS0 MCS8 26 95 MCS1 MCS9 26 92 MCS2 MCS10 26 87 MCS3 MCS11 26 85 MCS4 MCS12 24 80 MCS5 MCS13 23 79 MCS6 MCS14 22 74 MCS7 MCS15 21 73 ENVIRONMENT MECHANICAL Temperature Range Operating 20 C 70 C 4 F to 158 F Storage 30 C 80 C 22 F to 176 F Humidity non condensing 0 90 typical Waterproof IP55 ...

Page 77: ...thway within a network Bandwidth The part of the frequency spectrum required to transmit desired information Each radio channel has a center frequency and additional frequencies above and below this carrier frequency that carry the transmitted information The range of frequencies from the lowest to the highest used is called the bandwidth Bridge A wireless device that connects multiple networks th...

Page 78: ... usually the cause of dead spots See also coverage area 802 11 A category of WLAN standards defined by the Institute of Electrical and Electronics Engineers IEEE 802 11a An IEEE standard for WLANs that operate at 5 GHz with data rates up to 54 Mbps 802 11b An IEEE standard for WLANs that operate at 2 4 GHz with data rates up to 11 Mbps 802 11g An IEEE standard for WLANs that operates at 2 4 GHz wi...

Page 79: ... added to that network s MAC table can access the network Network Address Translation NAT An Internet standard that lets a LAN use one set of IP addresses for internal traffic and a second set of addresses for external traffic Network Time Protocol NTP A protocol that lets devices synchronize their time with a time server NTP uses TCP or UDP port 123 by default Passphrase A text string that automa...

Page 80: ...on priority and queue weight Queues with larger weights get more service than queues with smaller weights This highly efficient queuing mechanism divides available bandwidth across different traffic queues Wired Equivalent Privacy WEP Security protocol that provides a WLAN with a level of security and privacy comparable to that of a wired LAN WEP encrypts data sent between wired and WLANs to keep ...

Page 81: ...ity standard that defines stronger encryption authentication and key management than WPA It includes two data encryption algorithms Temporal Key Integrity Protocol TKIP and Advanced Encryption Standard AES in the Counter mode with Cipher block chaining Message authentication Code Protocol CCMP Wireless Distribution System WDS A technology that lets Access Points communicate with one another to ext...

Page 82: ...receiving antenna Increase the separation between the equipment and receiver Connect the equipment into an outlet on a circuit different from that to which the receiver is connected Consult the dealer or an experienced radio TV technician for help FCC Caution Any changes or modifications not expressly approved by the party responsible for compliance could void the user s authority to operate this ...

Page 83: ...éjudiciable et 2 ce dispositif doit accepter tout brouillage reçu y compris un brouillage susceptible de provoquer un fonctionnement indésirable IMPORTANT NOTE Radiation Exposure Statement This equipment complies with IC radiation exposure limits set forth for an uncontrolled environment This equipment should be installed and operated with minimum distance 20cm between the radiator your body NOTE ...

Page 84: ...ectrum Matters ERM ElectroMagnetic Compatibility EMC standard for radio equipment and services Part 1 Common technical requirements EN 301 489 17 V2 1 1 2009 05 Electromagnetic compatibility and Radio spectrum Matters ERM ElectroMagnetic Compatibility EMC standard for radio equipment and services Part 17 Specific conditions for 2 4 GHz wideband transmission systems and 5 GHz high performance RLAN ...

Page 85: ...nom du fabricant déclare que l appareil type d appareil est conforme aux exigences essentielles et aux autres dispositions pertinentes de la directive 1999 5 CE Italiano Italian Con la presente nome del costruttore dichiara che questo tipo di apparecchio è conforme ai requisiti essenziali ed alle altre disposizioni pertinenti stabilite dalla direttiva 1999 5 CE Latviski Latvian Ar šo name of manuf...

Page 86: ...y príslušné ustanovenia Smernice 1999 5 ES Suomi Finnish Valmistaja manufacturer vakuuttaa täten että type of equipment laitteen tyyppimerkintä tyyppinen laite on direktiivin 1999 5 EY oleellisten vaatimusten ja sitä koskevien direktiivin muiden ehtojen mukainen Svenska Swedish Härmed intygar företag att denna utrustningstyp står I överensstämmelse med de väsentliga egenskapskrav och övriga releva...

Reviews: