001-01-000092 Rev. 000
Page 2 of 5
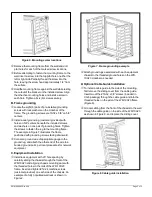
A side plate with cable take-up reels, Model SPL-4H, can
be added to store excess cable length being fed to
installed equipment. The SPL-4H mounts to either side of
the WR-10U23 and includes two adjustable, split reels.
3. DESCRIPTION
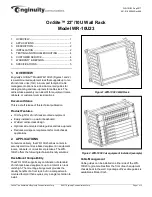
The WR-10U23 (Figure 3) features welded steel, carrier-
class construction. The front of the frame provides two
vertical rails with standard threaded hole spacing for up to
ten rack units. Eight pairs of threaded grounding holes
and pre-installed screws are provided on the rear
crossbar for attachment of ground lugs. One pair of holes
supports grounding of the WR-10U23 itself and the other
seven pairs of holes support ground connections from
installed equipment. The unpainted grounding area
provides metal-to-metal contact with ground lug surfaces.
Cable Guides
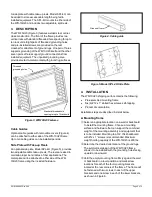
Optional cable guides with removable covers (Figure 4)
can be attached to either side of the WR-10U23 frame.
Up to ten cable guides can be installed per side.
Side Plate with Take-up Reels
An optional side plate, Model SPL-4H (Figure 5), provides
two adjustable cable take-up reels. The reels are sized to
maintain proper bend radius in fiber applications. The
metal plate can be attached to either side of the WR-
10U23 frame using the included hardware.
4. INSTALLATION
The WR-10U23 shipping carton contains the following:
•
Pre-assembled mounting frame
•
Six (6) #12 x 1
” slotted hex screws, self-tapping
•
Product documentation
Installation steps are described in detail below.
A. Mounting frame
Select an appropriate location on a wall or backboard
to install the mounting frame. Choose a mounting
surface and hardware that can support the combined
weight of the mounting assembly and equipment that
is to be installed. Mounting to a 3/4
” thick backboard
with #12 x 1
” screws is recommended. Maximum
weight holding capacity of the WR-10U23 is 200 lbs.
Determine the desired orientation of the ground lugs.
The symmetrical design of the WR-10U23 frame
allows it to be installed with the grounding holes facing
upward or downward.
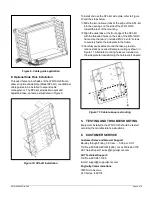
Hold the empty mounting frame firmly against the wall
or backboard in a level position and mark screw
locations for each of the four mounting brackets
located at the rear corners of the frame. The frame will
be fastened with two screws in each of the upper
brackets and one screw in each of the lower brackets,
as shown in Figure 6.
Figure 3. WR-10U23 Features
Figure 4. Cable guide
Figure 5. Model SPL-4H Side Plate
Slide on/off cover
Threaded
grounding holes
Standard threaded hole
spacing for up to 10 rack units

