


ASSEMBLY
Note: Do NOT Return this product to the store.
For assistance (including missing or damaged parts), call (800) 245-6489, toll free.
1
2
3
4
5
6
7
8
9
10
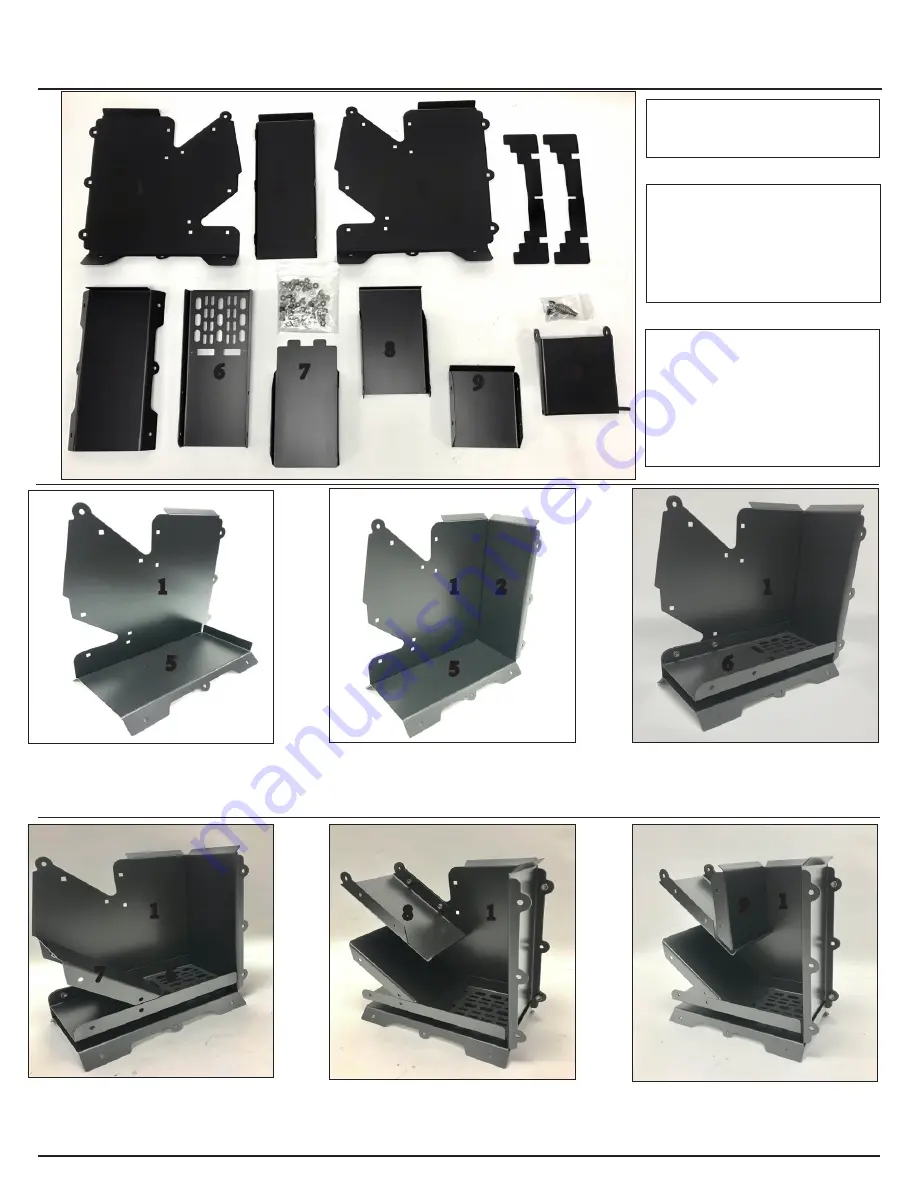
Included Parts - Numbered List
Note: Fasteners and the spring
handle are included in plastic bags.
1. Attach Left Side (1) to left side of
Bottom (5). Tab at top of (1) should
face outward and rear tab on (5)
should face upward.
4. Attach Chute Bottom (7) to Left Side
(1). Side tabs should face downward
and 2 small tabs on end should fit into
holes in Ash Grate (6).
Use protective gloves when assem-
bling AND handling this product.
Although we make every effort
to eliminate sharp edges or burrs,
please use caution when handling
ANY metal parts.
2. Attach Rear Panel (2) to Left Side
(1). Tab at top of (2) should face
outward and (2) should fit in front of
upward tab on Bottom (5).
IMPORTANT
Use provided bolts and nuts for
each step, with the bolt heads on
the OUTSIDE and the nuts to the
INSIDE of the stove. *FINGER
tighten all bolts first, then tighten
with 7/16” wrench.*
3. Attach Ash Grate (6) to Left Side
(1). Side tabs should face upward and
slotted grate should be toward the rear
of the stove.
5. Attach Chute Top (8) to Left Side (1).
Side and end tabs should face upward.
6. Attach Front Panel (9) to Left Side
(1). Tabs should face toward the front
of the stove with the top tab facing
outward.
1
5
2
6
1
1
7
1
6
8
1
9
1
5


