INSTALLATION INSTRUCTIONS
VALENCIA
TM
Slim Vanity
3 Fixing the vanity to the wall
(c) Having drilled the required holes fit the cabinet
into position over the pipework.
(e) Fix the cabinet to the wall using at least 6
screws (min 10g x 75mm) and
*
20mm washers.
Screw through the back wall so that they screw
into the nog and stud(s) in the wall behind.
*
Washers must be used to spread the load.
NOTE:
Before fastening the cabinet make sure
that it is sitting level and square.
NOTE:
Screws should be positioned evenly
and fixed into nogs or studs.
(b) With a suitably sized hole saw drill the holes
for the water supply and waste.
ENGLEFIELD
4
50mm
Maximum
height
240mm
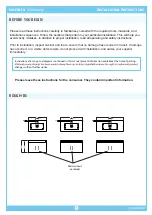
NOTE 2:
Ensure that plumbing holes are positioned
to allow for a maximum height of 240mm between
the bottom of the basin to the base of the trap.
2 Water supply and waste pipe holes
(a) Measure and mark the centres for water
supply and waste pipes on the back of the
cabinet.
4 Vanity top
(a) Unpack the top and check for any damage
that might have occured in transit. Check and
confirm the fit of your selected tapware.
(b) Apply a continuous bead of silicone (not
supplied) to the top edge of the cabinet sides
and back. Ensure there are no gaps in the
sealant bead. This will ensure the top stays
securely fitted to the cabinet and no water
spillage will find its way into the cabinet.
No silicone on
front edge
(c) Place the vanity top onto the cabinet ensuring
that the back is flush against the wall and
there is an even overhang on either side of the
cabinet.
(d) Wipe off any excess sealant.
NOTE 1:
Either a Dux or Aqualine Telescopic Tight
P trap is recommended for the Valencia SLIM range
of vanities.


