23
22
connecting the Flipper to the lcD power pack
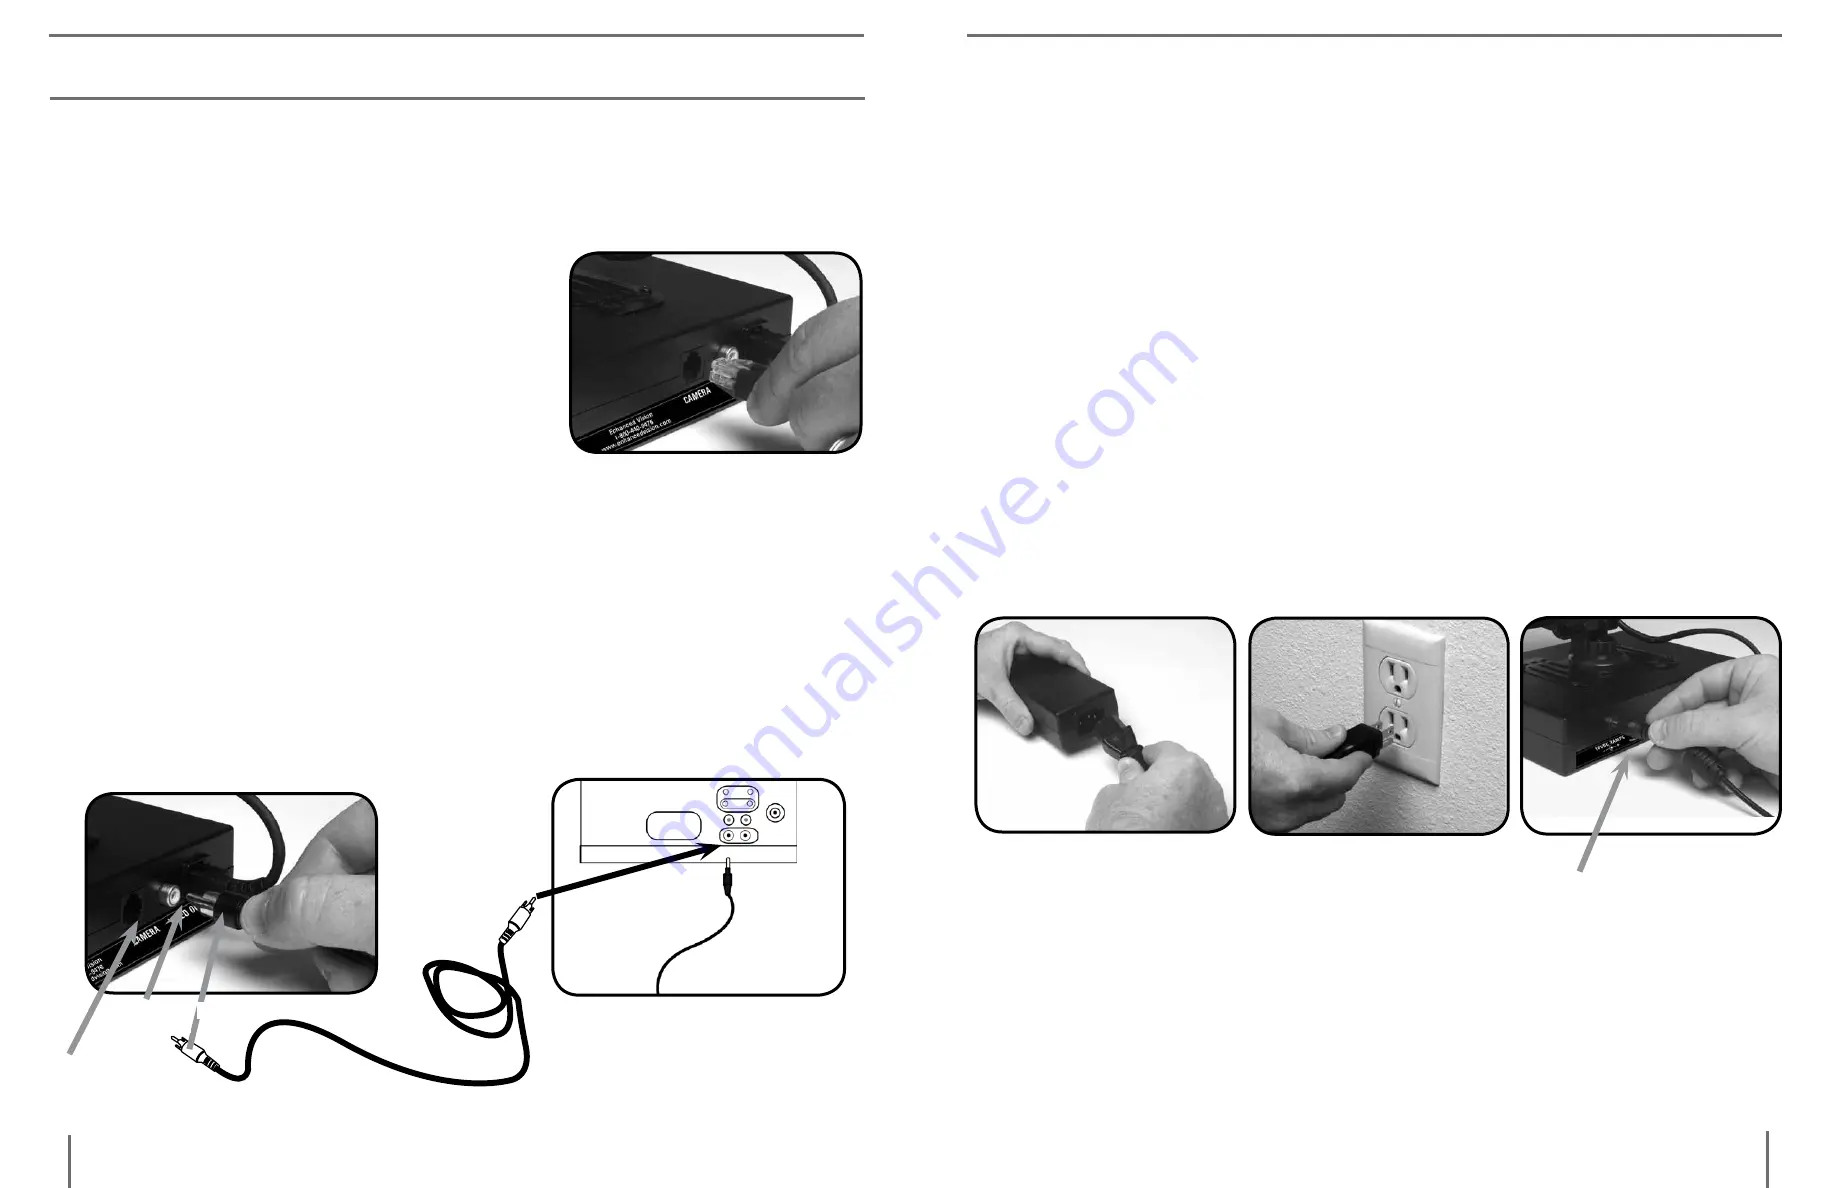
If you have purchased your Flipper camera separately from the LCD Power
Pack, you will need to connect them together. To do this, simply connect the
end of Flipper control cable (which resembles
a telephone connector) into the open jack
labeled “Camera” on the back of the LCD
Power Pack (See Figure 1). Once this is done,
refer to Using FlipperPanel on page 21. Note:
This connector is similar to a phone jack and
should be treated gently. Do not force the plug.
connecting lcD power pack to a tV Set
with a "Video in" connection
To connect the LCD Power Pack to a TV set with a video input, you will
need the 6-foot RCA video cable found on page 19. Plug one end of the
RCA cable into the yellow jack on the back of the LCD Power Pack labeled
“Video Out” and the other end into the yellow “Video Input” jack on the front
or back of your TV. Then switch your TV to Video Mode. This will allow
you to view magnified images on your TV screen. See figure 2. Note: The
LCD Power Pack video output standard will be identical to the type of
Flipper camera used. (NTSC or PAL version)
Yellow ViDeo in
on front
or back
of tV
Rca Video cable
Figure 2
Display
camera
Video out
Figure 1
Using the lcD power pack with Wall power
You should always leave a battery in the LCD Power Pack. Once you are
sure the battery is in the LCD power pack, then connect the desktop power
supply and power cord together (See Figure 1).
Next, connect the power cord to the wall and the other end of the desktop
power supply to the back of the LCD power pack where it says “18 VDC
3AMPS” (See Figure 2 & 3). A green LED light will appear on the front top
right corner of the power pack. If the light is solid then the battery is fully
charged. If the light is blinking then refer to “Recharging the Battery” on
page 24. It is not possible to “overcharge” the battery.
Note: The battery will drain if you leave the power switch ON when you
are not using the LCD Power Pack. To coserve battery life, turn the power
OFF when not in use.
Figure 1
Figure 2
Figure 3
18 VDc 3aMpS
USinG lcD poWeR pack
u
Sing
lCD p
ower
p
aCk
u
Sing
lCD p
ower
p
aCk


