20
19
U
sinG
lCd p
ower
p
aCk
U
sinG
m
ax
p
anel
4. Using Max Digital Magnifier
The Max Digital Magnifier automatically
focuses when it is placed directly over a
desired object and projects a magnified
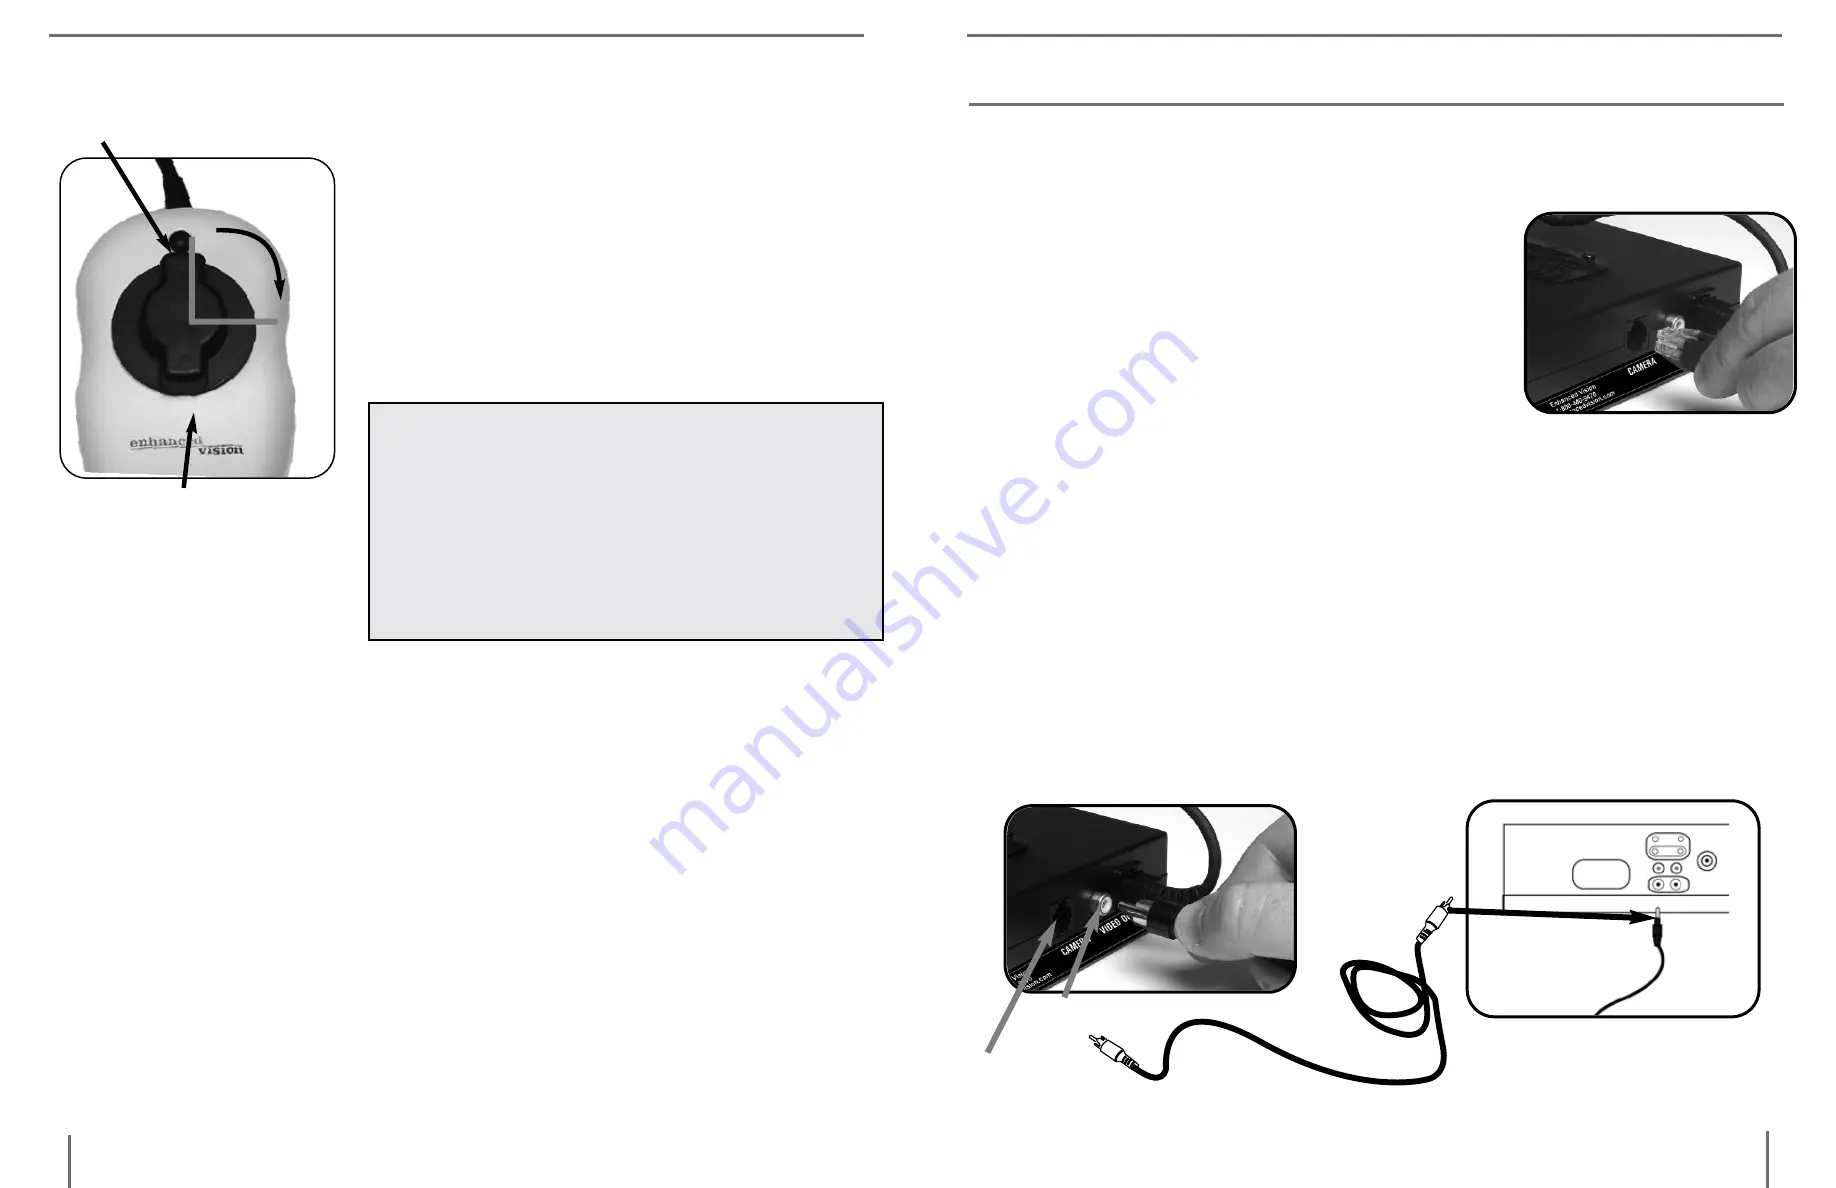
image onto the LCD screen. By rotat-
ing the magnification dial to increase
the size and pushing the viewing options
button to change viewing modes, you
will be able to find what settings work
best for you. (See Figure 7)
NOTE: The magnification dial only
turns from 12 o’clock to 3 o’clock. Do
not force the dial beyond these two
points.
For more information on how to use the
Max Digital Magnifier, please refer back
to page 11 “Using Max.
Viewing Options Button
Magnification Dial
12
3
Figure 7
Connecting Max or Flipper to the LCD Power Pack
If you have purchased the Max camera separate
from the LCD Power Pack, you will need to
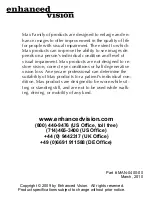
connect them together. To do so, simply plug
the end of the cable connector which looks
like a telephone connector coming from the
Max camera into the open jack labeled “Cam-
era” on the back of the LCD Power Pack.
(See Figure 1)
Connecting LCD Power Pack to a TV Set with Video In
To connect the LCD Power Pack to a TV set with “Video In” you
will need the 6-foot RCA video cable. Plug one end of the RCA
cable into the yellow jack on the back of the LCD Power Pack la-
beled “Video Out” and the other end into the yellow “Video Input”
jack on the front or back of your TV. Then switch your TV to Vid-
eo Mode. This will allow you to view magnified images on your
TV screen. (See Figure 2) Note: The LCD Power Pack video output
standard is the same as the Max camera used (NTSC or PAL ver-
sion).
Yellow VIDEO IN
on front or back
of TV
RCA Video Cable
Figure 2
Camera
Video Out
Figure 1
USing lcD power pack


