background image


POWER SUPPLY


Included within your Pebble HD box 

(International orders 

ONLY) 

is multiple inserts for the outlets of various 

countries. 

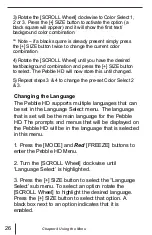
1.) To install choose the correct insert for your country 
(See figure 1). 

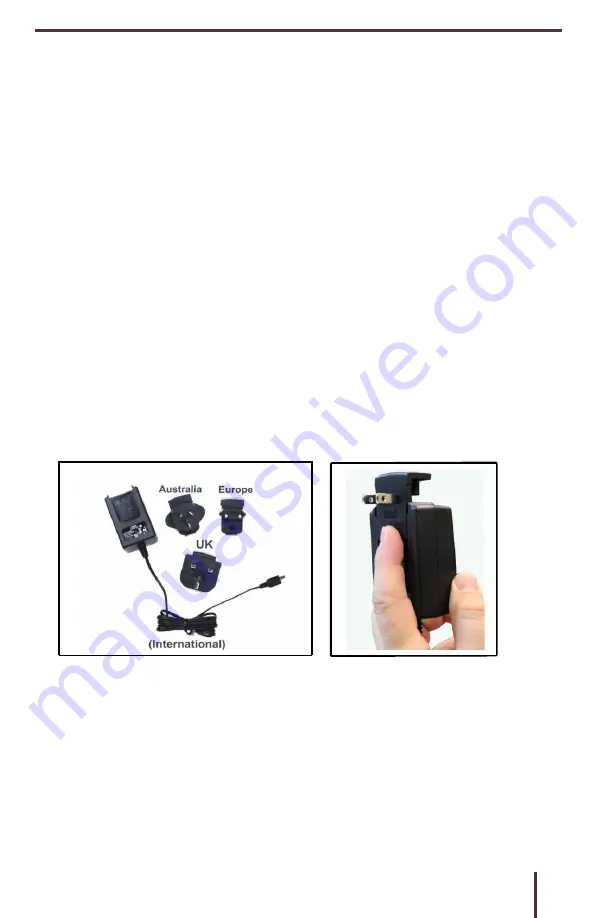
2.)  Find  the tab that is located  at the top  of  your  insert, 
slide  at  an  angle  into  the  main  power  supply,  and  push 
down until it clicks (See figure 2). 

3.) You may now proceed to plug this into an available 
outlet and begin to charge your Pebble HD magnifier. To 
offer additional protection during an electrical storm, a 
surge protector may also be used and is recommended. 

AUSTRALIA      EUROPE       
UK 

USA 

Figure 1 

Figure 2


Chapter 3 Using the Pebble HD 

11 


Summary of Contents for Pebble HD

Page 1: ...TM Screen Size 4 3 Users Manual ...

Page 2: ...n on the go With the Pebble HD you can easily read bank statements coupons prescriptions restaurant menus sign checks anywhere you need portable magnification The Pebble HD provides hours of low vision enhancement Featuring a built in LCD screen 4 3 the Pebble HD allows you to magnify images up to 20 times A built in Freeze Frame feature allows you to capture any still image and adjust magnificati...

Page 3: ...rference will not occur in a particular installation If this equipment does cause harmful interference to radio or television reception which can be determined by turning the equipment off and on the user is encouraged to try to correct the interference by one or more of the following measures Reorient or relocate the receiving antenna Increase the separation between the equipment and receiver Con...

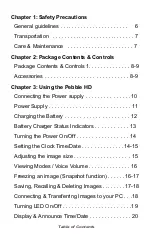
Page 4: ...the Power supply 10 Power Supply 11 Charging the Battery 12 Battery Charger Status Indicators 13 Turning the Power On Off 14 Setting the Clock Time Date 14 15 Adjusting the image size 15 Viewing Modes Voice Volume 16 Freezing an image Snapshot function 16 17 Saving Recalling Deleting Images 17 18 Connecting Transferring Images to your PC 18 Turning LED On Off 19 Display Announce Time Date 20 Table...

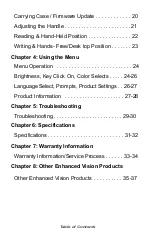
Page 5: ...htness Key Click On Color Selects 24 26 Language Select Prompts Product Settings 26 27 Product Information 27 28 Chapter 5 Troubleshooting Troubleshooting 29 30 Chapter 6 Specifications Specifications 31 32 Chapter 7 Warranty Information Warranty Information Service Process 33 34 Chapter 8 Other Enhanced Vision Products Other Enhanced Vision Products 35 37 Table of Contents ...

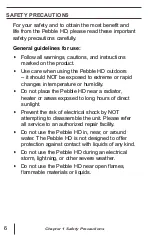
Page 6: ...y Do not place the Pebble HD near a radiator heater or areas exposed to long hours of direct sunlight Prevent the risk of electrical shock by NOT attempting to disassemble the unit Please refer all service to an authorized repair facility Do not use the Pebble HD in near or around water The Pebble HD is not designed to offer protection against contact with liquids of any kind Do not use the Pebble...

Page 7: ... clean the surface of the Pebble HD with a soft damp cloth or an electrostatic dusting wipe DO NOT use liquid cleaners on the plastic surfaces No additional methods of sterilization or cleaning are recommended or required Susceptibility to Interference There may be temporary performance degradation of the Pebble HD when subjected to a strong magnetic and or radio frequency field electrostatic disc...

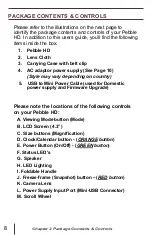
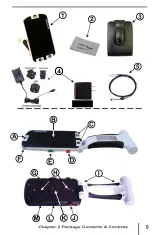
Page 8: ...y depending on country 5 USB to Mini Power Cable used for Domestic power supply and Firmware Upgrade Please note the locations of the following controls on your Pebble HD A Viewing Mode button Mode B LCD Screen 4 3 C Size buttons Magnification D Clock Calendar button ORANGE button E Power Button On Off GREEN button F Status LED s G Speaker H LED Lighting I Foldable Handle J Freeze frame Snapshot b...

Page 9: ... Domestic ...
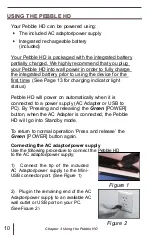
Page 10: ...it is connected to a power supply AC Adapter or USB to PC By Pressing and releasing the Green POWER button when the AC Adapter is connected the Pebble HD will go into Standby mode To return to normal operation Press and release the Green POWER button again Connecting the AC adaptor power supply Use the following procedure to connect the Pebble HD to the AC adaptor power supply 1 Connect the tip of...

Page 11: ...at is located at the top of your insert slide at an angle into the main power supply and push down until it clicks See figure 2 3 You may now proceed to plug this into an available outlet and begin to charge your Pebble HD magnifier To offer additional protection during an electrical storm a surge protector may also be used and is recommended AUSTRALIA EUROPE UK USA Figure 1 Figure 2 Chapter 3 Usi...

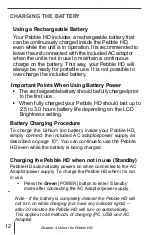
Page 12: ... battery life depending on the LCD Brightness setting Battery Charging Procedure To charge the Lithium Ion battery inside your Pebble HD simply connect the included AC adaptor power supply as described on page 10 You can continue to use the Pebble HD even while the battery is being charged Charging the Pebble HD when not in use Standby Pebble HD automatically powers on when connected to the AC Ada...

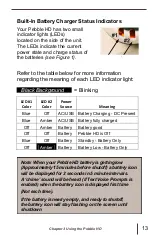
Page 13: ... current power state and charge status of the batteries see Figure 1 1 2 Refer to the table below for more information regarding the meaning of each LED indicator light Black Background Blinking Note When your Pebble HD battery is getting low Approximately 15 minutes before shutoff a battery icon will be displayed for 2 seconds in 5 minute intervals A chime sound will be heard if Text Voice Prompt...

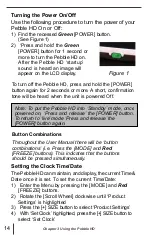
Page 14: ...de once powered on Press and release the POWER button To return to live mode Press and release the POWER button again 14 Button Combinations Throughout the User Manual there will be button combinations i e Press the MODE and Red FREEZE buttons This indicates that the buttons should be pressed simultaneously Setting the Clock Time Date The PebbleHD canmaintain and display the current Time Date once...

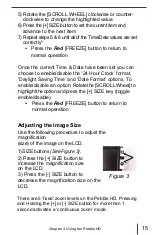
Page 15: ...ns To enable disable an option Rotatethe SCROLLWheel to highlighttheoptionandpress the SIZE key toggle enable disable Press the Red FREEZE button to return to normal operation Adjusting the Image Size Use the following procedure to adjust the magnification size of the image on the LCD 1 SIZE buttons See Figure 3 2 Press the SIZE button to increase the magnification size on the LCD 3 Press the SIZE...

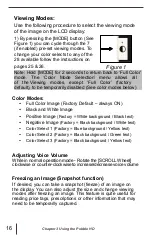
Page 16: ...s ON Black and White Image Positive Image Factory White background Black text Negative Image Factory Black background White text Color Select 1 Factory Blue background Yellow text Color Select 2 Factory Black background Green text Color Select 3 Factory Black background Yellow text Adjusting Voice Volume While in normal operation mode Rotate the SCROLL Wheel clockwise or counter clockwise to incre...

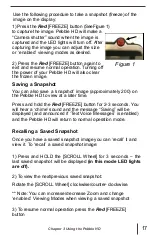
Page 17: ...o view at a later time Press and hold the Red FREEZE button for 2 3 seconds You will hear a chime sound and the message Saving will be displayed and announced if Text Voice Messages is enabled and the Pebble HD will return to normal operation mode Recalling a Saved Snapshot Once you have a saved snapshot image you can recall it and view it To recall a saved snapshot image 1 Press and HOLD the SCRO...

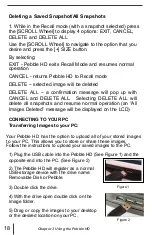
Page 18: ...d resume normal operation an All Images Deleted message will be displayed on the LCD CONNECTING TO YOUR PC Transferring Images to your PC Your Pebble HD has the option to upload all of your stored images to your PC This allows you to store or share these images Follow the instructions to upload your saved images to the PC 1 Plug the USB cable into the Pebble HD See Figure 1 and the opposite end in...

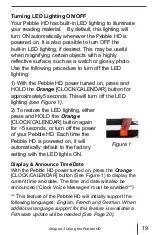
Page 19: ...e LED lighting see Figure 1 2 To restore the LED lighting either press and HOLD the Orange CLOCK CALENDAR button again for 5 seconds or turn off the power of your Pebble HD Each time the Pebble HD is powered on it will automatically default to the factory setting with the LED lights ON Figure 1 Display Announce Time Date With the Pebble HD power turned on press the Orange CLOCK CALENDAR button See...

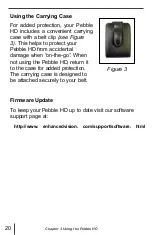
Page 20: ...le HD from accidental damage when on the go When not using the Pebble HD return it to the case for added protection The carrying case is designed to be attached securely to your belt Figure 3 Firmware Update To keep your Pebble HD up to date visit our software support page at http www enhancedvision com support software html 20 Chapter 3 Using the Pebble HD ...

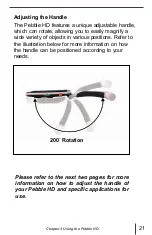
Page 21: ...iety of objects in various positions Refer to the illustration below for more information on how the handle can be positioned according to your needs 200 Rotation Please refer to the next two pages for more information on how to adjust the handle of your Pebble HD and specific applications for use Chapter 3 Using the Pebble HD 21 ...

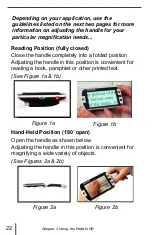
Page 22: ... handle completely into a folded position Adjusting the handle in this position is convenient for reading a book pamphlet or other printed text See Figure 1a 1b Figure 1a Hand Held Position 180 open Open the handle as shown below Figure 1b Adjusting the handle in this position is convenient for magnifying a wide variety of objects See Figures 2a 2b Figure 2a Figure 2b 22 Chapter 3 Using the Pebble...

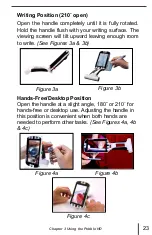
Page 23: ...ward leaving enough room to write See Figures 3a 3b Figure 3a Figure 3b Hands Free Desktop Position Open the handle at a slight angle 180 or 210 for hands free or desktop use Adjusting the handle in this position is convenient when both hands are needed to perform other tasks See Figures 4a 4b 4c Figure 4a Figure 4b Figure 4c Chapter 3 Using the Pebble HD 23 ...

Page 24: ...Selected Deselected To move through the Menu items rotate the SCROLL Wheel clockwise counter clockwise Press the MODE button to go up one menu level Press the Red FREEZE button to resume normal operation After 10 seconds with no activity in the Menu the Pebble HD will automatically exit and resume normal operation Adjusting LCD Brightness Your Pebble HD is set to the brightest level 5 on the LCD d...

Page 25: ... highlighted press the SIZE button to Enable Disable KEY CLICK ON 3 Press the Red FREEZE button to exit the menu and save your KEY CLICK settings Color Mode Selection Your Pebble HD has 4 set viewing modes Full color Black White Mode Positive Mode and Negative Mode Three of these can be enabled or disabled in the Pebble HD Menu There are also 3 additional color modes that can be changed to any of ...

Page 26: ...olor Select 2 3 Changing the Language The Pebble HD supports multiple languages that can be set in the Language Select menu The language that is set will be the main language for the Pebble HD The prompts and menus that will be displayed on the Pebble HD will be in the language that is selected in this menu 1 Press the MODE and Red FREEZE buttons to enter the Pebble HD Menu 2 Turn the SCROLL Wheel...

Page 27: ...n indicates that it is enabled 1 Screen Messages When a pop up message occurs the text of the message will be displayed with no voice prompt 2 Voice Messages Voice messages are similar to Screen Messages but in addition to the text of the message being displayed a voice prompt announcing the message information will also occur 3 Menu Voice Messages Scrolling over menu items will activate a voice p...

Page 28: ...the Pebble HD Menu 2 Rotate the SCROLL Wheel clockwise until Product Information is highlighted 3 Press the SIZE button to display the Product Information sub menu 4 While in this menu you can a View the Product Serial Number and firmware software revisions b Restore the default settings of the Pebble HD by rotating the SCROLL Wheel clockwise to Factory Restore then pressing the SIZE button 28 Cha...

Page 29: ...ng different viewing modes to improve image quality page 16 Video image on LCD display is too bright dark The Pebble HD is designed to be used in moderate lighting conditions preferably indoors Bright lighting or direct sunlight may produce shadows and or reduce visibility Try moving to a more shaded area to improve image quality Adjust the distance of the Pebble HD from your reading material or a...

Page 30: ... minute intervals A Chime sound will be activated when the battery icon is displayed the first time If the battery is nearly empty and ready to shutoff the battery icon will continue flashing on the screen until shut down and a Chime sound will be activated again Unit becomes warm to the touch Your Pebble HD integrates a camera LCD and battery charging unit inside a very small package but is desig...

Page 31: ...ll brightness Resolution 480 x 272 RGB Viewing Angle 60 Camera Fixed iris lens 3 6mm focal length Physical Dimensions 5 5 L x 3 1 W x 1 25 H with handle closed for Pebble HD 4 3 10 2 Lx3 1 W x1 H with handlefullyextended forPebble HD4 3 Weight 7 1 oz for Pebble HD 4 3 Magnification Ranges 4 5x 5 5x 7 8x 9 4x 13 4x 16 2x 20x For Pebble HD 4 3 Warranty 2 years Magnification ranges listed above are w...

Page 32: ... battery included 500 1000 charge life cycles Wall adapter UL CE rated Input 100 240VAC 50 60Hz Output 5VDC 2 1A max load Unit Input 5VDC 2 1A max load To prevent condensation do not use the unit for 1 hour after transporting the unit from extreme cold to room temperature All times listed are approximate Actual Charging and Usage times may vary depending on the life cycle remaining on the battery ...

Page 33: ...duct or replace it during the warranty period There are no other expressed or implied warranties accompanying this product This warranty policy does not cover a Defects or damage from misuse use in other than normal and customary manner accident or neglect b Defects or damage from improper operation maintenance installation adjustment alterations or modification c Defects or damage from spills of ...

Page 34: ... warranty service center If warranty service is required please contact Enhanced Vision at 800 440 9476 Monday through Friday between 8 a m and 5 p m Pacific Standard Time PST to request a return authorization number Warranty repairs will not be accepted without a valid return authorization number You may wish to keep the original product packaging in case warranty service is required The manufact...

Page 35: ...d magazines read and write letters manage your financial records view color photos do crossword puzzles and even pursue a favorite hobby See for yourself what makes Merlin HD the greatest value and the absolute best picture quality available in desktop video magnification Magnification 22 LCD 3 2x minimum to 64 7x maximum 24 LCD 3 4x minimum to 57 8x maximum Merlin elite See and hear the differenc...

Page 36: ...deal hand held magnifier whether you re home or on the go Easily read prescriptions mail labels price tags menus and so much more 3 0 LCD screen Freeze frame and image capture 28 available viewing modes Magnification 2X to 10X Transformer USB VGA Transformer is the most flexible and portable solution for reading writing and viewing magnified images at any distance Compatible with popular magnifica...

Page 37: ...ng Cases Convenient cases for storage and transport of all Enhanced Vision products Power Supplies Spare power supplies for your Enhanced Vision products Contact Information US Office Phone 714 465 3400 Fax 714 374 1821 UK Office Phone 44 0 115 9442317 Fax 44 0 115 9440720 DE Office Phone 49 0 6078 969827 0 Fax 49 0 6078 969827 33 Technical Support Main Toll Free 800 440 9476 ext 3 Local Phone 714...

Page 38: ...______________________________ ______________________________________________ ______________________________________________ ______________________________________________ ______________________________________________ ______________________________________________ ______________________________________________ ______________________________________________ ________________________________________...

Page 39: ...______________________________ ______________________________________________ ______________________________________________ ______________________________________________ ______________________________________________ ______________________________________________ ______________________________________________ ______________________________________________ ________________________________________...

Page 40: ...designed to restore vision correct eye conditions or halt degenerative vision loss An eye care professional can best determine the suitability of the Pebble HD for a patient s specific condition 800 440 9476 US Office toll free 714 465 3400 US Office 44 0 115 9442317 UK Office Tel 49 0 6078 969827 0 DE Office Fax 49 0 6078 969827 33 DE Office Part MAN 0770 00 Rev X2 January 2014 Copyright 2011 by ...

Reviews: