background image


                                                                                                      8/22 

AMF 3.1 USER MANUAL 

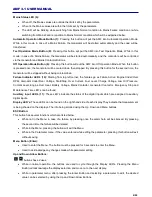
the  Mains  by  pressing  the  Mains  Contactor  Status  Button 

.  The  Load  can  be  idled  by  pressing  the  Mains 

Contactor Status Button again. 


OFF  Operation  Mode: 

When  the  OFF  button  is  pressed  the  AMF  will  stop  executing  the  Generator  and  Mains 

control functions and enter sleep mode. 


If the Generator is running: 


By  pressing  the  OFF  button  once,  if  the  Generator  has  supplied  the  load  once  or  more  times,  the 

Generator  will  be  cooled-down  for  the  time  period  set  by 

“P007  –  Engine  Cool-down  Timer”,

  then 

completely  stopped.  If  the  Load  has  never  been  transferred  to  the  Generator  then  it  will  be  stopped 

without being cooled-down 


By  pressing  the  OFF  button  twice,  the  Generator  will  be  stopped  without  being  cooled-down.  The  LED 

display will write OFF and measurements and displays will be shut-off.  

If the Generator is idle (stopped): 


By pressing the OFF button once, the Generator enters OFF Operation Mode but the measurements will 

continue to be displayed. If the OFF button is pressed for the second time, the LED displays will write OFF 

and  the  measurement  displays  will  turn  off.  If  the  user  desires  to  view  the  measurements  while  in  OFF 

Operation  Mode  the  measurement  screens  can  be  viewed  by  pressing  the  Up 

  or  Down 


Arrow 

Buttons. 


Summary of Contents for AMF 3.1

Page 1: ...AMF 3 1 EN K K 01 KO AMF 3 1 User Manual...

Page 2: ...4 Front Panel 5 Rear Panel 9 Terminal Connections 9 Alarm Codes Descriptions 11 Interface Structure 14 MENU SCREEN STRUCTURE 16 P2 Alarm Log Screen 18 P3 Maintenance Timers Screen 18 Digital Input Fu...

Page 3: ...ion modes Measurement instruments which reduce the panel cost Time stamped log of the last 15 failures Record of engine running hours and indicate when maintenance is needed Manual control of the MCB...

Page 4: ...4 22 AMF 3 1 USER MANUAL Connection Diagram...

Page 5: ...nd the Load is fed through the Generator The Mains contactor must be opened in order to close the Generator contactor Generator Contactor Status LED 3 Indicates the GCB status If the GCB output termin...

Page 6: ...oltage Start Stop Over Current Fuel Level Charge Voltage Low Oil Pressure Coolant Level Engine Over Heat Battery Voltage Mains Contactor Generator Contactor Emergency Stop and Maintenance Time LED s c...

Page 7: ...by the related parameters for the time period set by the P005 Mains Contact Delay Timer the Mains contactor will be closed and the Load is transferred to the Mains In the case where the Generator has...

Page 8: ...ly stopped If the Load has never been transferred to the Generator then it will be stopped without being cooled down By pressing the OFF button twice the Generator will be stopped without being cooled...

Page 9: ...s output is Normally Open 250Vac 10A 7 COM 2 The common input of Terminals No 6 and No 8 GCB 250Vac 10A Caution In order to enable the related Terminals to COM 2 this input must NOT be left empty 8 GE...

Page 10: ...Caution If a battery connection is NOT made to COM 7 the related digital inputs will not be operational 28 AUX INPUT 1 1 st digital input Can be configured via parameters P206 P211 29 AUX INPUT 2 2 n...

Page 11: ...d attempts to stop the engine F24 It indicates Overcurrent alarm This alarm is indicated when the total current is more than P272 Over Current Failure Value F22 F23 It indicates Fuel Level Alarm F22 i...

Page 12: ...Failure Input 3 Alarm This alarm is active when the digital input set for External Alarm Input 3 becomes active F34 It indicates Aux Failure Input 4 Alarm This alarm is active when the digital input s...

Page 13: ...ill wait in the system Once the operator manually removes the alarm the auto acknowledge counter will restart and acknowledge alarms until it reaches the limit set by parameter P051 again The table be...

Page 14: ...Emergency situation P233 F16 F17 F21 F31 F32 F33 F34 F35 F42 F43 F45 Depends on the function assigned to Aux Input 6 Oil Switch High Temperature Switch Low Coolant Level Aux Alarm 1 2 3 4 5 MCB Feedb...

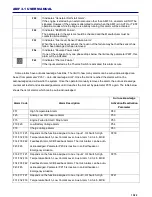
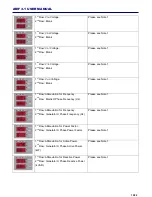
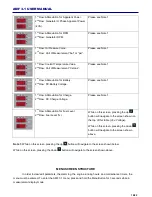
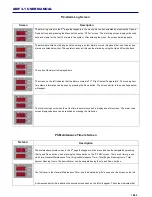
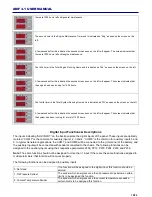
Page 15: ...Note 1 1st Row Abbreviation for Frequency 2nd Row Mains R Phase Frequency Hz Please see Note 1 1st Row Abbreviation for Frequency 2nd Row Generator U Phase Frequency Hz Please see Note 1 1st Row Abbre...

Page 16: ...age Please see Note 1 1st Row Abbreviation for Fuel Level 2nd Row Fuel Level While on this screen pressing the up button will navigate to the screen shown on the top of this table VR N Voltage While o...

Page 17: ...screen If the password entry is correct the screen below will appear In order to view edit a parameter the parameter number must be entered first The display indicating 000 shows the parameter number...

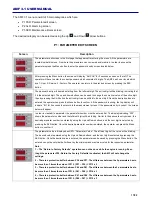
Page 18: ...ime stamp information can be seen by pressing the Down button The screen similar to the one shown below will appear The total running hours when the at the time the alarm occurred is displayed on this...

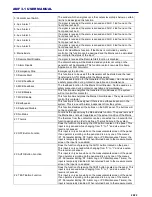
Page 19: ...indicating AUX INPUT on the back panel are the digital inputs of the panel These inputs are optically isolated COM 7 is the common for auxiliary inputs 1 2 3 and 4 COM 8 is the common for auxiliary i...

Page 20: ...tem will not control this contactor 18 Earthquake This function is to be assigned if there is an earthquake sensor in the system This is a Level 5 alarm independent from the system 19 Keyboard Disable...

Page 21: ...tput this function should be selcted 1 Engine Running If the engine has started and alarm delay time has passed this output will be activated 2 AUTO Ready If the panel is in AUTO mode this output will...

Page 22: ...lecom Running This output is activated once the battery voltage drops below the limit set by P26 and is deactivated once the voltage reaches the limit set by P27 There is a 5 second delay between leve...

Reviews: