Software Release: [App: 02.09.10039.00; Config: 2.9.20024; Built in PowerVision Configuration Studio Version:
2.9.23042; BTL: 02.09.10015.00]
Section 40
17
00-02-0996
2019-06-13
7. Ensure
Address Claim
is set to the CAN address that the TSC1 and Tier 4 regeneration is expected
to be sent from to the engine ECU (this is often times designated by the manufacturer/distributor).
8. Press down arrow to
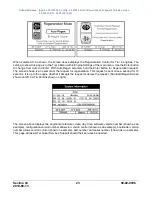
Warnings and Shutdowns
, press
[Enter]
.
9. Ensure all warnings and shutdowns are below or above ECU settings if required to have the ECU
shutdown the engine instead of the MPC-20 (for engine faults such as oil pressure and coolant
temperature).
NOTE:
If requiring the engine ECU to shutdown the engine on any engine shutdown
fault without help from the controller, select ECU Shutdowns in the System Menu and
change the setting to ECU Only.
10. Press the
[Back]
key and down arrow to
Throttle
, ensure desired throttle method is selected then
press
[Enter]
.
11. Press the
[Back]
key and down arrow to
Input/Output
, and press
[Enter]
.
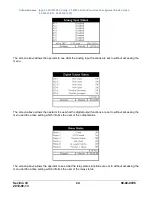
12. Press down arrow to access
Analog Inputs,
ensure the analog inputs aren't set to oil pressure or
coolant temp (disable or change to something different).
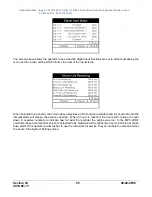
13. Press down arrow to
Relay1-6 or DO1-6
, and assign outputs to Crank, ECU Enable and Inc/Dec
outputs if throttle type selected was Inc/Dec.
14. Press the
[Menu]
key to exit the Menu Setup screens.
Adjusting Screen Contrast
1. Access
Menu/System.
Press down arrow to
Contrast
then press
[Enter]
.
2. Utilize the Up and Down arrows to adjust the Contrast (values of 0 to 255), and press
[Enter]
when
the desired number appears.
3. Press the
[Menu]
key to exit the Menu Setup screens.
Setting up to Auto Start/Stop for Single Contact Input (Single Float)
1. Access
Menu/Application Configuration.
Press the down arrow to
Auto Start/Stop Function
then
press
[Enter]
.
2. Utilize the Up and Down arrows to select
Single Contact
then press
[Enter]
.
3. Press
[Back]
once and arrow up to select
Input / Output
then press
[Enter]
.
4. Press
[Enter]
to access
Digital Inputs
then assign the
Function
of
Single Contact Start/Stop
to one
of the Digital Inputs.
5. Ensure no other Digital Inputs are set to a start/stop type.
6. Press the
[Menu]
key to exit the Menu Setup screens.
Setting up to Auto Start/Stop for Start Local Key
1. Access
Menu/Application Configuration.
Press the down arrow to
Auto Start/Stop Function
then press
[Enter]
.
2. Utilize the Up and Down arrows to select
Local Start Key
then press
[Enter].
3. Press
[Back]
once and arrow up to select
Input / Output/Digital Inputs
.
4. Ensure no Digital Inputs set to a start/stop type.
5. Press the
[Menu]
key to exit the Menu Setup screens.
Setting up to Auto Start/Stop for 2 Contact Inputs (Dual Floats)
1. Access
Menu/Application Configuration.
Press the down arrow to
Auto Start/Stop Function
then
press
[Enter]
.
2. Utilize the Up and Down arrows to select
Two Contact Maintained
or
Two Contact Momentary
then
press
[Enter].
3. Press
[Back]
once and arrow up to select
Input / Output
then press
[Enter]
.
4. Press
[Enter]
to access
Digital Inputs
.

