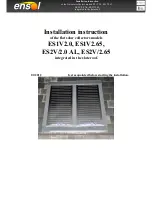
Installation instruction
of the flat solar collectors models ES1V2.0, ES1V2.65,
ES2V/2.0 AL, ES2V/2.65
integrated in the slate roof.
4.1.5 montage of the collector clampings
4.2
Installation of the connection system - hydraulic connection of the collector
4.2.1. Hydraulic connection of the harp collectors ES1V/2.0 and ES1V/2.65
Directions!
Hydraulic conduits and fixtures can be connected at the left or right side of
the collector battery. The instruction presents the connection at the right side,
as an example.
One-sided connection of maximum 5 collectors.
When forming a battery you can connect maximum 5 collectors.
elbow Expansion joint cross-fitting
Fix the left collector at the upper and lower
left side by the help of the collector clamping
(40 x 40mm) and wood screws (5 x 40mm).
Afterwards place the right collector. Set both
linear collector clamping bars (114 x 30mm)
between the collectors, push the collectors
together and screw the clamping bars down
by wood screws (5 x 40mm). Fix the right
collector also at the upper and lower side by
the help of collector clamping (40 x 40mm)
and wood screws (5 x 40mm).
Collector clamping

