-
46 -
2.
DHCP Client Connection
:
Connect the printer to the Local Net work (via HUB)
with a standard Ethernet Cable.
The DHCP server will assign an IP address to the
printer.
Be sure to configure the printer to the
DHCP Client
Mode
before install the printer to the Local Network.
Note:
It
’s recommended to consult the MIS personnel relating to
the information about the Local Network and IP address
assignment.
Summary of Contents for PRP-188
Page 1: ...Save the user manual for future reference Thermal Receipt Printer Instruction Manual ...
Page 2: ......
Page 4: ......
Page 12: ... 8 Dimensions ...
Page 17: ... 13 Parallel Type Parallel Port RJ 11 PWR Printer Cable Cash Drawer Power Adaptor ...
Page 19: ... 15 Baud Rate Setting DIP 7 DIP 8 19200 Default 9600 115200 38400 ...
Page 23: ... 19 3 Replace the Cover and tear out the paper ...
Page 26: ... 22 4 Click Next to continue ...
Page 29: ... 25 1 Select Module Number Select the proper Printer Model Number ...
Page 44: ... 40 4 As the location of the driver is specified Click Next to continue ...
Page 45: ... 41 5 Start Notification Click Continue Anyway to continue ...
Page 46: ... 42 6 The wizard is installing the driver ...
Page 54: ... 50 Printer Status This menu displays the printer status and can perform print test ...
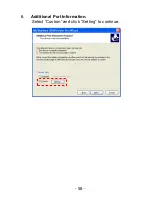
Page 62: ... 58 6 Additional Port Information Select Custom and click Setting to continue ...
Page 64: ... 60 8 Click Finish to complete ...
Page 71: ... 67 ...
Page 72: ...20121110 ...


