-
49 -
IP Reconfiguration
You can open the web-browser and type the IP address to
access the
Ethernet WebConfig
utility.
Note:
When first re-configuring the IP address of the printer,
you may need to use the supplied Ethernet crossover cable
to establish a direct cable connection to your Host PC and
start IP re-configuration.
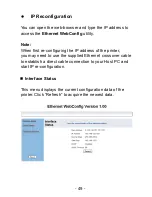
Interface Status
This menu displays the current configuration data of the
printer. Click
“Refresh” to acquire the newest data.
Summary of Contents for PRP-188
Page 1: ...Save the user manual for future reference Thermal Receipt Printer Instruction Manual ...
Page 2: ......
Page 4: ......
Page 12: ... 8 Dimensions ...
Page 17: ... 13 Parallel Type Parallel Port RJ 11 PWR Printer Cable Cash Drawer Power Adaptor ...
Page 19: ... 15 Baud Rate Setting DIP 7 DIP 8 19200 Default 9600 115200 38400 ...
Page 23: ... 19 3 Replace the Cover and tear out the paper ...
Page 26: ... 22 4 Click Next to continue ...
Page 29: ... 25 1 Select Module Number Select the proper Printer Model Number ...
Page 44: ... 40 4 As the location of the driver is specified Click Next to continue ...
Page 45: ... 41 5 Start Notification Click Continue Anyway to continue ...
Page 46: ... 42 6 The wizard is installing the driver ...
Page 54: ... 50 Printer Status This menu displays the printer status and can perform print test ...
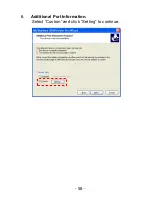
Page 62: ... 58 6 Additional Port Information Select Custom and click Setting to continue ...
Page 64: ... 60 8 Click Finish to complete ...
Page 71: ... 67 ...
Page 72: ...20121110 ...


