background image

Page 6 of 10

AVN-AN-ACC-R10

Installing the Accelerator Card

Application Note

Accelerator Card Installation

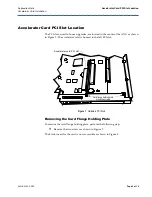
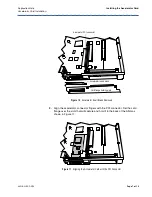
Figure 8   

Card Holding Plate Removed

Installing the Accelerator Card

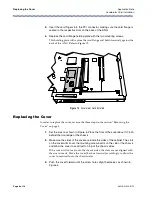
To install the accelerator card, perform the following steps. Refer to Figure 9 below.

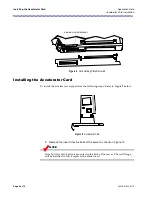
Figure 9   

Accelerator Card

1.

Remove the insert from the back of the server as shown in Figure 10.

NOTE

Note how this blank plate is mounted to the back of the server. The card flange 

will be installed so that it replaces the blank insert.

Accelerator card blank insert

Summary of Contents for Aurorean ANG-7000 Series

Page 1: ...t install Release 3 1 software before installing the card Refer to the Installation Service Guide for detailed instructions on upgrading the system software If you do not have Release 3 1 contact Ente...

Page 2: ...4 Type your password the default is netadmin and press ENTER 5 Login as superuser by typing su and press ENTER 6 Type the default password welcome and press ENTER 7 Save the ANG configuration and shu...

Page 3: ...13 Remove the server from the rack Removing the Cover One screw fastens the cover to the ANG To remove the cover perform the following Figure 4 Top Cover Mounting Screw Location 1 Remove the screw ho...

Page 4: ...sing your fingers in the three indents on the cover top apply pressure toward the rear of the ANG Refer to Figure 5 Figure 5 Top Cover Screw Removed 3 From the rear of the ANG lift the back edge of th...

Page 5: ...ter of the ANG as shown in Figure 7 The accelerator card is housed in the left PCI slot Figure 7 Hardware PCI Slots Removing the Card Flange Holding Plate To remove the card flange holding plate perfo...

Page 6: ...lerator Card To install the accelerator card perform the following steps Refer to Figure 9 below Figure 9 Accelerator Card 1 Remove the insert from the back of the server as shown in Figure 10 NOTE No...

Page 7: ...ert Blank Removed 2 Align the accelerator connector fingers with the PCI connector Set the card flange over the slots that will capture and hold it to the back of the ANG as shown in Figure 11 Figure...

Page 8: ...er reverse the three steps in the section Removing the Cover on page 3 1 Set the cover as shown in Figure 6 Place the front of the cover about 1 2 inch behind the front edge of the chassis 2 Make sure...

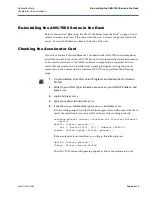
Page 9: ...king though by issuing the dmesg command on the Command Line Interface CLI To do so perform the following steps 1 On your desktop click Start select Programs and double click Command Prompt 2 Telnet t...

Page 10: ...asys Networks consult the following table Please include your name title company and phone number in all correspondence Enterasys Networks offers 7x24 customer support by calling 1 800 872 8440 or by...

Reviews: